Thursday, 29 February 2024

Cavalier 2024 and Transports of Delight

On Sunday just gone, I visited my first hobby show of the year - Cavalier 2024 at Tonbridge, staged by the Tunbridge Wells Wargames Society. It proved to be a good day out, from all the important points of view - seeing games, meeting people and acquiring 'goodies'.  I'll describe them in roughly that order.  

There were 17 games advertised, in  a good variety of periods, scales and universes - I admit I tend to stick to the 'historical', with apologies to Sci-Fi and Fantasy fans. Having said that, first up was a really  interesting sort of  'crossover' game,  Death on the Savannah (Survival of the Thickest) from Deal Wargames Society - not a toy solider in sight, but kind of 'historical' .  As the show program stated, 'Can the Wildebeest cross the Savannah, hunted by lions and crossing a crocodile-infested river?; 1/32nd using vintage Britains figures'  


I don't know how it played and whether the wildebeest made it (that looked quite challenging!), but I like the way the Deal guys always come up with something a bit different, and always make it look good.  

Another group that can be relied upon for a really good-looking table are Retired Wargamers Reloaded - their Hold Until Relieved game of Pegasus Bridge, June 1944 is well up to their usual standard. I have featured this before ( at SELWG 2023 ),  but can't resist showing a few pics again - apart from the fine terrain and scenery, I like the details such as  columns of vehicles moving up, aircraft overhead etc.  


Also in the  WW2 period,  Tonbridge Wargames Club presented LRDG - The First Rogue Heroes ('LRDG Raids in the Western Desert 1942; DAK Mini-campaign; 28mm' ) as a participation game. I am very bad at trying participation games - just for once I probably had time to give one a go, but ended  up spending quite a lot of time talking to various people - so participation will have to wait for another time!

Looks like LRDG did a good job,,

Another one I really should have tried was Maidstone Wargames Society The Summer of '77 - no, not punk rockers vs. disco divas, but a Battle of Britain game, based on a game that had been published in Warlord comic in, presumably, the summer of 1977.  I liked the way they had taken the simple printed square-gridded map from the original and made a really nice scenic table, with the 1/300 aircraft 'flying' on stands above.  The game ran several times and always looked busy.


And just one more  WW2 feature:  Friday Night Firefight Club's Fall of the Reich, depicting battle around the Reichstag, Berlin in 1945 using 28mm scale and Bolt Action rules. 

that Reichstag model  looks suitably grim and imposing

Other periods are available, of course: starting with the oldest, The Society of Ancients   put on a game of the Battle of Ilipa 208BC  in 28mm using Impetus rules: 

Ilipa : view from Carthaginian line


..and the Roman force

This was interesting, as I had taken part in one of Jon Freitag's games of this battle, using his version of Basic Impetus.  Watching the play, I recognised the mechanisms in use for combat die rolls etc, though I think the 'proper' version of Impetus has a bit more chrome than the basic version.  The action seemed to move along at a decent pace with  experienced players.

battle in full swing, later


Several Napoleonic games were in progress: first up Battle of Villamuriel   from  Konfederacy of Eastbourne Gamers using 10mm figures 


I really liked the Vineyard terrain pieces, cleverly made to allow units to fight amongst them! 


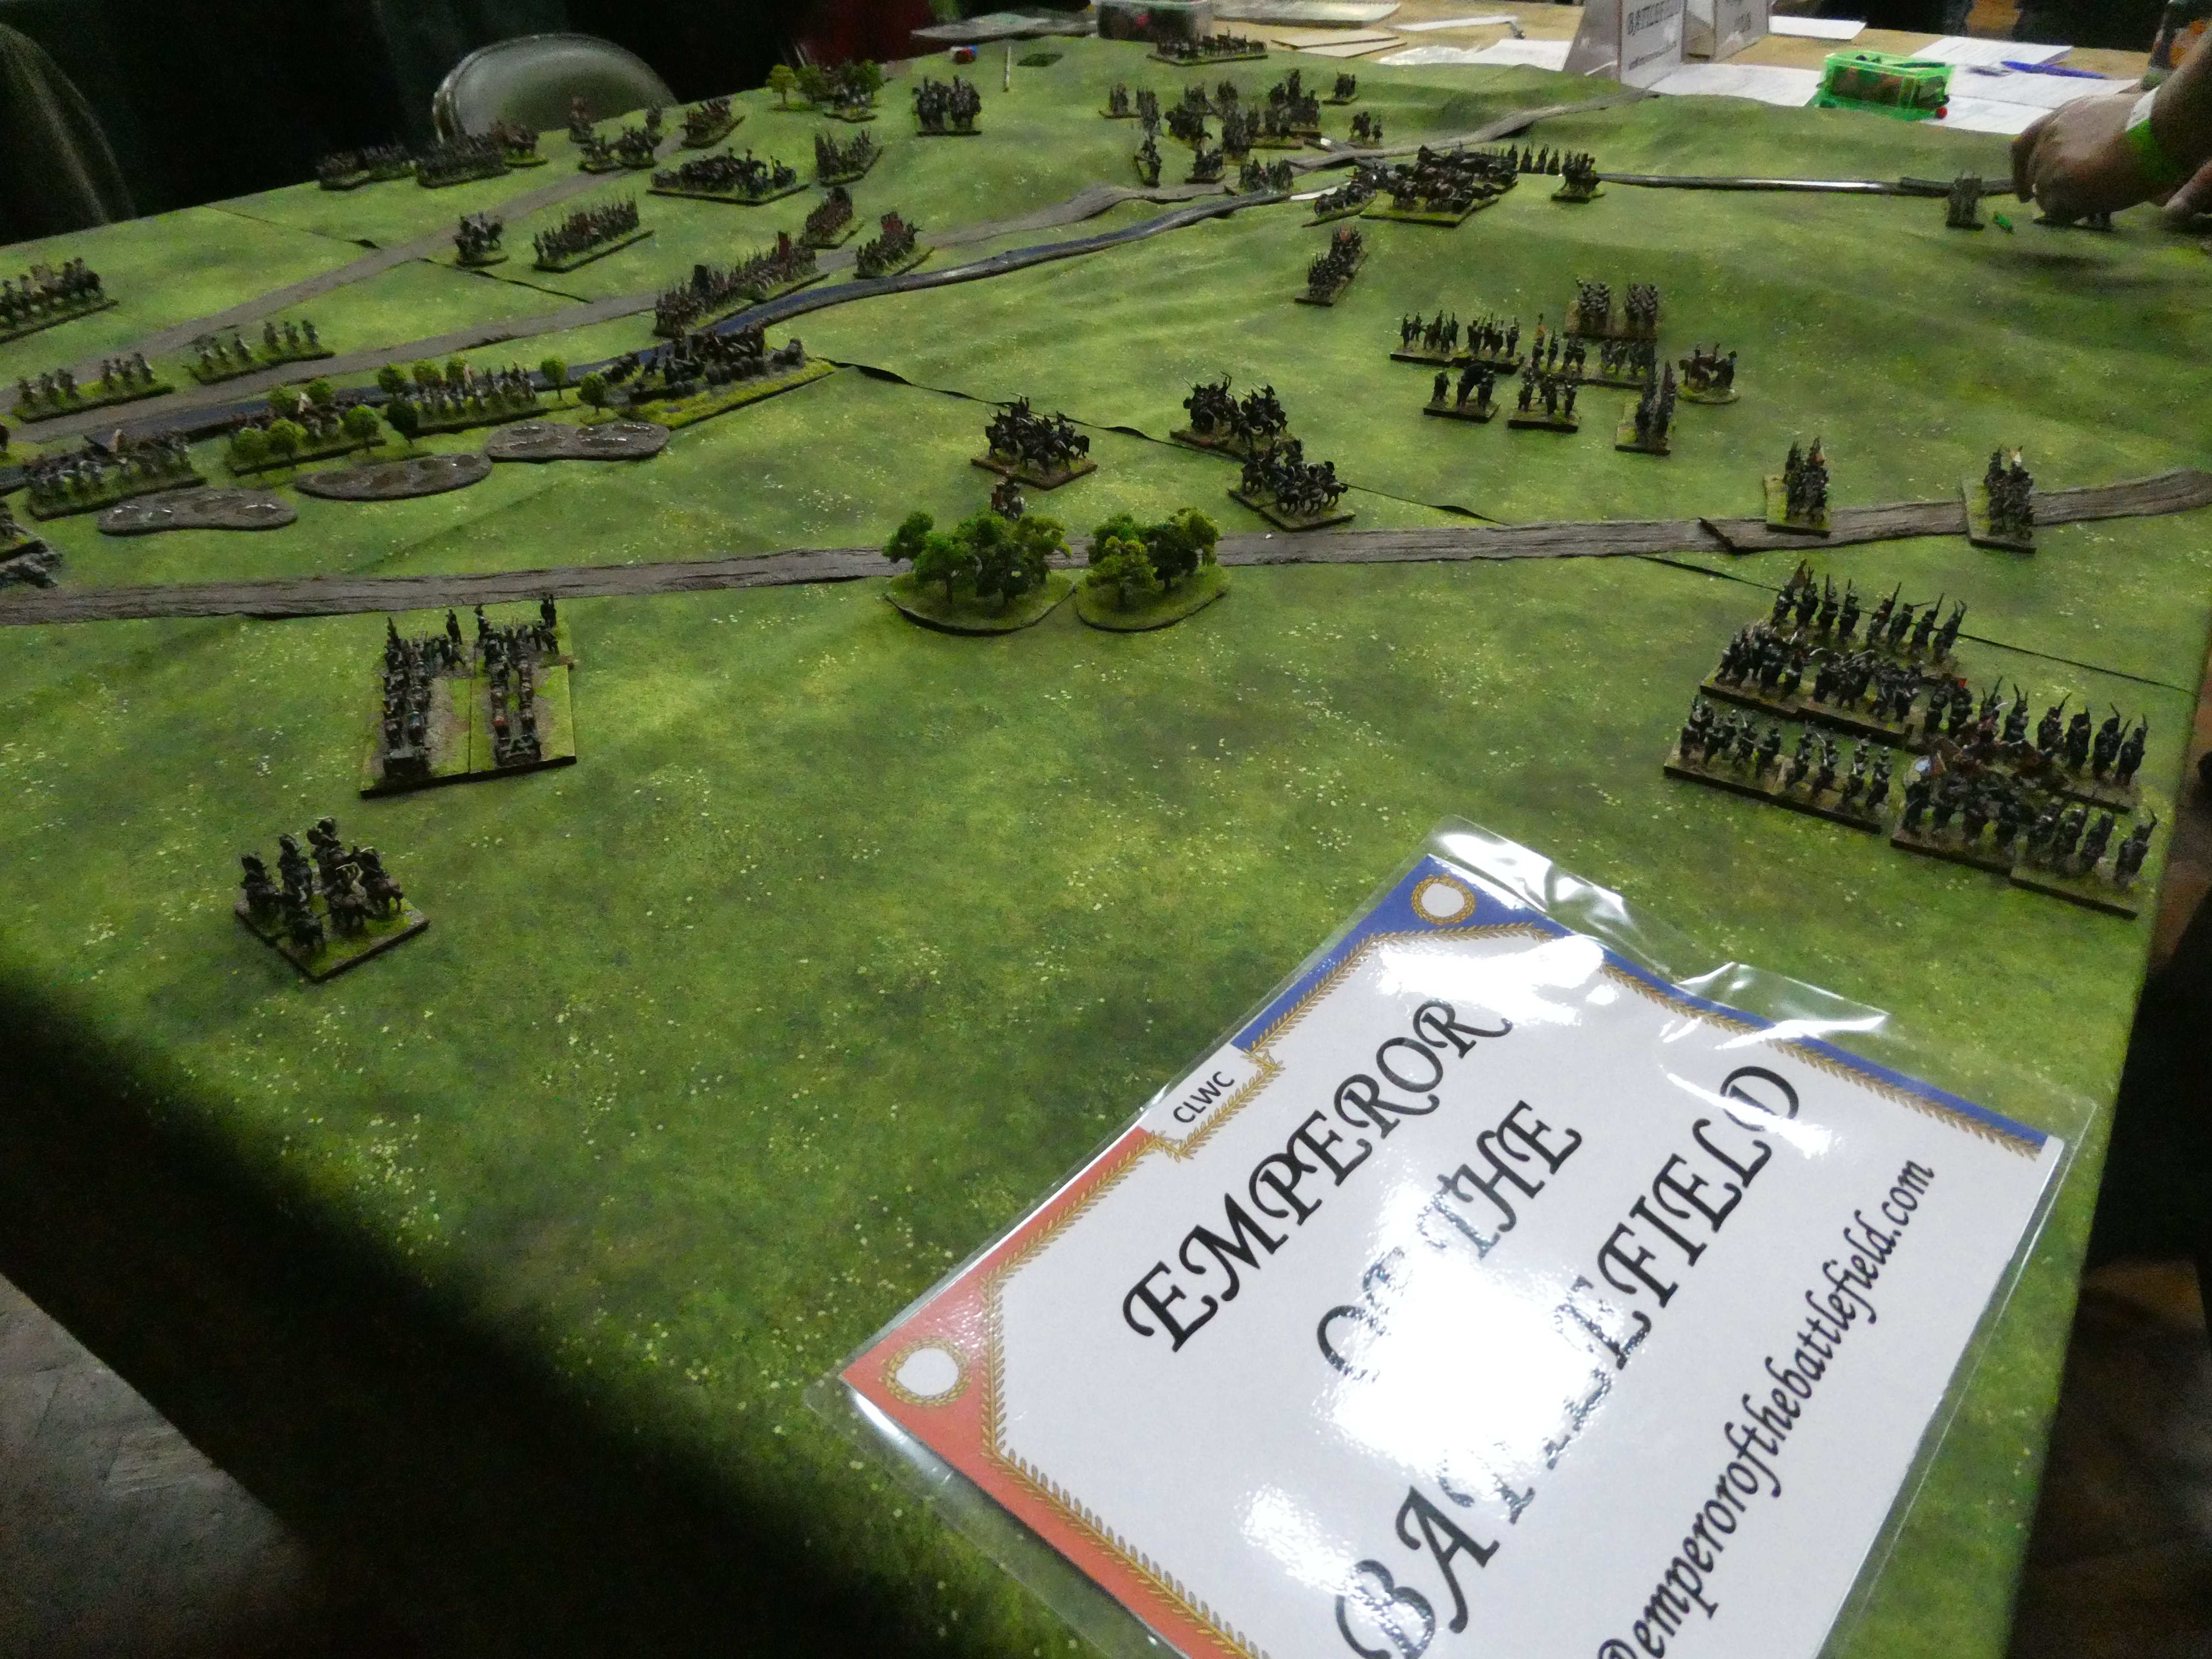
Central London Wargames Club brought their Tally Ho Vera (!)  in 15mm,  showcasing the Emperor of the Battlefield rules written by one of their members, I think. I had previously encountered them at SELWG - I'm sure if I was thinking of a move into Napoleonics (get thee behind me, tempation!) they would be worth a look.


Meanwhile Warlord Games had a nice-looking demo game of their Epic Napoleonics system in 13.5mm.  They look pretty good en masse! 


Rainham Wargames Club showed a game of Hammerin' Iron : Riverboat Action in the ACW 

Nice layout and 'buckets of dice' !

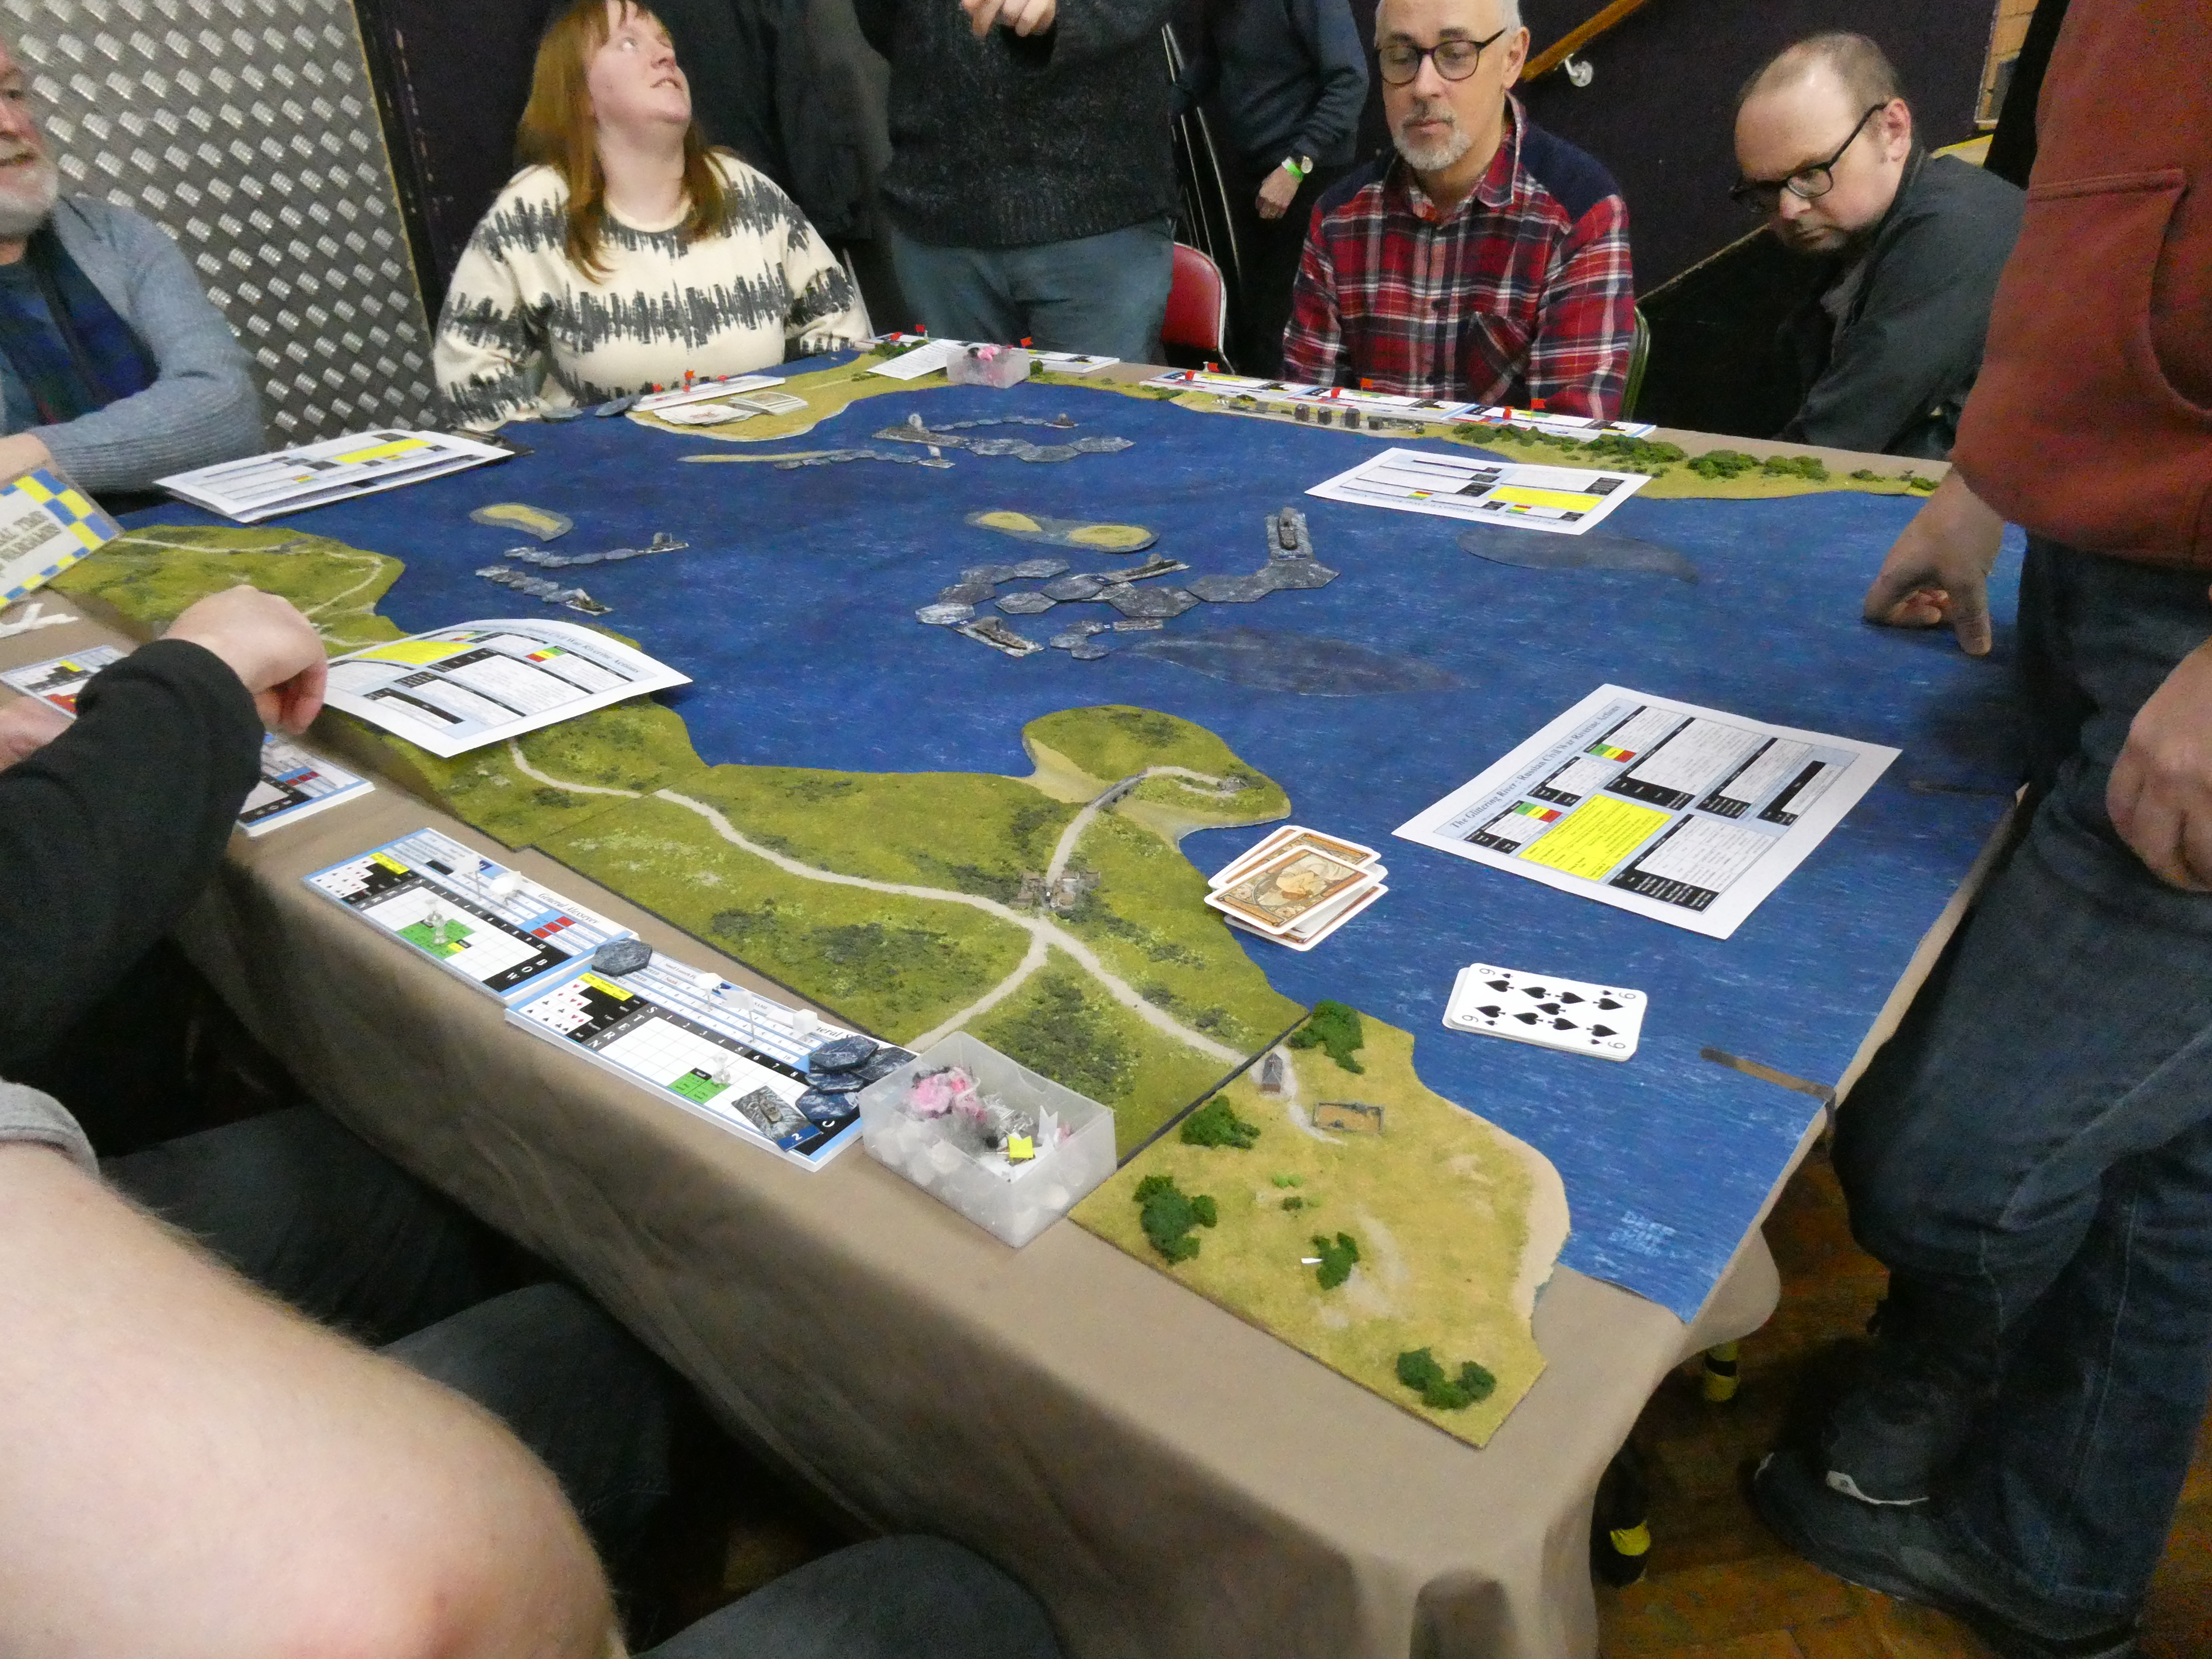
..and Real Time Wargames had their Russian Civil War  rules and campaign system The Glittering River on show, attracting quite a few players to a participation game. These guys often seem to create games in 'interesting and different' periods and settings. The ships and aircraft were 1/600th and the terrain was 2mm scale.


South East Essex ( SEEMS ) showed their Nach Paris!  ( previously seen also at SELWG )   28mm Franco-Prussian War game, using The Men That Would be Kings rules but pitting two European forces against each other - an interesting idea.


 Last but certainly not least Milton Hundred Wargame Club with, their  1/100th Modern (Soviets vs. NATO )  game featuring 'an armoured bridge assault including a paradrop' , Eine Bruecke zu Weit  (geddit?). 


That's all the tables I managed to photograph, as I think you can see it was a good selection of games. The second aspect of any show is the social side - I was very pleased with that side of things. I met up with old gaming friend Tony Toms ( from  Retired Wargames Reloaded ) who I had met at the Broadside show  last year after a very long time out of touch. Tony had come along with his son Oliver  also a gamer, and friend Reg, another of my former Rainham Wargames club-mates from the 1980s(!) - Reg and I think we had not met for at least 40 years!  We all had a good long chat over a coffee in the cafeteria, and there may even be some gaming to follow, as it turns out Reg and I don't live so very far apart. It was really great to meet these guys!   I also bumped into various members of Posties Rejects, and had another  good  chat with  Ray Rousell ( looking surprisingly well after his recent illness - thank goodness!)  and Big Lee - including a bit of tactical talk ahead of their second playing of Jon Freitag's Battle of Lake Trasimene game ( they didn't win in the end, so not sure how much help I was! ). I would strongly recomment both Ray's and Lee's blog/Youtube  posts on this show -  loads more and better pictures than me, and a pic of me on Ray's blog - fame at last! 

I also had an important appointment to meet  up with the excellent David Crook of A Wargaming Odyssey  blog,  as we had arranged for me to buy some WW2 British vehicles from the collection of the late Eric Knowles. These turned out to be a really splendid purchase, as you can see :


Four Jeeps, six Bren Carriers, four Lloyd Carriers, eight trucks and a 'Dorchester' command vehicle - a pretty useful collection!   And David threw in a lovely 'Brucie Bonus'  -  a box full of command figures and AFV crews. Star of the show is this command group map table :  


This is fantastic stuff, it will provide transport for at least two British battalions in my 'D-Day Dodgers' Italian Campaign project, plus a rather well-appointed Brigade HQ with the Dorchester! Many thanks indeed to David, I am very pleased indeed with these! 

A little light shopping with the tradestands was also done - 1-72nd Models are always of interest, and I picked up a couple of items from them. All those games of the Punic Wars with Jon F must have had an influence, and I have dipped a toe in the water of that period with these HaT Carthaginian Veterans:

Sadly I 'ummed and ahhed' too long over a nice unit of Garrison Roman Republican infantry on the Bring and Buy stall, which would have been a good match with these - learned my lesson there, if you like them,  buy things when you see them!  So the Carthaginians are a bit of an impulse buy, but could be the start of a DBA army - maybe even using some of my vintage  Airfix Ancient Britains for Celtic warbands.. From the same stall, I also picked up some cheap MDF road sections, which should come in handy for the more urbanised setups which are bound to feature in WW2 games As you can see they come with neat jointing included, and also some 'end caps' ( not shown ), so they will lay out nicely and should remain straight when placed on the table! Just need a bit of suitable paint and texture. 


So there we have it - overall, a pretty good day and a pretty decent 'mid-size' show, with good games and  traders  and best of all, meetings with friends old and new! Many thanks to the organisers, and all the  clubs, traders  and players, and to everyone I was fortunate enough to chat to.  I was glad I attended, a nice relaxed  start to the 'season'. More to follow I suspect, as  I note that  April, May and June will offer Salute, Partizan and Broadside, all very tempting..  Now I'd better take inspiration from all this and get some painting and/or gaming done... Until then, keep well everyone.

Friday, 23 February 2024

Lurking in the Loft - continued

I was sure I would get on with painting and/or gaming this past week or two, but those have rather fallen by the wayside - apart from a great evening in the (remote)  company of Jon Freitag and fellow bloggers Tony MS Foy, Mark  Jolly Broom Man and Chris Nundanket,  playing Jon's Third Battle of Trasimene - many thanks, all! 

One of the things that has taken up some time has been finally getting round to looking at a whole bunch of hobby-related stuff that was still lurking in the loft, some for several decades!  These really need sorting through, and reducing (in terms of  volume occupied, at the very least), and some stuff probably needs to go to a more caring home. 

The largest task has been going through many and various boxes of old (mainly) Airfix figures. As a first tranche, I found this selection of random boxes : 


what lies within..?

Gotta love the random selection of boxes and tins that must have been all that came to hand years ago (the box from the Japanese fighter plane kit has a price label marked 33p!) .  I wasn't a smoker as a child, I hasten to add(!), but an elderly 'aunt'  ( do kids still have 'aunts' that are not really aunts? ) rolled her own and was a good source of those nice tobacco tins. And yes, that's a classic Hinchcliffe box, too - pocket money never stretched to them, so where did that come from?! 

But enough about the boxes - you can see how  sorting through this stuff can be a slow process.. On to the actual figures themselves. Let's start with the real vintage ones : 

The 'classic' 1960s Airfix Germans


and rather fewer British, of similar vintage 

I'm quite glad to have about 80 of those vintage Germans, they are the figures my gaming started with as a kid, and there will be enough to raise a few more Wehrmacht units for my 'D-Day Dodgers' to fight.  The British 'Combat Group' is more tricky as there are not many of them - and I don't think I ever liked them that much. My first  British infantry battalion (in Rapid Fire order of battle)  has been built around some 1970s Matchbox figures which I liked, but there are only a few more of those, and the Airfix 1970s update to British infantry are a bit rubbish, tbh! So I may have to find an alternative which may involve much more modern figures. I suppose I will just have to put up with the much better quality sculpts(!).  

Having said that, the following couple of sets may come in handy: .

old-school (1960s) British 8th Army..


..and German Afrika Korps

I think these two sets could be quite useful when  running games that purport to be set in the Italian summertime, such as Sicily in July/August  1943.  After all, it was pretty much the 8th Army making up the British  contingent, and they would have surely continued wearing their tropical uniforms - and I assume  the Germans would have worn 'hot weather'  gear too. So there is scope for a judicious mixture on both sides - and the various 'early Airfix' will go together OK, so I think I can use these. Yes, I am really going to try to use some of these -  I should say I am entirely aware that more modern figures are much 'better', i.e more detailed, dynamically posed  and well-proportioned, but this is at least partly an exercise in nostalgia for me, I have had these figures a very long time and it will be lovely to make use of them - and to finally get them painted!  

I'll spare you too many   more of these pictures, but so far I have also found Airfix British paratroops (terrible poses and blobby physiques ),  Commandos ( men holding up anchors!), a few WW1 British,  WW2 Russians, Japanese and US Marines, plus the later (1970s) Germans,  and 1980s Esci British and German WW2 - which have an old-fashioned look which may just fit in.  


the famous 'Michelin Man' Paratroopers


Switching periods, a couple more random aircraft kit boxes revealed a small collection of (badly-painted)  Airfix Ancient Britains - ancient indeed,  probably at least 40 years old! I think based for WRG 6th Edition:

yet another US Cavalry conversion
 

I had just been reading Alan Gruber's  Duchy of Tradgardland blog featuring lovely conversions of old Airfix figures, in which it was mentioned just how versatile the US Cavalry figures were - and guess what?  Yes, very clearly they are the basis for these Ancient British horsemen - you can see the dark blue plastic where the paint has flaked off saddles etc. The US cavalrymen have had their body rather brutally cut off at the waist, and the top half of a British foot warrior glued in place - and as if to prove it, one of them has suffered a catastrophic glue failure and separated into its consituent parts. I'm afraid the conversion wasn't terribly well thought-out,  as the shields get in the way and prevent the man sitting securely on the horse - but at least the younger me had a try!

There's plenty more in the loft, which means a lot more sorting required, I suspect, and perhaps one or two more blog posts.  Meanwhile, if anyone out there is desperate to add to their collections of say, those blobby British Paratroopers or slightly bizarre Commandos, do drop me a line via the comments and we'll see what we can do - just cover the postage, maybe?  I can't quite bring myself to actually throw them in the bin. 

To end on a positive note, this Sunday is the Cavalier wargames show run by Tunbridge Wells Wargames Society,  and I will be going along, I have never been before, so it will be interesting. Given the quotation on my blog page header, I really should pay homage to the club that George Gush founded. The website lists about 20 traders and 17 games, so a nice medium-size show, which I hope makes  everything a bit more relaxed than the big shows like Salute, and allows visitors to spend a bit more  time looking at each game or stand. I'm glad to say I have arranged a couple of meet-ups with friends old and new, too, and it will be great to have a bit of a chat.  Hopefully a nice start to the 'show season' for 2024.  

Right, now back to the boxes, let's see what else there is... Until next time, keep well, everyone.

Wednesday, 7 February 2024

Calling up the 'West Suffolks'

I've been sadly neglecting my 'D-Day Dodgers' Italian Campaign min-project recently, so I thought it was high time I put in some more time on them.  Bob Cordery's The Portable Wargame gave me a nice introduction with his simple,  accessible rules - I will doubtless use them again, but for the moment I am looking to use Colin Rumford and Richard Marsh's  Rapid Fire Reloaded ruleset. I like their simplicity too, and they have the advantage of providing plenty of details on the organisation of scaled-down forces for all the main combatants.  So I am starting from there, with my first British infantry battalion. 

The 'RRR' booklet gives a nice suggested organisation for such a battalion, which looks like this : 

The above represents the 10th Highland Light Infantry,  and is used in the rulebook's example  scenario for Mouen, Normandy, 28th June 1944.   So I have borrowed it as inspiration for my very own 1st Battalion, West Suffolk Regiment. This of course is a distinguished senior regiment of the line, with many hard-earned battle honours from the times of Marlborough to Montgmery, all of which are stirringly recorded in the annals - of my imagination.  

Starting from the basis of the 'battle group' I put together for the Portable Wargame, which previously saw action at  Monte Lucedelsole  and Ponte Natale,  I have been making small acquisitions of additional figures and vehicles from traders at various shows in the last year or two - yes, I am one of those annoying folk who will approach a tradestand and buy just  one or two packs of two or three figures, or one vehicle! I should also mention the 'bring and sell' style tables at the Broadside show at Gillingham, which proved a good source of 'pre-loved' Bren carriers, Jeeps etc. 

new recruits - need to smarten up a bit

I've now had a proper sort through the various accumulated packs of figures and vehicles, and put them together in the organisation as suggested above - minus the Machine-Gun Company, which is not an integral part of the battalion.   

From the front  we have the Battalion HQ with its Bren Carrier, PIAT and Mortar team,  the Carrier Platoon with another Bren and PIAT team, the four Rifle Companies, and at the back the Support Company with Lloyd Carrier and 6-pounder AT gun, Bren Carrier and 3-inch mortar.   Figures are a right old mixture - the majority being my vintage 1970s Matchbox guys as previously seen, with PIAT and mortar teams from Brittannia/Grubby Tanks and SHQ. I didn't have quite enough Matchbox figures in suitable poses, thus the newly-recruited   'D' company's riflemen are good old Airfix 1970s WW2 British Infantry, which have been in the loft for several decades! Vehicles an equally polyglot bunch - two of the Bren carriers (probably Airfix ) were second hand, provenance unknown, the Lloyd Carrier a resin Ready To Roll  model from Rapid Fire themselves,  and the rather nice Bren Carrier which the battalion commander has 'baggsied' is by Disain Studio, and proudly proclaims that it is 'Made in Devon' - I think it is 3D-printed, which is a first for me!  I am entirely happy with this mix and match approach, I think it's fun to make use of the vintage stuff that I originally had as a child and give it a new lease of life, supplemented by some new aquisitions from - well, whoever I happened to find at SELWG, Broadside, Salute or Partizan! They all seem to go together pretty well. 

Now I have to get on with painting and basing the recent recruits as required, and then rustle up some suitable opposition - the core of which will be  nice  old 1960s vintage Airfix Germans, riding in a fleet of recently-acquired Steyr heavy cars and Opel Blitz trucks.   After that,  I think I can raise a lorried Indian battalion, with trusty Bedford QLs and doubtless some more Bren carriers.. 

 'In other news', as they say,  I was lucky to be included in the latest of Jon Freitag's remote games,  playing the ill-fated Roman Consul Flaminius in Jon's  table-top  re-creation of Lake Trasimene, 217BC. I'll won't give too many spoilers, and leave it to Jon himself to give his usual excellent battle report - suffice it to say it was a surprisingly close-fought and exciting affair!  Many thanks to Jon for a great scenario and for running the game so smoothly.  Also for this teaser picture, showing Flaminius and one of his  legionary Principes units ( lovely figures from Jon's collection, of course ) getting their feet wet - which may give you a clue as to the eventual result!   


Many thanks to Jon, and to fellow players Chris, Tony and Mark  ( aka  Nundanket,  MS Foy and Jolly Broom Man ) for a great evening!  A re-match may be in prospect, with the sides reversed - I think Hannibal has it rather easier, let's hope it turns out that way.  Meanwhile, maybe it's time to run an actual game (albeit solo)  here - I am mulling over Seven Years War vs. Thirty Years War. Watch this space - or just 'follow' this blog, and it will pop up on your reading list.. Until then keep well, everyone.


Wednesday, 31 January 2024

Wing Leader: Air Combat Over China, 1942

I have owned a copy of the  aerial combat board game Wing Leader : Victories 1940-1942 for several years (pre-pandemic, at least) without really finding the time to give it a proper go. It's a very interesting game, so I've been glad to finally devote some time to it, and at least play the first couple of scenarios.


Among the aspects that I found interesting were (i) the counters represent 'units' of aircraft, specifically Flights (about 5-6 planes)  and Squadrons  (about 10-12 planes) rather than single aircraft - this seems appropriate as it was generally how air battles were run in the period concerned -   and most interesting, (ii)  the portrayal of  altitude.  

It has always seemed to me that the absolutely most important factor in portraying  air combat must be the height that the aircraft are at. Read any eyewitness account of aerial combat - having height advantage (which translates into speed advantage, for attack or escape ) is crucial. You might argue that in 1914-1918, combat once joined tended to be mainly turning fights ('dogfight' is the perfect word!),  but 1939-45 saw the triumph of height and speed against manoeuverability, as the pilots of nimble but lightly-armed and armoured Japanese and Italian fighters, for example, found to their ultimate cost against American and British aircraft built to prioritise height, speed and heavy weaponry. 

All the game systems that show aircraft moving over a map of the land, with markers denoting  altitude,  just don't look right to me: the aircraft seem to move more like ships in a sea battle game, or tanks on the land.  Things can be improved by putting the models on stands with adjustable heights, but that always seems a bit awkward too, and quite difficult to put together.  A solution was suggested 45 years ago (ulp!) by Mike Spick in his book Air Battles in Miniature - he dispensed with 'depth' on the table, and having its two dimensions represent (i) distance along the ground and (ii) distance above the ground. The model aircraft were  shown in profile, the altitude and attitude (nose up or down)  of the aircraft were perfectly represented - it looked like an air combat!  As I've mentioned before, as a youngster I was enthralled by Mike Spick's book, and a few of us fought some exciting (if completely unhistorical) mass air battles at our club using 1:72 scale models 'cut down the middle' - I can tell you that a B-17 in that scale looks pretty impressive! Happy days, indeed. 

 Therefore it was fascinating to see that the Wing Leader designer Lee Brimmicombe-Wood has taken Mike Spick's concept and used if for his game - the unit  counters show their aircraft in profile, and the board represents distance along the ground and height over the ground in the same way.  As an example, here is the intial setup for Scenario 2 'Birthday Present' which I have played through:   


And a close-up of the Japanese raiders, stalked by American P40s:


With apologies for variable quality of photos in this post, I hope you can see how the format works. The scenario is set in April 1942 near  the Chinese city of Lashio.  A Japanese raid is launched, with two squadrons of Japanese Ki 21 'Sally' bombers ( 12 aircraft each) escorted by 1 Squadron (12 aircraft) and 1 Flight (6 aircraft) of Ki-43 'Oscar' fighters.  American forces of 1 Squadron (8 planes) and 1 Flight (4 planes) of P-40B Warhawks, plus a Flight (4) of the improved model  P-40E  are sent to intercept, with the P-40Bs climbing from below a layer of wispy cloud toward the Japanese formations, and the P-40Es  approaching from behind.  On the counters, Squadrons are  denoted rather neatly by showing two aircraft profiles on the counter, Flights by only one. 

Movement rules are very simple - it's basically 2 movement points (MPs)  for bombers and escorts which have not yet been alerted to the presence of the enemy,  3 MPs for  fighters operating independently as interceptors or a 'sweep', and usually 1MP per square in level flight, and 1MP if changing facing by  more than 90 degrees.  If they dive, add 1 MP/square  - and climbing one level requires more MPs, depending on the aircraft type and current altiude (for example P-40Bs take 2MPs to climb 1 level starting from levels 4 to 9,  3MPs if starting from level 10 or higher).  This is quite a contrast form the old Mike Spick system, which I seem to remember involved calculating each aircraft's speed to the nearest 1mph, and moving correspondingly precise distances in mm, then re-calculating according to changes in height and throttle setting - it was all admittedly a bit like airborne Bruce Quarrie or WRG rules..! 

The game introduces the concepts of  'Vectors' and 'Tallies', markers for which can be seen on the board. Each interceptor unit starts with a 'Vector' which is the target square their ground controller has directed them to aim for,  but they can then attempt to spot enemy units, taking a die roll check which is modified for distance, weather conditions (those clouds)  etc. If successful,  the Vector counter is flipped to 'Tally' and placed on the enemy unit that was spotted, and the interceptor unit can then move to attack the enemy unit.  The sequence of movement means that the target  unit has to move first - thus if you spot ( Tally )  an enemy unit, you can follow it and move to attack.  All fighter units can Tally, and the result can be a 'chain of Tallies' which deternines the order of movement -  quite a neat system for representing the importance of spotting and tailing enemy aircraft. The poor old bombers have to just lumber along in straight lines, I'm afraid, and always move first.. 

Turn 1 : 'Tallies' obtained, action will follow..
 

In our game,  early on several Tallies were gained and had interesting effects - the P-40E ( labelled 'P') unit spotted the rearmost bombers (unit 'Y') and climbed, ready to swoop, but in turn were Tallied by the Flight of Ki-43s ( unit 'D' ),  who in their turn were spotted by P-40B Flight 'B'. So a 'chain of tallies' occurred, and that determined move order - first bombers 'Y', then P-40Es 'P', then Ki-43s 'D' and finally P-40Bs 'B' - several levels of 'cat and mouse' being played! Meanwhile the remaining P-40B squadrom 'A' had seen the leading bombers 'X' and climbed to engage, but the Ki-43 Squadron 'A' remained blissfully unaware ( and in this scenario have no common radio 'net', so can't be alerted by their comrades ) and just beetled along with the bombers, having a lovely day..

However, that squadron 'A' of Oscars woke up in the end,  spotted P-40B squadron 'A' below them, and dived to attack through the wispy clouds, while the other units were all still closing in on each other in their chain of Tallies.  Combat commendes in the bottom left of this picture, from Turn 3 : 

Turn 3 : first combat, and 'chain of tallies'
 

Once two or more opposing units reach the same square, combat ensues, and this is a bit more involved. The basic mechanism is to compare combat values for each aircraft type, work out the differential between them, then roll dice for 'hits' against a combat table where the differential denotes which column to use - so if your combat value is better, you should get more hits. The attacking unit can choose whether to use 'Turning Fight' tactics or 'Hit and Run' - different aircraft types can better at one or the other (the Oscars are better at Turning, P-40s are better at 'Hit and Run'),  and there are modifiers for 'Veteran' or 'Green' units, whether climbing (hence slower) or diving, or formation has been distrupted, etc. 

aircraft stats cards are rather nice
 

Each 'hit' then triggers another die roll, modified by 'Firepower' of the attacker  and 'Protection' of the victim - this can result in no effect, a  damaged  ( 'Straggler' ) aircraft or a 'Loss'  representing one plane destroyed - remember your unit may be a Flight of say 6, or Squadron of 12.  Obviously if all 4 or 6 in your flight become Losses, the unit is eliminated - but usually formations  will break up long before that - which leads us to unit cohesion. 

After hits and losses, there's a Cohesion check for every unit in the combat, which is rather akin to morale - after a bout  of combat,  your formation may be disrupted and therefore less effective, or it may simply break up altogether.  I quite like this idea, as it reflects the common experience of pilots reporting going into a combat where the air seems full of machines of both sides, only to suddenly find themselves seemingly  alone in the sky  as all formation has been lost, and they might as well head for home.  This has some interesting implications,  in that a unit could attack an enemy unit from a good position, roll well in the combat, score  several hits and convert them to 'kills', but then roll low in the 'cohesion ' check and become 'broken' because the pilots have lost touch with each other, and are  obliged to head for home. Flights are more likely to suffer this than Squadrons, and Fighters more than Bombers, who after all depend on keeping close together.   This mechanism can mean that combats can be rather short, and highly unpredictable!  

In my opening fight between Ki-43 Oscars and P-40Bs, the attacking Oscars chose 'Turning fight' which gave them an advantage, and gained for being 'Veteran', so rolled on the '+2' differential column - rolling 7 on 2 dice gave 1 hit on on the P-40s. In turn the Americans, at a '-2' differential , rolled '10' and also got 1 hit.  Then in the determination of losses, the Oscars rolled poorly and suffered from their poor armament ( low 'Firepower' ) - so the 'hit' had no effect, but the P-40s rolled higher and had better Firepower, and claimed the first kill of the game, as one Ki-43 went down, presumably in flames..  In the cohesion checks, both squadrons suffered one point of disruption, but remained unbroken - it takes 2 disruptions to break a squadron.  So the combat continued in the next turn  - an actual 'dogfight'.. In Turn 4, neither side could score any hits, but the unfortunate P-40 squadron 'A' rolled low in the Cohesion check, took another Disruption level and was thus 'Broken' - and out of the fight, with the small consolation of having claimed one Ki-43 'Kill'. Units are brittle in this game!

Turn 5 : Oscars, Sallys and P-40Es get stuck in
 

The other units on both sides continued stalking each other, and on Turn 4 the Flight of P-40Es ('P')  caught up with the rearmost squadron of  'Sally' bombers , shooting down one bomber , only to be caught up with on Turn 5 by  Flight 'D' of 'Oscars'.  The fighters battled it out, each Flight scoring one 'kill' on the other - but crucially the P-40 Flight failed its Cohesion roll and took one Disruption point - enough to break a Flight. So by turn 5,  two of the three US units had been Broken and forced out of the fight - actual losses standing at 1 P-40E from the US force, and 1 Ki-21 'Sally' and 2 Ki-43 'Oscar's from the Japanese. Interesting - despite more  casualties, the Japanese  formations had held together better and were gaining the upper hand. The remaining  P-40B Flight comprised 4 aircraft ( and were 'Green' pilots ) now up against about 40 Japanese planes!

Perhaps any sensible US pilots would have dived for home at this point, but I decided these guys were keen to fight - they had a Tally on Ki-43 Flight 'D', though were by now also being stalked by Ki-43 Squadron 'A'. So inevitably on Turn 6, all three units met in a climactic combat.. 
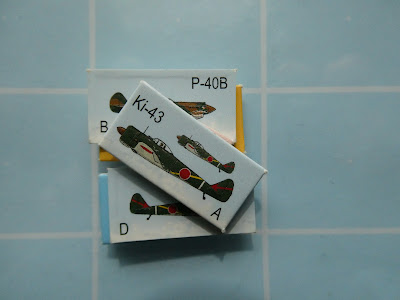
final mass brawl: 4 P-40s vs 16 Ki-43s..

 With the Ki-43 Squadron 'A' moving last they were the attackers and chose a Turning fight, which gave them the advantage, plus being Veterans against Green, and having two units agianst one - the Japanese player then rolled 11 on 2 D6, scoring 4 hits! The P-40s scored none, unsurprisingly. Those 4 hits could wipe them out - in the event, they suffered one Loss and one Straggler (damaged), thanks to the Oscars' light armament.   In the Cohesion check, the P-40 flight took one disruption point and was Broken - no suprise there! But it didn't go all the Japanese way, as the ki-43 Squadron 'A' also took one Disruption point, which added to one from the previous combat, left them Broken too.  Broken units must make for home, so with all 3 of its units now Broken, in effect the US force was finished.  

Turn 7 : P-40s dive away, but are pursued
 

Broken units can simply drop out of the game by mutual player agreement, and I had done that with all previous examples, but it's not automatic, and they may be forced to try to escape, pursued by the enemy - so I thought I would try that with my plucky 'Green' P-40 Flight. Accordingly on Turn 7, the P-40Bs dived away towards their baseline - but were pursued by the remaining Ki-43 Flight, who continued the combat with some advantage.  The 'Oscars'  scored 2 hits , which resulted in 1 more Loss to the P-40s - now reduced to just two planes, one of them damaged. They were saved finally by the Cohesion check - after several rounds of combat ( depletion of 'ammo' is tracked and this reduces cohesion ), the Ki-43 Flight failed its check, and was also required to make for home. With that, all fighter formations  on both sides had broken up and retired to base, leaving the two Japanese  bomber squadrons to continue on their mission - this being to simply reach the American baseline and release their bomb loads. With no opposition remaining this was a done deal, and the game ended.  A tot-up of Victory Points (basically 1 VP per fighter Loss, 2 VPs per bomber, and 6VPs per unbroken Bomber Squadron reaching 'target') followed.  Losses were 2 P-40Bs and 1 P-40E  (3VP) versus 1 Ki-21 and 2 Ki-43s  (4VP), but with 12VP for the unbroken bombers, the Japanese had scored enough to claim a victory - as was pretty much apparent. 

So there we are - I have strapped in, started up, taken off and flown my first  missions, and returned to terra firma relatively unscathed and with a little more confidence to face further sorties. I must admit I rather like this game system, not least because of its use of  Mike Spick's clever concept of portraying the all-important third dimension  ( I have never understood quite why other rule-writers have not followed his lead in all these years! ).  The movement rules are simple but effective, and I like the 'Tally' system.  Combat rules with their three stages of calculating advantage and hits, incurring losses, and checking cohesion took a little getting used to, but quite soon seemed to flow quite naturally. The 'Cohesion' rules did give me pause slightly, as they make fighter units (especially smaller ones)  very fragile once committed to combat - they can seem like a one-shot weapon, and combat can be pretty brief.  I did wonder if that was a bit too impactful  -  I suppose a possible 'tinker' with the rules might be to increase the number of Disruptions that cause a unit to become 'Broken'? But would that then mean long,  drawn-out combats and unrealistically high casualties?   If the Cohesion rules are giving a good version of what happened in reality - and I think they might well be - then I should be satisifed with that, perhaps. One is not playing the role of a single heroic ace fighter pilot doing battle at 'Angels One-Five',  but more likely the Wing Leader, or even the  Ground Controller watching plots moving on his radar screens and plotting tables,  committing squadrons to battle and hoping for the best as you listen to them excitedly reporting ( or not ) the outcomes over the radio..       

Now so far, of course I have only used the basic rules - there are 'Advanced' rules still to come, covering among other things Drop Tanks and fuel limits, special tactics, special weapons, Jets and Rocket Planes, Surface Units and Flak Units, Barrage Balloons,  and last but by no means least,  Bombing.  I'll try to take it slowly!   I like that the game covers 1940-1942 only - the 'early war' period is just as interesting in the air as on the ground, as the combatants are on a learning curve and pre-war concepts  and designs are tried and sometimes found wanting. Me-262s and Mustangs can wait, I want to try Gladiators and Fiat G.50s first!  There are 23 scenarios in this edition, covering China,  the Eastern Front, the Battle of Britain (of course!), Malta, Greece 1941, the Pacific, France 1940, the Western Desert, and France 1941-1942. There's a huge Dieppe 1942 scenario with about 15 units each of RAF and Luftwaffe, and a Midway scenario where 5 units of Japanese 'Zeros' have to try to deal with 3 times their number of American Fighters, Torpedo- and Dive-bombers in multiple waves - challenging stuff indeed.   On a much more modest scale the third one in the scenario book is 'Stalingrad Airlift' , whereby 2 units of He-111s acting as supply carriers have to fly very low, escorted by a single Flight of Me-109Fs  (4 machines),  and are intercepted by 2 squadrons (18 planes!) of Russian Yak-1s. The Me-109s have 'Experte' ( i.e. an Ace ) status and the Russians are 'Green', but it will be a hard one for the Germans, I suspect - they'd better do well on the Cohesion checks! 

I hope this has been interesting for anyone thinking about  WW2 aerial combat games  and looking for  a different and interesting approach -  I think you can see this fits that bill.  I am quite pleased with the game, and will try to work my way through the scenarios.   Hmmm... do you think it could work on a 'bigger scale' ?  I mean , a board with  larger  squares, and actual models for the units - perhaps 1/144 kits could be used? It could look really good at a show(!)..  Does the spirit of Mike Spick look over our shoulders..?

Now I really need to crank up the painting production line - there are 7YW, WW2, and Pike and Shot waiting for attention, and some gaming with such figures should also be lined up.  A planning session is required, and then some execution, to be shown in future posts. Until then, keep well, everyone ( that means YOU, Ray..hope you're on the mend! ).

Wednesday, 24 January 2024

Fnurban #28 Anarchy in Tottenham, 1909

Although my home is in Suffolk,  I am fortunate to get to spend some time in The Great Wen - specifically in the North-Eastern part of London. So I was  able to join a local guided walk yesterday,  on the 115th anniversary of the event known as 'The Tottenham Outrage'.  On 23rd January 1909, a pair of Jewish Latvian  radicals (labelled as 'Anarchists' by the media at the time) named Paul Hefeld and Jacob Lepidus staged an armed robbery in Tottenham, stealing the weekly wages (about £80) of Schnurmann's India Rubber factory (where Hefeld had been briefly employed), just off the Tottenham High Road.  It so happened that the factory was also right opposite the Tottenham Police Station - hence the alarm was very quickly raised, and the robbers pursued.  A chase ensued, which lasted at least a couple of hours and covered about 6 miles, and which caused the deaths of four people, including both of the robbers, a Police Constable and a child, and the wounding or injury of at least 20 other people including seven policemen. 

Our walk followed (most of) the route of the chase, through part of Tottenham, onto the nearby marshes, and on towards Highams Park and Hale End, pausing at various points to mark the significant events along the way. First, the site of the actual robbery, at the gates of Schnurmann's factory, where the company car with chauffeur and a young wages clerk were set upon by the robbers. 

Site of the robbery...now a car park

 
... and the Police Station (centre left), right opposite!

It seems the robbers made off with the heavy bag of money, and were also carrying quite a lot of ammunition - it is reported that over the course of the chase they fired over 400 shots at their pursuers!  The factory owner and his staff apparently gave chase in their car, but at some point a bullet hit its radiator, immobilising it.  Police from the station of course joined the chase, but only after having to smash open their weapons cabinet, because no-one could find the key!  That was just the first incident in a series which seem to give the whole affair a semi-comical Keystone Cops aspect - I found myself picturing events like the chase sequence from one of their silent movie capers, complete with gunsmoke as weapons are wildly discharged.  But of course, the gunfire was all too real, and had tragic consequences.  

The first of those consequences happened by St Mary's church in Mitchley Road, N17: 


The first fatality - a 10-year-old child

Ten-year-old Ralph Joscelyne was a baker's delivery boy, caught in the crossfire and killed. The killers kept running towards Tottenham Marshes,  but  PC William Tyler took a shortcut and confronted them at the site of a refuse incinerator - he was also shot, and subsequently died.  The refuse facility site is currently being re-developed, but its original perimeter wall still bounds the road - for now, at least.

Site of PC Tyler's fatal wounding 


and memorial plaque on Tottenham Police Station
 

The killers reached the edge of the built-up area ( really the edge of London at the time ) and crossed the railway tracks via the rather wonderfully-named Carbuncle Passage (which follows the Carbuncle Stream, which even today is well-named, I feel) 

possibly the best street name in London..

 Having crossed the railway, the scene changed to the open spaces of Tottenham Marshes - still undeveloped today, 

onto the Marshes..


At one point on the marshes, the pursuit ran across the Chalk Footbridge - at this point, one PC Nicod got close enough to take aim with his Police issue Webley revolver, which misfired. The robbers returned fire (they carried more advanced weapons, Hefeld a .32 Browning automatic pistol,  Lepidus a 6.5mm Bergmann) and wounded Nicod  in the calf and thigh. 

Chalk Footbridge - where PC Nicod was wounded

We followed the course of the chase along the River Lea Navigation and around the perimeter of the Banbury Reservoir, but skipped (access not being easy, plus we needed a lunchbreak - the cafe of Sainsbury's Low Hall branch proved convenient)  possibly the most comedic part of the chase.  In 1909 Helfeld and Lepidus commandeered a No. 9 Tram on the Chingford Road,  forcing the conductor to drive it - pursued by a policemen in a commandeered pony and trap, until the unfortunate pony was shot down, and another tram full of police oficers! The fugitives then transferred to a horse-drawn milk cart, which they turned over, then hijacked a grocer's cart, but could not release the brakes!  Finally they abandoned that and continued on foot, along the River Ching,  but ended up cornered in a dead end by a railway bridge.  Lepidus climbed a fence to escape but Helfeld could not, and shot himself as the Police closed in - he died weeks later in hospital.

River Ching railway bridge - end of the line  for one fugitive
 

Jacob Lepidus  continued running, and holed up in a cottage next to the Royal Oak pub, where he was soon surrounded. After some further slapstick moments ( he may have tried to hide in the chimney(!),  and a policeman climbing a ladder had to rapidly descend when fired on ), finally the officers broke into the house and Lepidus died in an exchange of fire - it later transpired that he had taken his own life as the police broke into the room -  and so ended the chase.  The cottage is long gone, but the pub remains ( it had been rebuilt only in 1906 but is now probably the oldest building nearby ) and has a signboard with a decent potted history of the event. 

Royal Oak pub - the cottage was next door


The pub's information board

It was a drear January day, of course, and raining at the start, the weather forecast had not been good  (in between 'named' storms), but it dried and brightened up later, so the walking was OK, admittedly not through the most picturesque parts of NE London! But it was really very interesting to follow the route of the chase and try to picture  how events had unfolded in 1909.  

Various discussion points came up - especially the motivation of the attackers.  It seemed to us present that the money was perhaps not really the crux of the matter - why stage a robbery next to a police station, robbing people who would recognise you?  And carrying hundreds of rounds of ammunition, which must have been very heavy, on top of the money bag?   It seems quite possible that the aim was not to fund their political activities but perhaps to simply provoke a confrontation and draw attention to their cause - that of Jewish communities suffering Pogroms in their homelands under the  Czarist Russian regime.  They clearly were prepared to use extreme violence and did not value their own lives - does this reflect the sort of nihilistic/suicidal attitude that we have seen more recently in various actions by Al Queda/ISIS and other groups?   It seems the money bag was never recovered - did it end up in the cottage chimney, or in the river or marsh? One rumour was apparently that the grocer whose cart had been hijacked soon afterwards moved to rural Essex and opened his own shop  - had he applied the rule of 'finders keepers'?

Another point was the 'public participation' aspect  - it seems that many members of the public were willing to 'have a go' as the chase continued. From the very start, passers-by tried to intervene ( And several were shot, for their pains), one story says that a housewife threw potatoes at the fugitives! Also an 'eye-opener' was the number of members of the public who were able to produce a selection of weapons to join in the gunfights - it seems a fair number of residents had shotguns handy, and perhaps some local ex-army veterans ( with the Boer War only a few years in  the past ) may have had 'souvenir' weapons to hand. As the chase progressed onto the Marshes, a couple of gents who had been out hunting ducks were persuaded by the police to assist, and at least one of the robbers was wounded by shotgun pellets.  We worry about the level of gun and knife crimes in certain areas of London today ( hmm...including  Tottenham, perhaps? ) - but perhaps it wasn't so very different 115 years ago? It became a sort of running joke as our excellent walk leader stopped at various points to describe the events of the chase, and almost inevitably added to the list of 'joe public' appearing with various weaponry at every point! 

There is a good account of the event on Wikipedia :  https://en.wikipedia.org/wiki/Tottenham_Outrage   - well worth reading if this has interested you. But my memory was also  'nudged' by the story - I have been dimly aware of the events described for many years, and I realised that this was because I had read about it in a wargames magazine article! A little light internet searching established that this was 'Anarchy in the UK'  by Mike Bell, which had appeared in Duncan MacFarlane's Wargames World (annual  supplement to Wargames Illustrated )    number 1,  as far back as 1988!  It's even possible to download a pdf version of the magazine - free from the nice people at Wargames Illustrated using this link  https://www.wargamesillustrated.net/wp-content/uploads/2021/03/Wargames-World-1.pdf

Perhaps even more interesting, Mike Bell's piece is actually a game, allowing us to wargame the events of January 1909, including a printable game board and pieces.  It's a gridded 'chase' game, appropriately enough, and as various squares are landed on or passed, events can be triggered and pursuers activated - reading through the details for each significant square in effect gives you the narrative of the real-life chase. It was  rather clever, I thought!  Does anyone out there remember this piece, and if so, has anyone actually played the game?    It reads pretty well, I suspect it could make an interesting game - now if you had suitable Edwardian period figures and vehicles in 28mm/40mm/54mm (anyone got a model tram?!) and say, a 6ft by 5ft table, the board could be modelled in 6-inch squares...  Could be almost 'local interest' if the SELWG show remains at its venue in Edmonton... Just a thought!!

All in all, a thoroughly interesting and enjoyable day, even if a tad cold and damp,  and thanks are due to the Leyton and Leytonstone Historical Society for organising the walk, and on the anniversary too! 

I hope this has been interesting, I really enjoyed the day and was inspired to post it  here having read several excellent 'local walk'  reports on Mr. Nundanket's  Horse and Musket Gaming blog - thanks for the idea, Chris!  

I hope to do some actual gaming, painting etc soon, honest folks! Hopefully more of that in the next post, until then keep well, everyone.