Last time, I set up the forces and table for a trial game of The Portable Pike and Shot Wargame rules variant by Alan Saunders. I have now played the game, and can report how it went - quite well, actually!

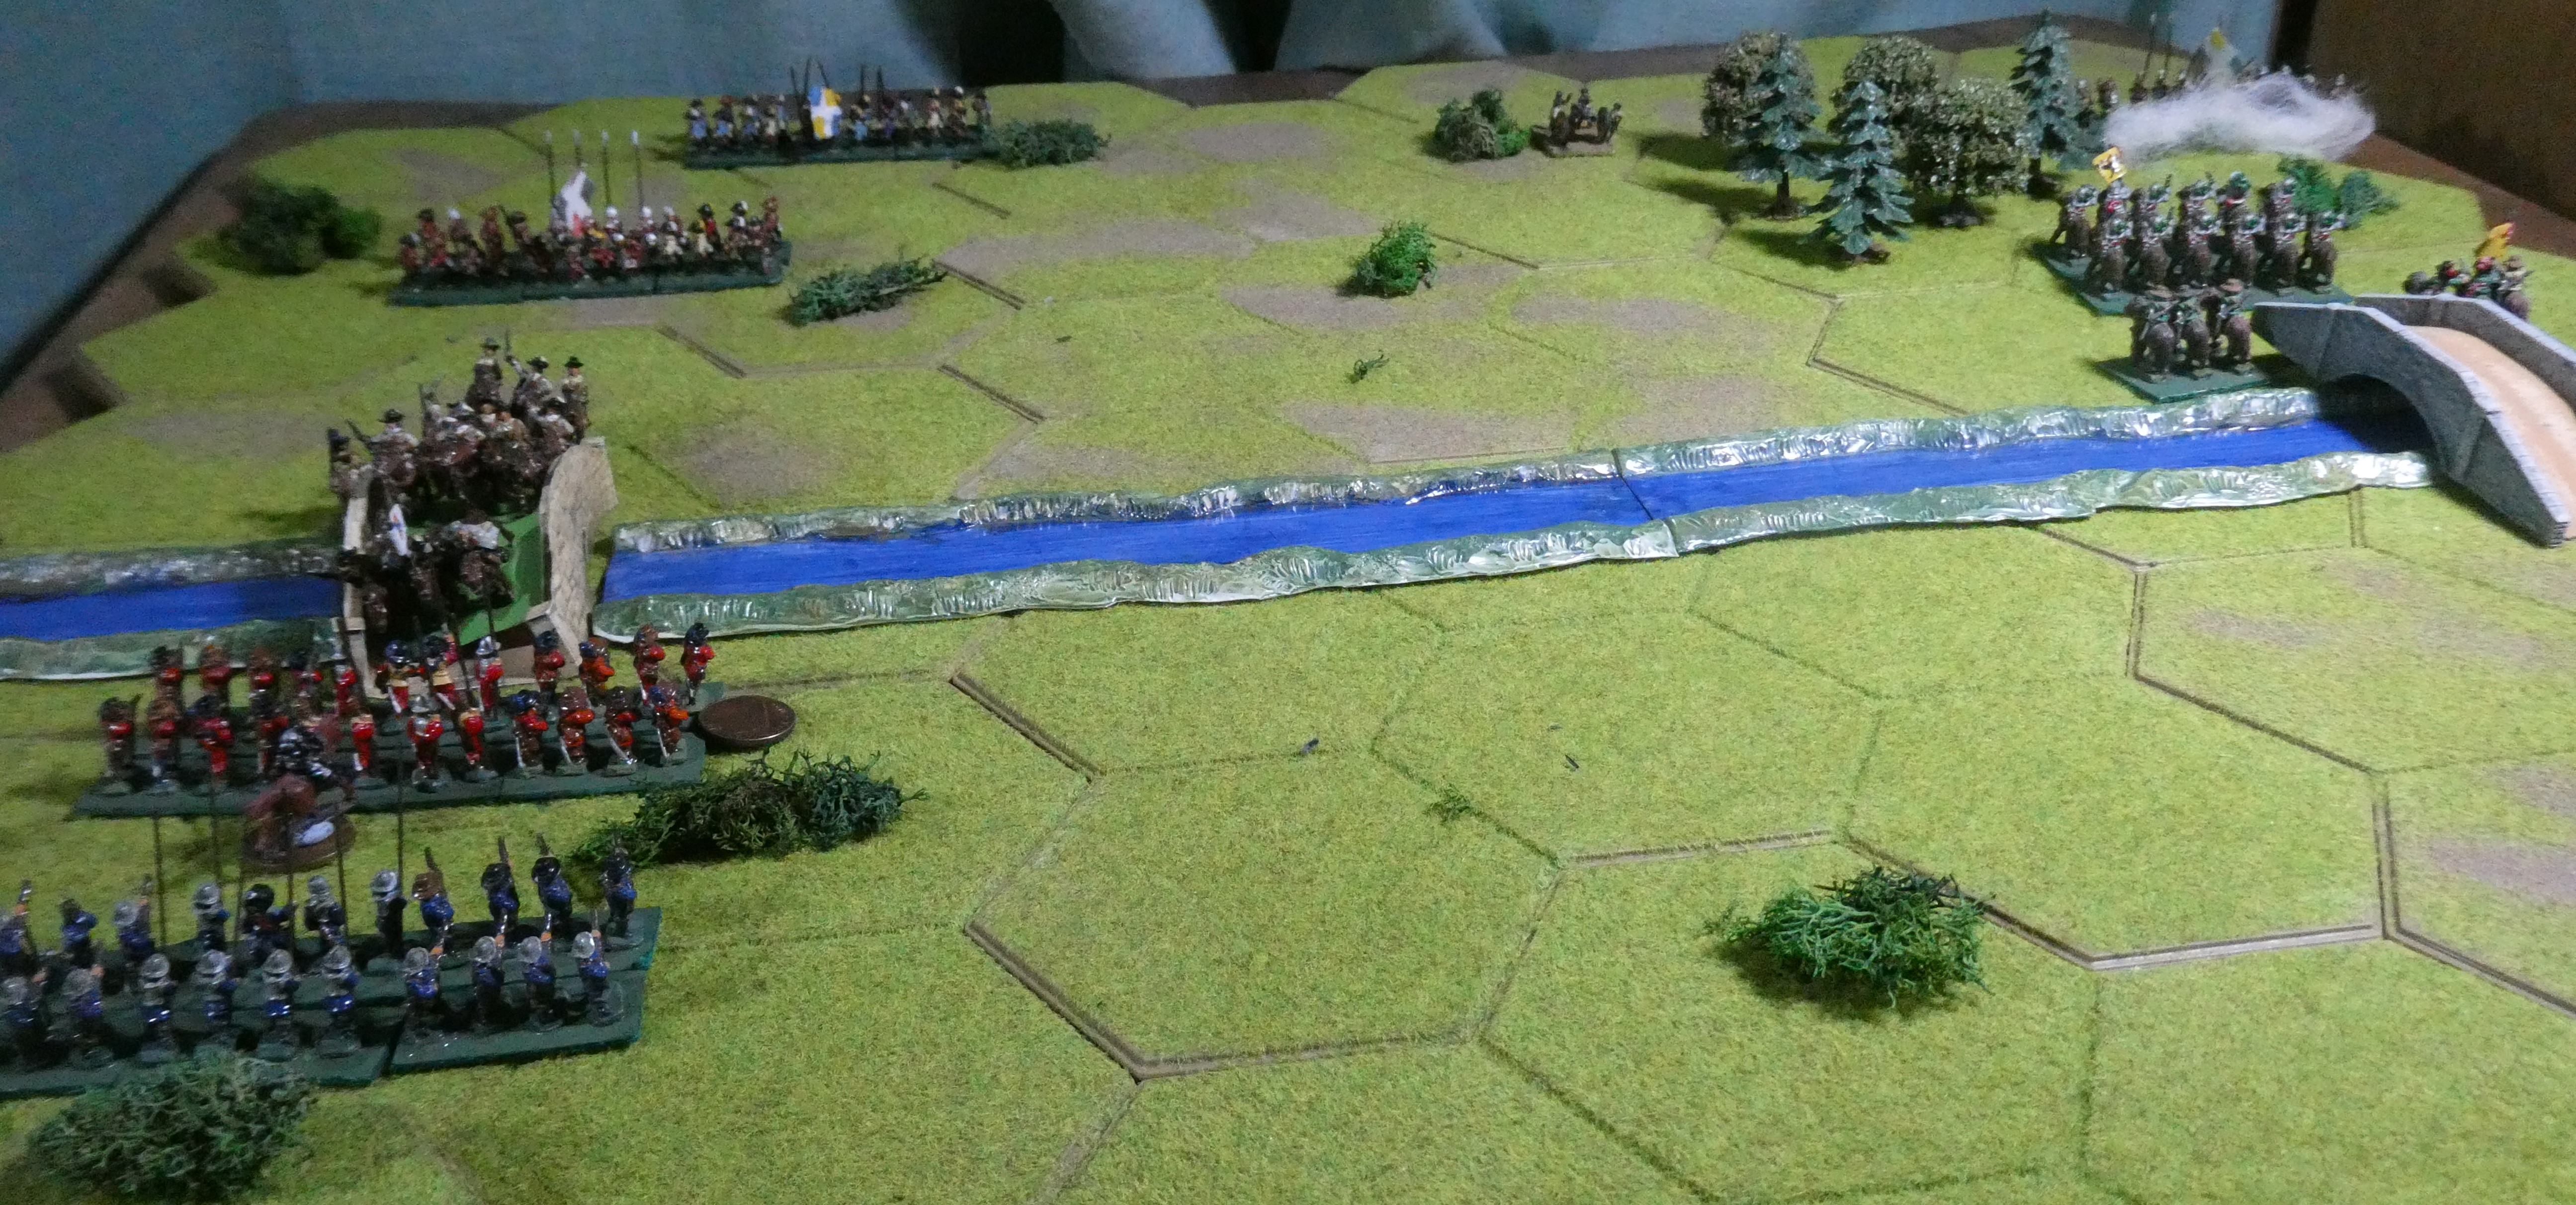
Herr General Blau's Imperialists approached from the South ( nearest camera ), and the French under General Le Rouge from the North, both intending to seize control of two bridges across the river. Both sides started off-table, and I decided to make their deployments quite random - I divided the table into 3 sections left/centre/right for each army, and rolled a 'D6' dice for each unit - roll 1 or 2 to enter on the left, 3 or 4 centre, 5 or 6 right - but no more than 3 units could arrive in each section. The dice decreed that the Imperialists deployed all three of their infantry regiments on their left, with their cavalry and dragoons on the right and artillery in the centre, while the French had two infantry regiments and their cavalry on their right, dragoons in the centre and the remaining foot regiment and artillery on their left. So, both sides had sent strong forces to take the Western bridge, with fewer units going for the Eastern bridge, but with slight variations in the makeup of those sub-groups. Hmm..how did the dice know that there was no bridge in the centre?
The rules decree an initiative die roll each turn, with the winning player going first and usually getting to activate more units. So initiative is quite important, and it must be said that the dice gods were on General Blau's side - the Imperialists won the initiatve on the first four turns, and in seven of the ten turns in all! Quite an advantage. By turn 2, both sides cavalry had crossed the river at their respective bridges ( French at West bridge, Imperialists at East bridge ), and 'contact' was made as the French horse charged into oncoming Imperial foot, specifically the Roter Mantel (thanks, Google translation) regiment. Close combat under these rules has a slightly amended system to Bob Cordery's original Portable Wargame - each side rolls a dice (with modifiers, e.g. for cavalry charging, or foot with pikes) 'to hit', and the highest modified score gets to inflict damage first if hits have been achieved. Both sides could suffer hits, of course. This seemed to work fairly well, avoiding multiple rounds of 'no effect' combat. In the first fight, the Imperial redcoats took a hit and suffered a loss of 1SP - first blood to the French. At East bridge, the French Regiment Vert opened fire at the Imperial cuirassiers - with no effect.
 |
Turn 2 : Horse vs Foot at both bridges
|
On Turn 3, the Imperial foot at West Bridge tried to push back the French cavalry, but everything went wrong for them - the cavalry kept rolling sixes! Roter Mantel regiment was forced to retreat, and the cavalry pursued (it's mandatory for horse to follow-up if close combat opposition retreats), crashing into regiment Blauer Mantel, beating them and forcing them to lose 1SP rather than retreat and be pursued again! So much for the Imperial counter-attack. Finally the 'Blaus' steadied things on their own activation, with a volley of musketry forcing the rampant cavalry to retreat back to the bridge. That didn't stop the horsemen, though - in the French turn, they charged again! But the dice were not with them this time, and they 'bounced off'. They had thoroughly unnerved the Imperial infantry, and bought time for French infantry to come up to West Bridge. At East Bridge, the French regiment Vert, facing enemy cavalry and dragoons, wisely took to the cover of wood, while their own dragoons moved up in support.
The clash at West Bridge continued the following turn, and the French cavalry's luck held under fire from Imperial muskets and newly-arrived cannon ( artillery are not very effective unless firing at close range - 2 hexes or less ), then charging yet again and taking anoother SP from Blauer Mantel regiment. In the centre, Imperial cavalry gave a nasty shock to the French dragoons ( which count as foot in combat, but of course have no pikes ) - 1 SP loss. At the end of Turn 4, losses were French 1SP, Imperials 4SP, mainly due to those rampaging French cavalry! Going well for the French, but the Imperialists had East Bridge, and three regiments of foot must eventually see off one cavalry?
 |
Grinding on at West Bridge: Cavalry clash in the centre
|
Turn 5 - finally General Le Rouge won the initiative, and used it well.
He pulled his cavalry unit back from the bridge and personally led it to
the centre, promptly crashing into the Imperial cavalry, pushing them
back and following-up. At West bridge, regiment Rouge charged in, but
were stopped by Imperial Blauer Mantel, losing 1 SP. On the Imperial
turn that fight continued, both sides losing 1 SP rather than retreat,
both determined not to fall back from the bridge - desperate stuff. The
Imperial Horse continued to be pushed back by their French opponents,
and were now back to East Bridge.
And so things continued for another
two turns, with a grinding fight between infantry regiments at West
Bridge - French regiment Rouge reduced to 1SP and falling back, replaced
by their regiment Bleu comrades, and neither side giving ground,
Meanwhile the opposing cavalry duked it out in the centre. Losses
mounted fast - by end of Turn 7, losses were 7 SPs each ( both sides
having 'Break Point' at 11 SP ).
 |
Infantry fight at West Bridge..
|
 |
..and Cavalry fight in the centre
|
Turn 8 brought a twist - the initiative die roll was tied, and in these
rules that means a 'Random Event'. A couple of die rolls determined
that this would affect the French, and the result was the other
player picks one of the affected player's units and performs an action
with it, including engaging in combat. It will still only shoot at or
charge enemy units, but the decision to do so is in the hands of the
player making the move. So, one French unit would 'go rogue' for a
turn; I chose to make foot Regiment Bleu retreat a full move from West
Bridge. Presumably the desperate fight had temporarily broken its
morale.. Of course this 'opened up' West Bridge, and the Imperials
promply won the re-roll for initiative and poured their infantry over
the bridge, attacking the weakened regiment Rouge - and destroying it!
The only consolation for the French was that in the continuing cavalry
fight, the Imperial horse were reduced to only one remaining SP, and
their hold on East Bridge looked very shakey.
 |
Turn 8: 'Random Event' gives Imperials the bridge
|
Next turn the Imperial infantry ( regiments Roter Mantel and Gruner Mantel ) kept pushing their lone French opponent (regiment Bleu) even further from West Bridge - bad news for General Le Rouge. However, in the East he threw everything at the Imperial cavalry - his Regiment Vert charging out of the woods to support his cavalry - and finally broke them! Thus East Bridge taken by the French, to balance events to the West. At end of Turn 9 losses were French 9 SP and Imperials 10SP - only 2SP and 1SP from break points, who would crack first?
Turn 10 was the end - and General Le Rouge's dice won the initiative,
allowing him and his cavalry to gallop over East Bridge, then swing
West to threaten the Imperials at the other bridge from behind. Over in
the West, Regiment Bleu steadied their muskets and delivered a volley
at Gruner Mantel regiment - and took 1 SP from them. Not much effect on
a relatively fresh unit, but crucially it meant the Imperialists
reached their 'Break Point' of 11 SP losses. As such, on their turn
they must take a 'Break Test' - a D6 roll, with modifiers relating to
possession of objectives ( even, with both sides holding one bridge )
and proportion of units lost. The modifiers looked good at 'Plus 2' with
a modified 4 or more required - but Herr General Blau rolled a one!
His weary men's morale had clearly collapsed as the French Cavalry ran
amok behind them - his army was deemed Broken, and victory went to the
French! Losses at the end - French 9SP, Imperial 11SP.
 |
Turn 10 - French Cavalry rampant (lower right)
|
I really enjoyed this game, and I think the rules went pretty well. I particularly liked the way the distinction between shooting and close combat is handled - with units adacent to each other able to simply shoot, but shooting having somewhat less effect, and close combat is the way to force a decisive result and to take ground. The scenario obviously tended to funnel the action into two 'bottlenecks' at the bridges, but that added to the tension as both sides contested those bridges determinedly, unwilling to retreat. Equally I thought the 'Random Event' added a nice bit of friction, and with only one such event coming up, it didn't overly randomise the game. The 'Break Point' rule seemed good too, as reaching Break Point does not mean automatic defeat - with good die-rolling, an army past its Break Point can keep fighting. Not so for Herr General Blau, however!
I hope you've enjoyed my account of the game, I certainly enjoyed playing the it, and will certainly come back to these rules. Many thanks to Alan Saunders for them, and to Bob Cordery for publishing them in The Portable Pike & Shot Wargame.
Next time - well, I have a few ideas, and not yet sure which one to pursue. Meanwhile I've also enjoyed no less than two remote games in the American War of Independence period ( Loose Files and American Scramble ) run by the excellent Nundanket - many thanks to him and the other players. Until next time, keep well everyone.