Saturday, 31 August 2024

D-Day Dodgers : Rapid Fire at Monte Lucedelsole

Having been 'getting round to it' for ages, I thought I'd better finally have a go at putting on a game using some of my 'D-Day Dodgers' WW2 Italian campaign troops, and try out the basic  Rapid Fire Reloaded rules.  Previously I had staged a British  assault on the (entirely fictional) hamlet of  Monte Lucedelsole, somewhere in 'Sunny Italy' - hard to believe that was in June 2020!  On that occasion Colonel Badger's force had failed to capture the position, so it seemed logical for the Tommies to have another go. 

This time the perhaps dubious honour of attacking will be given to the 1st Battalion West Suffolk Regiment, and the defence provided by the 1st Battalion, 960th Grenadier regiment of the Wehrmacht - the glorious exploits of both outfits being again mysteriously absent from any official records of the conflict. 

First, a view of the position, perhaps as seen by a British airborne observer ( North is at the top ): 

Monte Lucedelsole defences  from a British view

First of all, I should admit that it doesn't look too much like Italy! My next move in this project must be to acquire or make some more appropriate scenery - Cypress trees, olive groves, vineyards, perhaps? And maybe a less green and lush table covering too - a little more Mediterranean style. But for now, let's imagine it is rainy autumn in Italy, and try to ignore those rather Northern-looking trees.    

The German battalion has three infantry companies and have deployed No. 3 Kompanie divided between  the Western wood and hedge behind it,  No.2 Kompanie holding  the central hedgeline and the scrub-covered  hill, and No.1 Kompanie in  the Eastern wood ( on right of picture). Meanwhile  the Battalion HQ, and the 4th (Heavy) Kompanie with its MMGs and 81mm mortar are entrenched on the hill along with their Infantry Gun Kompanie with its 75mm gun - a useful piece of kit. Finally the A/T Kompanie with its PAK 40 gun is secreted behind the Western wood, in case British armour advances up the road. The latter is unlikely to see much use, however as the West Suffolks have no tank support today - I am keeping it simple in my first game, this is pretty much a straight infantry fight. With the Heavy Kompanie and the Infantry gun, the German commander must be confident of giving good account to any attacking formation - and all his troops are initially concealed from the view of any intruders advancing from the South ( I have made some of them visible in the picture of course,just for convenience ), 

Without further ado, here come the West Suffolks on Turn 1: 

Enter the West Suffolks..
The British know that the position will be defended, so are not simply charging up the road, and approach fairly cautiously, rifle companies deployed and ready for combat.  On their left (West) is 'A' Company, with the battalion's Carrier Platoon advancing boldly to the hedge-line, from where they can automatically 'spot' German 3 Kompanie in the West wood (spotting is automatic at 6 inches distance, even in cover such as a wood). In the centre, 'B'  Company footslog forward, while the Support Company's 3-inch mortar crew have dismounted from their carrier in the stone-walled enclosure.  On the right, 'C' Company moves up on foot, along with the  Battalion HQ's PIAT Team and 2-inch mortar. The Battalion Commander and his aides are also quite adventurous (rash, as it turned out), moving up to the hedgeline in their carrier and thus also able to 'spot' German 1st Kompanie in the Eastern wood.  The West Suffolks' 'D' Company is held in reserve off the board at the start.  

It looks quite a challenge for the West Suffolks, essentially assaulting a postion held by a force at least equal to theirs, but I think this does reflect the reality in Italy 1943-45, where the Allies often did not  have overwhelming numbers to throw at the Germans.  What they did have was good artillery support, so accordingly I have allocated a Battery of 'off-board'  25-pounders, with a Forward Observer unit mounted in a Bren Carrier.  I seem to have forgotten to place the FO in this picture(!) - they arrived just behind 'C' Company. Many of the  British will have been seen immediately by the defenders, but are as yet out of range of their infantry weapons and/or using some of the  hedges etc  to block line-of-sight. 


With British Bren Carriers approaching pretty close to both woods - in fact within 6 inches, which meant that the rules allowed the British to automatically 'spot' any troops there -  could the German infantry lurking at the treeline let rip at them? The rules have a useful mechanism which provides for just that - as long as they have not already moved/fired in their turn, the defenders may interrupt their opponents turn with Ambush Firing .    Therefore, the first shots were fired as both 3 Kompanie and 1 Kompanie let rip at close range - using both normal infantry weapons and Panzerfaust ( a 'one shot' weapon, but this was as good  a time as any ).  At the West wood, 3 Kompanie's Panzerfaust managed to miss, but their rifle and LMG fire scored a hit which (rather crucially) disabled the Carrier Platoon's vehicle-mounted machine gun (VMG)   - so it could not return fire. At the East wood, 1 Kompanie's Panzerfaust operators aimed better, scored a hit and damaged the Battalion HQ Bren, but did not destroy it - I imagine the Panzerfaust round must have glanced off the armour somehow! The riflemen and LMGs did better, inflicting one hit and thus also disabling the Bren's VMG.  All good fun,  and a learning process with the rules - the British carriers got close to the woods to  spot the German troops within, and got into the cover of hedges, but in the process were rather shot up, and lost their VMGs, and therefore their ability to return fire!  Perhaps it would have been better to have advanced a little more slowly - at up to 12 inches they could have taken a test, rolling 1D6 (needing a 5 or 6 to succeed ) to spot the Germans in the woods.  Probably the latter would have opened fire anyway. but would not have been able to use Panzerfausts - the British carriers would most likely have got off more lightly, and may have been able to return fire, the Germans having revealed themselves by firing. A nice lesson on tactics, and a bit of 'learning the ropes' of Rapid Fire Reloaded.

Next, the British could fire - but those carriers were no longer able to! Only a couple of figures of  'A' Compamy were able to 'draw a bead' on 3rd Kompanie in West Wood, but their shooting was good: they rolled a 6, inflicting the first figure loss on the defenders ( old school figure removal - I rather like it!), and that completed the Britsh turn.  Over to the Germans, who moved no units but were able to let rip with a small storm of fire.  3rd Kompanie shifted their attention to the West Suffolks'  A Company and did well (rolled 5 and 6 on 2D6) , removing 2 figures.  From the hill the Heavy Kompanie's 81mm joined in, zeroing-in on their British 3-in mortar counterparts. With HE 'direct fire' you roll 1D6 to hit, then for an 81mm mortar it's 3D6 for effect against hard cover, 5 or 6 to 'kill' - they inflicted 2 kills. BUT a crewed weapon with 3 crew has to lose all 3 in one turn to be eliminated, so Gerry needed another hit - at which point, I realised later, I didn't notice that mortars fire twice per turn... oops! The German infantry gun joined in, but rather crucially missed, and the British mortar crew lived to fight another turn - to make things fair, I allowed them only one shot in their next turn. At  the East wood, German 1st Kompanie kept up their fire on the damaged Battalion HQ Bren carrier, but could score only 1 hit, not enough to knock it out  - an open-topped AFV requires 3 hits from infantry weapons to be eliminated.  

So battle is joined, with those rather hasty Bren Carriers having taken a bit of a pasting, but at least establishing that the two woods were defended! To be continued - I'll leave you with a picture from Turn 2, the West Suffolks  continuing  forward, with the Carrier Platoon and Battalion HQ unsurprisingly dismounting from their battered carriers:


 I have probably given far too much information here, having covered only the opening turn(!), but I am treaiing this as a sort of revision aid/discussion document  for the RFR rules : which so far, I find I like well enough.  Everything is very simple and seems pretty logical: you are rolling one or more D6 to hit, and with artillery/mortars you then roll variable numbers of dice for 'kills'. Mortars with 2 shots per turn should be pretty deadly, as was indeed the case - I  just need to remember that rule!  The spotting rules made sense too- and I  think  this is crucual in a WW2 game. You aren't allowed to speculatively fire at say, a wood, but if you get close enough to see any occupants, or if they fire first, you can let them have it - that simple rule works for me.  

That's where things stand at the moment - 'real life' has intruded rather, but I hope to get the game finished tomorrow. Will the West Suffolks be able to prevail, given their artillery support? Or will the   960th Grenadiers stand firm? I hope to  report the outcome in the next few days. Until then I hope this has been of interest to those who haven't tried these rules - and in the meantime keep well, everyone.   

Saturday, 17 August 2024

Imperfect Painting - Picardie and Piedmont

This may be an unusual post, in that I am going to show some, shall we say, 'less than perfect' painting results. I may be drummed out of the blogging society for this, but I think I'm keeping with the spirit of my hobby. .I'm doing my best, making mistakes, hopefully learning lessons, enjoying it, and maybe getting better bit by bit.  If I only showed perfect results I'd have nothing to show here! So,  you have been warned - here are the latest 'learning opportunities'...      

 Picardie:

It took a while, but I finished painting my first  Seven Years War French Infantry - a couple of 'Portable Wargame' units of the Picardie regiment.  These are nice Garrison figures,  supplied by the excellent  Rob Young of The Eastern Garrison - thanks very much, Rob!  I liked them - rather more elegant and less 'chunky' than the vintage  Minifigs I have been painting up to now for the period. So here is a view of them - 'Button Counters' need not look too closely, as I have not  painted on any buttons...  

gentlemen from Picardie..

 However, 'belt counters' may well be clutching at their pearls, as I will admit  I have made a mistake with the crossbelts. Two factors : (a) colour, and  (b) arrangement. As to colour, I took a steer from the Kronoskaf website, which states that crossbelts were  natural leather (often whitened with pipe-clay)  - I decided my chaps would want to be smart, and use the white. But then all the examples I've seen in other illustrations ( such as a nice plate in an edition of Tradition picked up the Broadside show ) tend to show the natural leather look, so I may be out on a limb here. Yesterday I acquired the  Osprey Men-At-Arms no.302 Louis XV's Army (2) French Infantry, which states that 'from the later 1750s a growing number of regiments whitened their belts', which maybe gets me off the hook.  Where I have a bigger problem is the arrangement of belts - with a slight shortage of documentary sources initially, I rather rashly assumed they would have the classic 'two belts crossed over' , whereas I now see that in reality they more likely had a single shoulder belt for the cartridge box, with a waist belt for sword and bayonet scabbards. Oops.  I suppose I could try to re-paint the extra belt into the 'Grey-White' coat colour, but for the moment I am going to leave them, and assume a rather eccentric Colonel has provided non-regulation equipage - or 'liberated' crossbelts from fallen Prussians, perhaps? . Further units ( I have another two or three lots still to do )  will revert to the single belt. possibly in buff leather for good measure.    


Having said that, I was otherwise quite pleased with them;  I kept them in my very  simple and rather old-school  'house style' ('cos that's all I can do!);  I think I got the 'grey-white' about right, and it will distinguish them nicely from the pure white of my Austrians and Saxons. I hit upon the trick of using a fine-line black pen to outline those belts (thus highlighting my mistake, oops!) and to do the garters at the knee, and I will use that again, it worked pretty well. I even managed to get the flags more or less to my satisfaction - made from good old wine bottle-top foil, painted with acrylics, and which may be shaped a bit to give an impression of fluttering in the breeze - they are only temporarily attached for the camera.   Not too bad for a first go, and I hope the next batch will be better - onwards and upwards, etc.

 Piedmont

Now a complete change of tack - both  period and scale. A bit of a first for me: I have had a go at some 6mm figures.  Since acquiring Neil Thomas' fine book Wargaming 19th Century Europe I have been thinking about that period, and the wars of Italian unification or Risorgimento  (memories of history teacher Mr Davis intoning that word in his mellifluous Welsh tones, c.1976 - it must have stuck somehow) seemed an interesting and colourful setting (and balanced - no dour Prussians winning all the time!).   At  'Salute'  I picked up a nice book on the subject, Gabriele Esposito's Armies of the Italian Risorgimento, which has lots of inspiring contemporary illustrations of the uniforms of the time.  I also took a punt on buying some figures, having decided to give 6mm a try for this period, as a bit of an experiment. That nice Mr. Berry at Baccus was happy to oblige with a few packs of figures, so I now have some Piedmontese and Austrian infantry, and some artillery pieces.  As a first attempt, I tried  putting together a Piedmontese infantry unit ( a battalion?  Neil Thomas is deliberately vague ).  

For painting advice, Baccus has quite a useful page on their website,  the crucial point being 'paint the unit, not the figure' - don't get caught up trying to paint the detail that no-one will ever see at this scale! Armed with that, I plunged in - and I reckon the advice is good. 


From the Risorgimento book I found this plate (above, centre) showing a Piedmontese Line Infantryman, post-1849, and that looked a nice simple and pleasing colour scheme.  Immediately a slight problem arose, in that the picture shows a man in single-breasted tunic, but if you squint hard and look closely, the Baccus figures are in longer coats, probably greatcoats! No pic of those in the book,  so I made an assumption that the  long coats would be basically the same blue colour - fingers crossed. Following the Baccus 'cheat sheet', I found I could fairly whizz along with painting, especially as I was only doing 8 strips of figures - a total of just 32 men.  Having done a basic job, and given them equally, er,  basic  bases, I have a unit. A bit rough around the edges ( and a lesson learned about sticking them to the base before trying to paint the green on - I won't do that in future, and will probably end up re-basing these! ),  but I reckon they will do fine.  I reckon I could knock out serviceable ( for me) units at a satisfyingly high rate..

HOWEVER of course, when I came to photograph them, I ran into the problem with modern cameras - they are far too good! Took this on my phone: 

 and they look terrible, don't they? Click on the pic to look closely - overlapping paint everywhere, green base colour all over the place..  BUT also note, if you click on the pic to look at them closely, you are seeing them as about 25mm tall - 4 times their actual size!  No-one will EVER see them like that in reality, short of picking them up and putting them under a magnifier - and if you do that, you will  NOT be invited back...  I think a more realistic view is something like this  ( and no clicking!) 

Looking at them like that, I am not  unhappy for a first and rather hasty attempt- I'll re-do the bases, though. And I do hope to get a bit better at painting them too, with practise. Following a hint from Neil Thomas' book, I have kept the figures on two of the bases in their strips, representing a 'reserve' part of the unit in closer order, while the other two bases have the strips chopped up and spaced out a bit, to represent skirmish order. Here the unit is in 'Line' formation as per Neil's rules, with in effect a skirmish line out front and a formed-up reserve behind, ready for the glorious bayonet charge.. 

As I said these are Baccus 6mm, largely because they were what I could buy on impulse at Salute. - but I admit I actually rather like the look of  the range of 'semi-flat'  MDF 6mm figures from Commission Figurines - you can see them in use on recent blogs such as Wargames with Toy Soldiers 1685-1845 by Steve J,  and   My Wargaming Habit by Richard,  of Postie's Rejects fame.  Commission do a Napoleonic range and an ACW range, and I think both could come in quite handy for the Risorgimento, - British shakos for Austrians, for example, and ACW Kepis for Garibaldi's redshirts? the figures have a rather stylised look and minimal detail, which I think will make 'paint conversions' very possible. 

 It so happens I picked up some of their ACW figures at a show in  pre-Covid times, and here are some - posed in front of the Baccus Piedmontese, we have a base of kepi-wearing Union and one of slouch-hatted Johnny Rebs :

Commission Figurines ACW in front of Baccus Piedmontese 
 

Sadly it looks like one of the Reb's musket has turned into a shotgun with the barrel 'broken', but  think I might be on to something here! I think the two different makes of figure don't look too different in size, so should go together on the table without problems.  Given the 'mission creep' factor ( hmm.. when will the D-Day Dodgers actually get a game? And those Picardie chaps? ), any such project needs to be quick and cheap, and I think 6mm with Neil Thomas rules may just fit the bill. Much to think about, then.. 

*** UPDATE :***

After a little thought,  I decided to re-do the Piedmontese infantry basing as shown in this picture: 


I simply reduced the number of figures on the 'skirmish' bases to 4 instead of 8, so they look a bit more of a loose formation. They are not 'stuck down' yet, but I am happier with them - and there is a small bonus in that with 24 figures per unit rather than 32, I should get four  units out of my pack of 96 Baccus figures, rather than only three. So, more efficient too!

And while I'm here, many thanks to Jon at Palouse Wargaming Journal for mentioning this post in his latest!   

*** update ends.. ***    

As I said, not a parade of Picardie and Piedmont perfection, but I hope this has been interesting. Next week, maybe even some gaming - he said, yet again..  Also a return visit to Duxford is planned, to include the 'Land Warfare' hall - should be lots of wargaming interest there! I will give a full report, I hope.  Meanwhile, keep well, everyone.

Friday, 9 August 2024

Fnurban #33 : A Fine Day at Duxford

Until last week, I had never been to IWM Duxford - I'm really not sure why, given that the childhood  me was pretty much obsessed with aeroplanes, having picked up Biggles in Borneo from the mobile library that visited our village school, aged about eight. That was the first of many such books that I positively devoured in the next two or three years.. 

Recently an old friend of mine suggested visiting Duxford, and I thought 'why not' - it's only about an hour's drive from home, so an easy journey.  Well, we got there about 10:30, and were still there pretty much when the place closed at 6pm - clearly there was plenty to see!  I'll include a selection of the (probably far too many) photos that I took during the day. 

The displays are divided between several different sheds and halls, plus a number of aircraft parked outside. We visited most, but not all, areas - first up was the 'Flying Aircraft' sheds. As the name makes obvious, these are the hangars for aircraft which are in flying condition. This was very interesting, as several of the aircraft were being worked on, with engine covers etc removed - best example of this was the Gloster Gladiator:

does this bloke have a dream job, or what?
 

As I've said in a previous post, I've long been fascinated with the defence of Malta 1940-1942, so it was great to see a Gladiator - and it's clearly able to fly, so might see that one day too! 

There were no less than three of the Curtiss Hawk family : a P-36, a Curtiss 75 in French markings, and a nice  P-40C 'Tomahawk' undergoing maintenance.


 Also a P-47 Thunderbolt - it's a big brute of a machine, I'd quite like to see that flying. 

One point that really struck me about the 'flying condition' section  was the sheer number of Spitfires!  When I was a child, I remember going to an air display at Rochester airport where the star attracton was a Spitfire Mk IX  (painted as 'Johnnie' Johnson's 'J-EJ', just like the Airfix kit!)  which was thrilling to see, and I'm pretty sure was billed as either the only flying Spitfire, or one of just  two or three in the world. . Fast forward several decades, and if you'll excuse the poor  picture composition,  on a random day at Duxford you can chance upon a hangar  like this: 


Ok, so that's a Mustang at the back, but I can count 4 'Spits' here, and we'd already seen several in previous rooms. I suspect Duxford could now muster a squadron of them! Interesting how the restoration of vintage ( and especially WW2 ) aircraft has become a small industry - and I am told that owning one will cost you a few million.  Perhaps there was always  a demand waiting to be met, once restorers worked out that the task was practicable?   

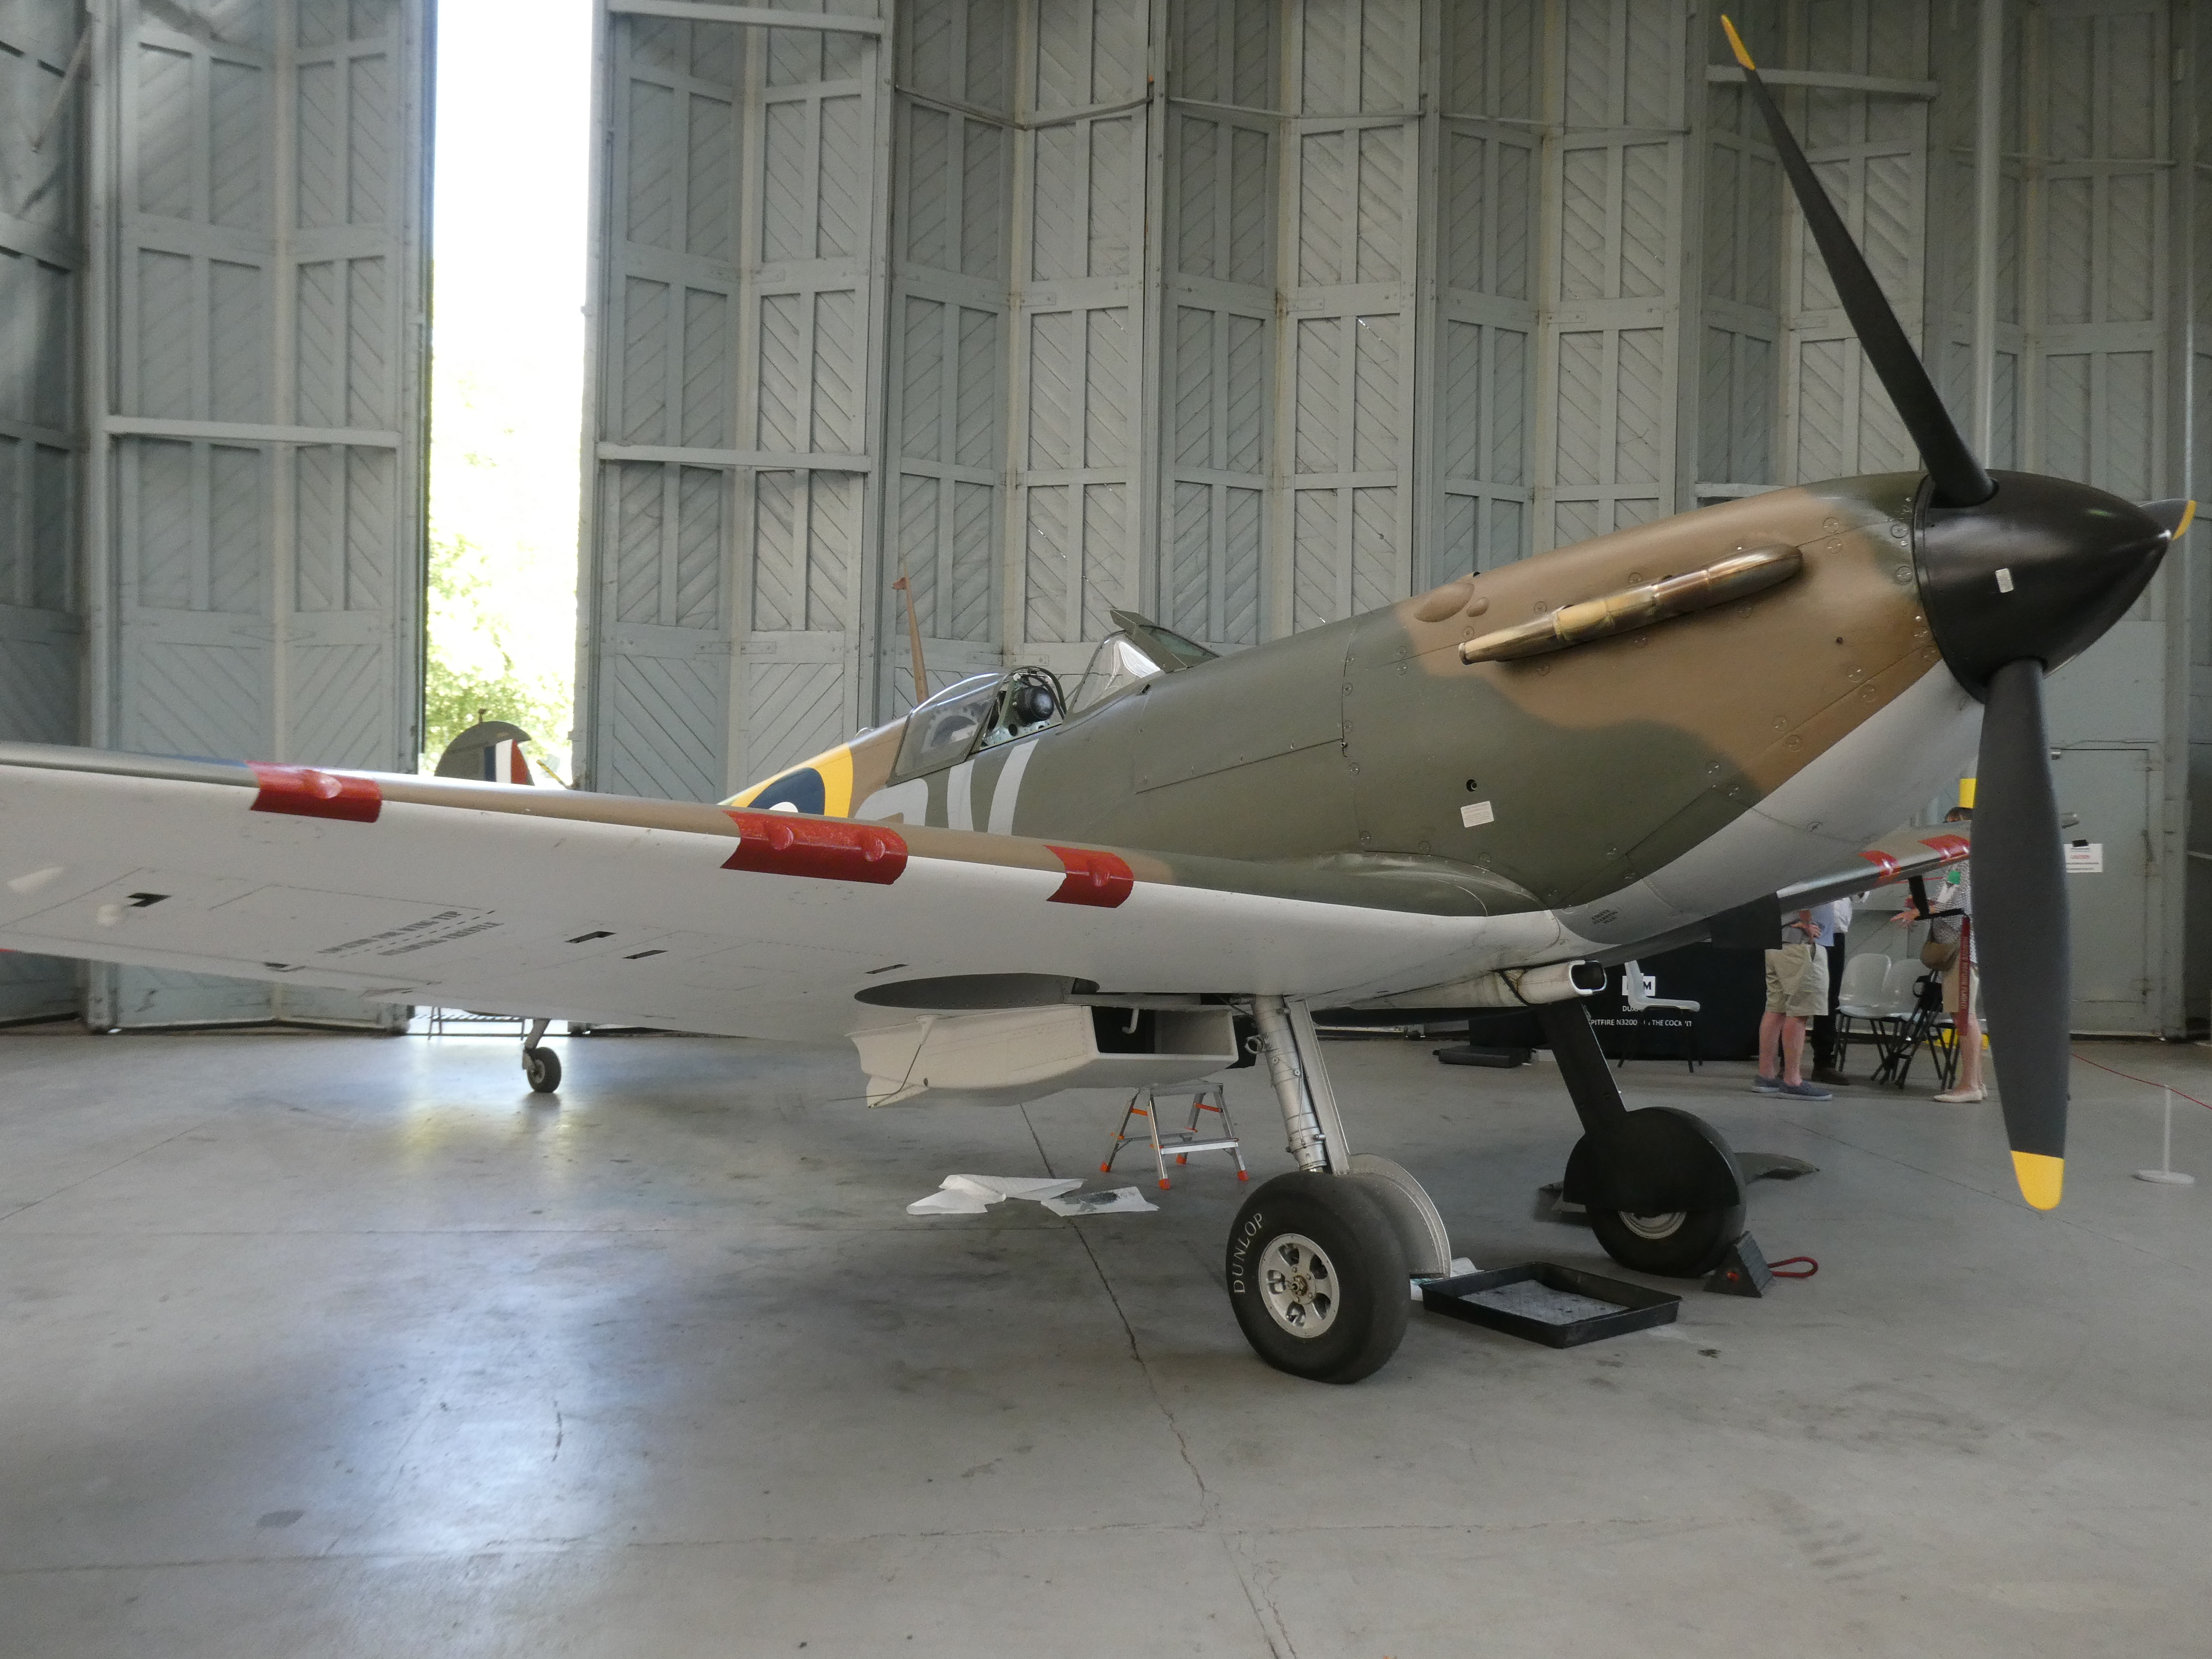
Of course there is a 'Battle of Britain' display - appropriate as Duxford was a Fighter Command sector station at the time ( home to Douglas Bader's wing ) and was also used for filming the 1969 movie. And of course, there is a Spitfire:


If I recall correctly, we were told that this particular Spitfire is a Mk.1 which actually flew from Duxford, force-landed near Dunkirk and was recovered from the sea decades later and restored.

Of course there must be a Hurricane, also: 


and from the other team, an Me 109E - which had force-landed in England during the battle, and been subsequently put on show around the country to raise funds for the war. 


.   The next building we visited was the American Hall, which displays a collection of US military aircraft from WW1 to the present day - and it's quite something! It's a very big space, but it is absolutely packed with aircraft:


As you can see they have a B-17 Flying Fortress in there, and a B-24 Liberator - I was interested to see those,as both types operated from the air station near my home ( RAF Sudbury as it was known ), the runways of which can still be seen today.  They were impressive, but I have to say they looked a bit small compared to some of the other exhibits! In the same hall there is a B-29 Superfortress - significantly bigger - but even that is dwarfed by the B-52 Stratofortress, which is simply huge, and I suspect the Hall may have been effectively built around it!  You can see the cockpit windshield, one wing and a couple of its eight engines in the first picture, but there was just no way to get a view of the whole aircraft, it's too big! .  I rather loved the juxtaposition of the SPAD from  1917 with the F-4 Phantom and the B-52 - the development of American air power in one picture.  All sorts of other aircraft were packed in there: P-47, P-51, B-25, C-47, F-111,  F-15, A-10, to name a few, and not forgetting the SR-71 Blackbird.  Quite something to see! 

Not to be outdone,  the history of  British aviation is of course represented, in the other big hall named 'Airspace'. We were running out of time by this point, but here's an idea if it: 


 Yes, that is a Concorde at the back - and the rear end of a Sunderland in the middle. Lots more to see here. Fro now, there's one more really 'big bird' to show - the Handley Page Victor 


 I gather this has been a major restoration project in recent years (though I suspect not to flying condition), and it is currrently parked in its own hall in the Airspace building - this is quite a surreal experience as one wanders into a truly huge 'room',  in which a pretty  huge aircraft only takes up a small proportion of the space. And because there's nothing else in the room,  there's nothing else to give you a sense of scale - it all feels a little unreal. Amazing to see it, though, and I wonder how it is going to be permanently displayed. 

Finally a few more gratuitous plane pics from the 'old and interesting' categories :  going back to Biggles, I was pleased to see several aircraft from 1914-1918.  A Bristol Fighter, for instance :


 ..and a Be2 : another example of decades of history in one  picture, with the Hawker Hunter and Tornado behind!

.   


And from memory, we also spotted an RE 8,  and a DH 9 - and there was a flying replica Fokker Triplane!  

Slightly more modern now : I had never seen one of these in person before.  MiG 21 'Fishbed', a surprisingly large 'plane. I think this was formerly with an Eastern European air force of the Warsaw Pact era.    


And not forgetting the goings-on outside the static exhibition halls - I thought the (almost constant) comings and goings of flying aircraft added an extra dimension (quite literally!) to the day. There were modern light aircraft visiting,  there were 'joy-rides' available ( I think ) from a Tiger Moth, a DH Dragon Rapide, and the two-seater Sptifire - I presume at a corresponding range of prices! Also  a varying selection of interesting aircraft tantalisingly lined-up on the grass, some of which obligingly took to the air - and it seemed to be obligatory for any vintage fighter plane to complete its flight by a low-level pass to 'beat-up' the airfield! In between halls, it was great to just stop a minute and see what was flying, and at all times the 'sound effects' were great!   Getting pictures of these - neccessarily distant and often fast-moving - proved not to be easy, but some of them stood still for the camera.

Given the local connection, it was great to see the B-17 'Memphis Belle' parked on the apron: 


And last but not least, with apologies for picture quality, here's a snapshot from the varying line-up of aircraft waiting their turn for a spin - nice juxtaposition of 'old enemies' now flying together :


 ( and yes, for the real nerds that is one of the ex-Spanish  Bf 109s with a Merlin engine..)

Well, now I think I may be said to have 'entertained us long enough', perhaps I'd better leave it there. As you can tell, that was a great day, and there's more to see - a whole hall of 'Land Warfare' which will no doubt be of interest(!), and all those British 'planes to have a proper look at, for example. Good job we took out annual membership... the plan is to go back fairly soon, while the weather is still good and the flying condtion aircraft are still active. So, watch this space.

In the meantime,  'in other news' so to speak, I was lucky to be invited to take part in another of Jon Freitag's remote games, this time the ECW battle of Cheriton, where I played to role of Sir Arthur Haselrige, no less. Jon will no doubt publish one of his excellent battle reports soon; in the meantime as a taster here is a picture he passed around after the game     

Cheriton 1644 : infantry contest the South Spur
 

The figures are ( I think )  30mm scale, and look lovely - and Jon was in constant danger of injuring his hand on the pikes!  I can't say Sir Arthur exaclty covered himslef in glory, but it was a great evening's gaming and sparked some good discussions. Many thanks again to Jon and the other players! 

Apart from the above I have been doing a bit of painting, slow but sure progress, and will show off the results soon.  Meanwhile, keep well everyone. 


Tuesday, 30 July 2024

Retired Wargamers Reunited..

Last week was the second anniversary of my retirement/redundancy from work (which is not missed at all!),  and what better way than to sit down to a tabletop battle with old friends?  Having recently re-established contact with Tony and Reg, formerly (very formerly -1970s/1980s!) fellow members of Rainham Wargames Club,  it turned out that Reg lives only 40 mins drive from me, and Tony was visiting for a couple of days - so I was honoured to be invited to join them for a game. The first time in several decades that we three had rolled dice and moved figures together - and indeed, given that my gaming since starting this blog has been essentially solo.or remote (using Zoom)  this was probably my first 'face-to-face' game using figures in many years.  I must give a very big 'thank you' to them both for a warm welcome and excellent gaming! 

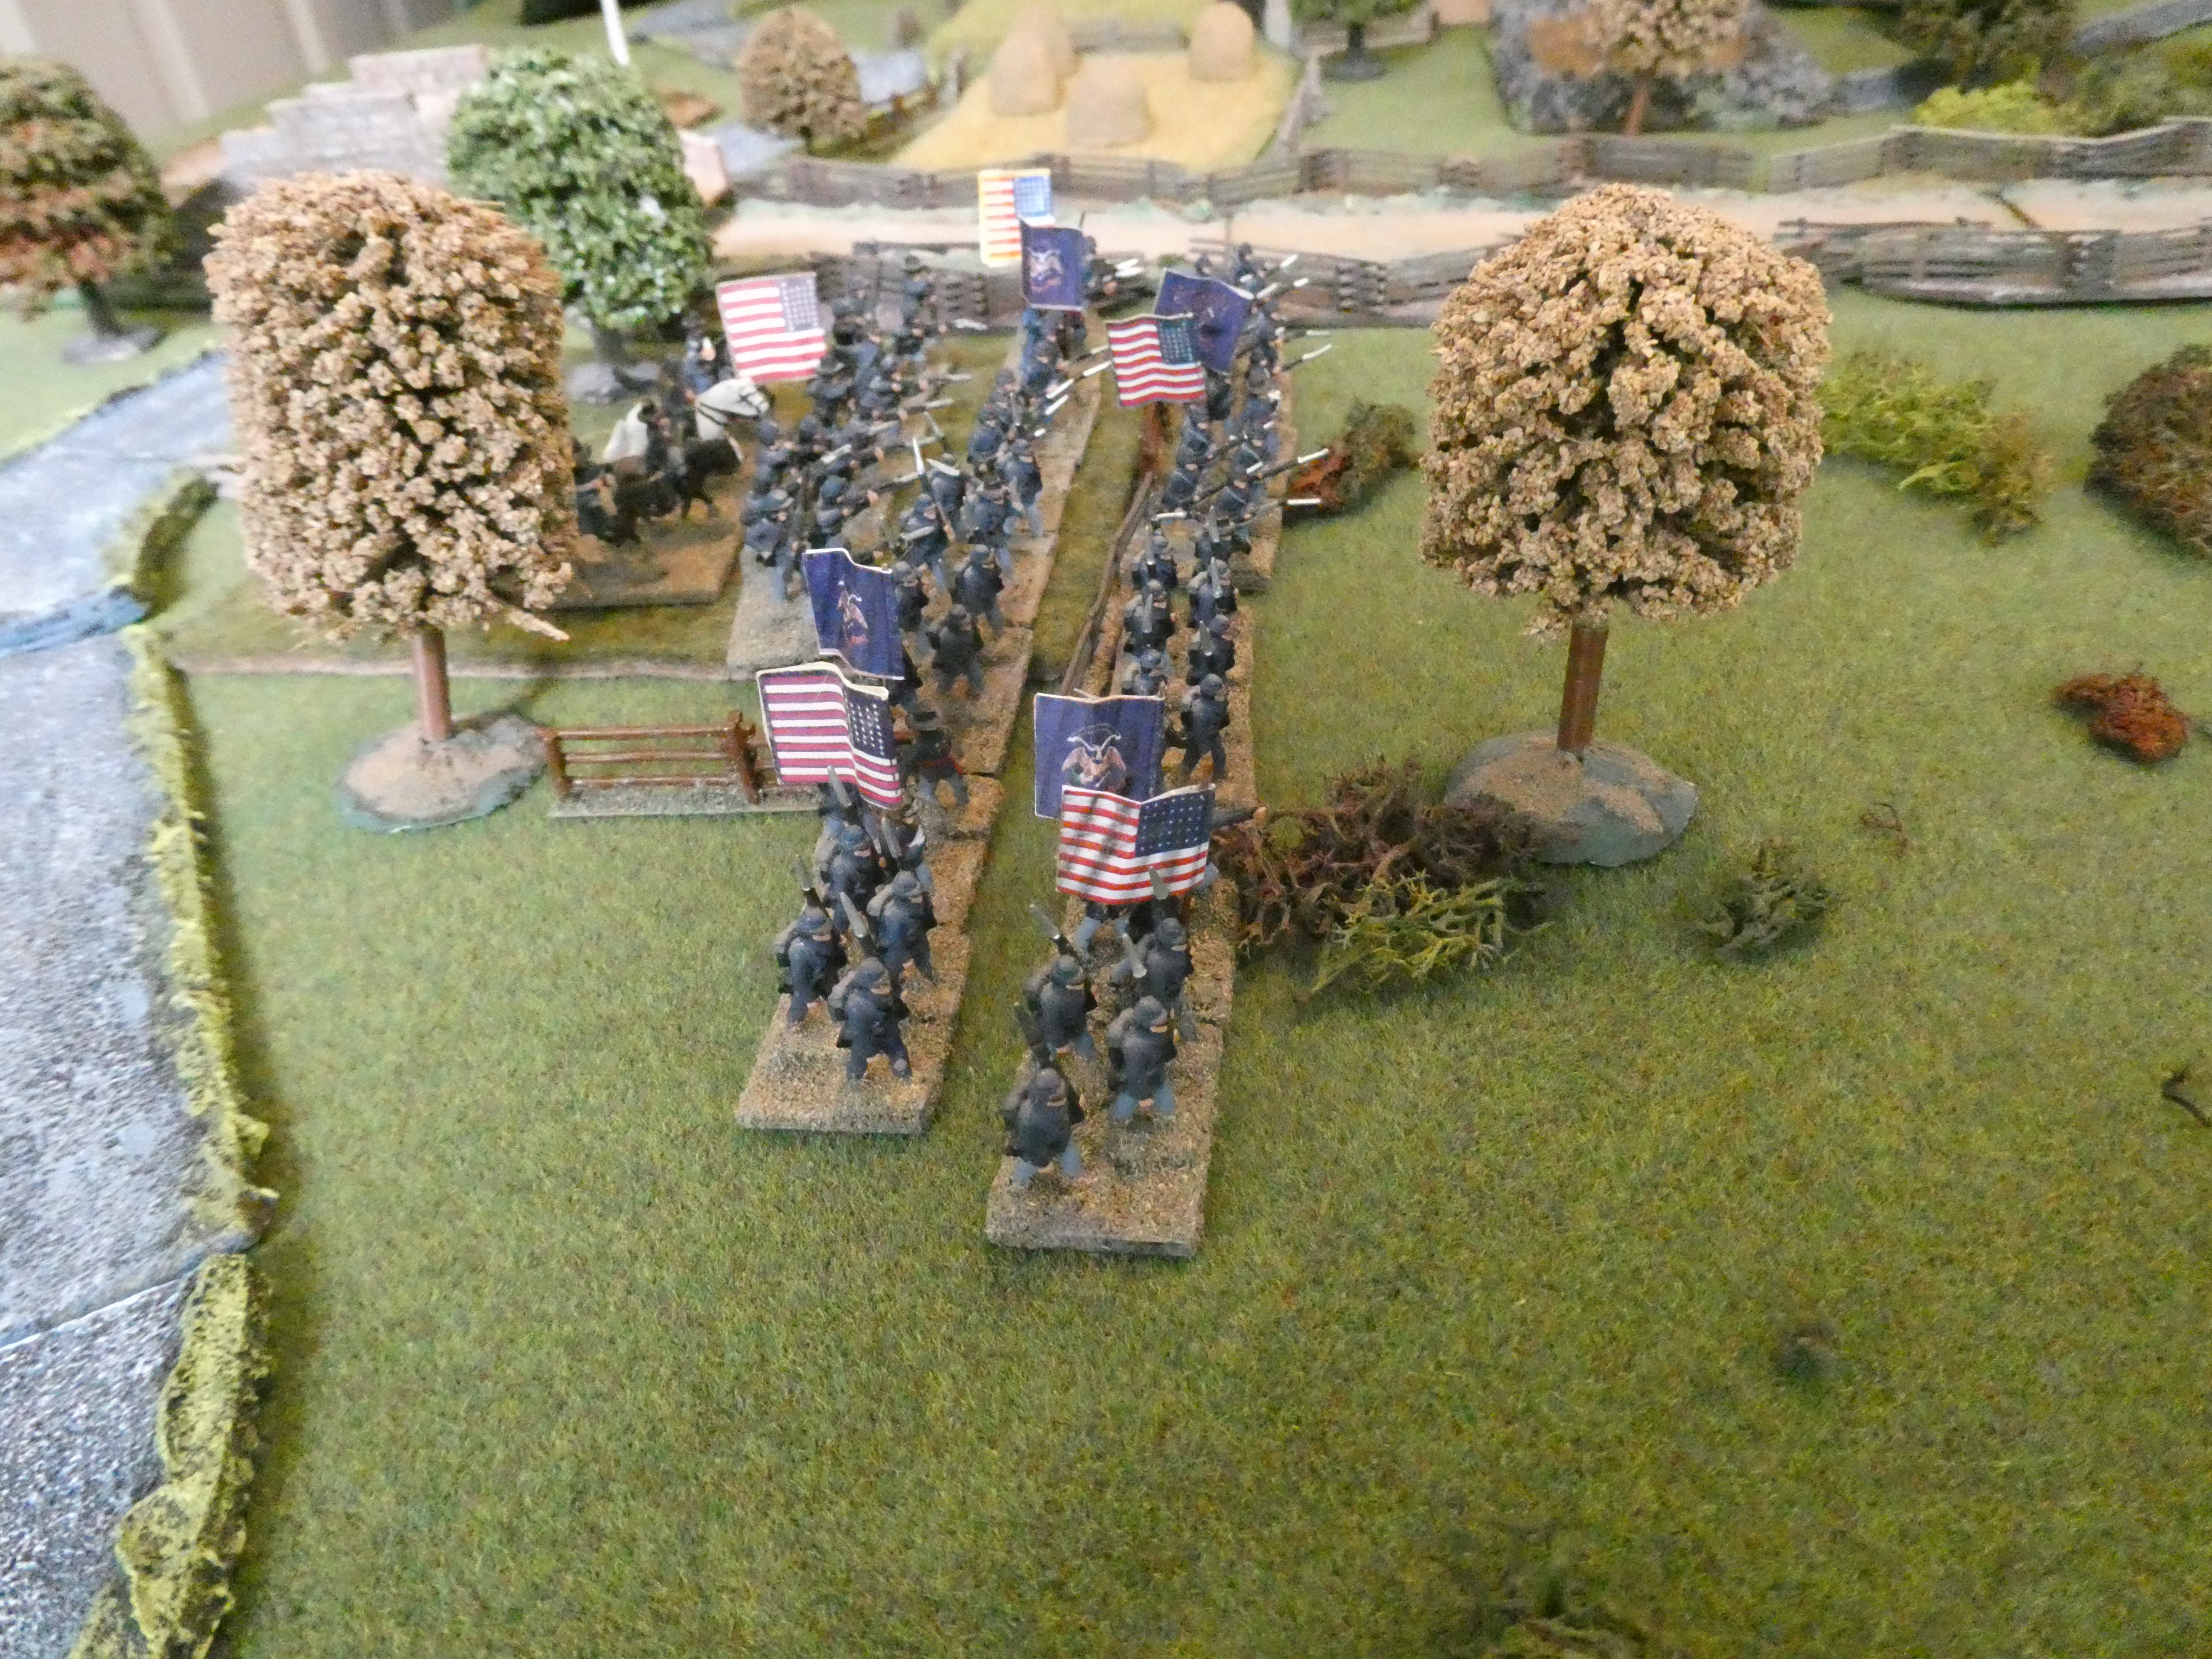
Union troops enter right - my zouaves in foreground

The main event was a game using Reg's  ACW 15mm collection (mostly Minifigs, I believe), played with Black Powder rules, with some tweaks from the ACW supplement. You can see the table above - I liked Reg's copious use of trees, scrub etc denoting  the rough terrain beyond the river, these were purely for visual effect and could be shifted to accomodate units moving through, but made the table look really good.  

The setup was that Tony and I would share the Union force, with Reg taking the Rebel side. He provided a briefing, the core of which was as follows: 

Time and Date: The date is 22 July 1862. The location is in the Shenandoah Valley near Winchester.
Forces: You are divisional generals in Major General Nathanial Banks V Corps. You each command a division, which together completes the corps.  A division consists of two brigades with supporting artillery.
Scenario: The corps has camped overnight south of Crampton’s gap on the Valley Turnpike. Orders were received during the night to move through the gap to relieve General Shield’s division which has sent word for help after being attacked by T. Jackson.
Sadly Banks died during the night from a heart attack. The corps needs to go to Shield’s rescue. The only way is through Crampton’s gap.
You have no knowledge of size or where Jackson’s forces are. He could be lying in wait or come on from either flank. If Early’s division is with him you will be outnumbered.

Notes on Troops
You both have a command value of 8, your Brigadiers are 7.
You each have a division of two brigades.
Each Brigade has 5 regiments plus artillery. The composition of each brigade is
different and you will draw for them.
You each have a spare brigade but it will cost you victory points to bring it on.
 

Victory against me [i.e. against Rebels]:
    Level 1 getting supply train across the creek.
    Level 2 getting supply train across and into gap.
    Level 3 getting supply train off of board.
 

Victory against each other :.
Points for routing my forces - per unit.
Points for Crossing stream - getting on hills and exiting board. Per unit.
Minus points for using spare Brigade. Cost reduces as time goes on.
Winner gets to replace Banks as corps commander.
 

All of which gave some nice twists to the game : Tony and I started with no idea of what opposition faced us, and had a 'co-operative but competitive' relationship in  aiming to beat Johnny Reb ( or Johnny Reg? )  but also jockeying to become the Corps commander!  See the picture above for the table layout - Union entering from the left (South), the river is crossable  by infantry at all points but guns must use one of three fords ( two at the roads ),  but the area North of the river is all deemed rough terrain, and Confederate troops may be concealed there. To the right hand side (North) of the table the land rises to ridges, with the central road going through at Crampton's Gap. 

The four Union brigades were shared (two each)  randomly between us, each brigade having its own distinct character - one containing mostly 'Green' but enthusiastic regiments stiffened by one veteran unit,  another made up of colourful Zouave regiments with high  morale plus a unit of sharpshooters, the other two comprising  more straightfoward 'regular' regiments.  I drew the Zouaves and one of the regular brigades, Tony took the 'Green' brigade and the other regular one.  Not being an ACW expert and having never played Black Powder, I thought of myself as an inexperienced Division commander, in his first campaign. Maybe I was acting the son of a US Senator, with no military experience,  who had joined up to do his bit for the Union and been gifted a Division  to  command after a bit of Senatorial/Parental string-pulling?  I was happy to watch and learn from my more experienced colleague, and I figured he was probably going to get to be the Corps commander! 

I knew nothing about Black Powder and was pleasantly surprised - the simplicity of the rules made them easy to pick up, and  allowed the game to move along at a good pace, with quite large forces - the Union commanders had 20 regiments between them, but this didn't seem to be a particular  burden. The 'command dice roll' mechanic is  simple  (each Brigade Commander rolls 2 dice for each order they issue, requiring to score less than or equal to their command rating for the order to be successful )   and seemed to work pretty well, ensuring that not all orders got through or got obeyed, but also that units could obey the orders with different levels of enthusiam - taking a normal move, or a double or even triple! You need to be careful how you describe the orders you are suggesting - 'advance as far as possible' can spring a surprise if you roll up a triple move, as I was to find out.  

The 'dice gods' tended to take a hand with interesting results - my Zouave brigade was more keen than I expected in marching up the right-hand turnpike ( I did specify 'go as far as possible' ) with the result  that the leading regiment was caught in column by a volley from Confederates concealed behind cover on the ridge - causing some damage and disorder, and hurried re-deployment into firing line!  The brigade shook out into lines and began a slow advance towards the enemy lining the ridge, exchanging fire and giving and taking hits and 'disorder' results.  The firing mechanism was simple but gave reasonable results, I thought - aside from casualites,  a 6 on the 'to hit' dice caused disorder to the target for the next move, reducing their effectiveness, so with luck you could 'keep their heads down' while you advanced, unless you took a disorder yourself!    . 

Zouave brigade shooting its way forward..
 

On the other hand, my 'regular brigade' started off steadily advancing, crossed the river OK but then on hearing the firing as other brigades made contact, failed a string of command rolls and basically sat tight, going no further forward, even when my Divisional commander galloped over to give direct orders! I pictured my inexperienced commander perhaps trying and failing to persuade his brigadier that he really ought to finish lunch and get the men forward, and not get too involved with that looted whiskey bottle...

'Regular' brigade having a long lunch.. 
 

What with all the excitement I didn't take many pictures, but I can give an ideas of the main features of the game : essentially while my chaps either got embroiled in a firefight or sat things out, Tony was much more dynamic and aggressive, and made good use of his 'green' brigade on our left  - the 'green' units had lower 'stamina' (taking less hits before having to check morale), but were also more likely to get stuck in with a charge to contact, so Tony used them to lead the attack. 

Tony's 'cannon fodder' lead the charge
 

He expected them to be cannon-fodder, I think, hopefully weakening their opponents for the more experienced brigade to finish off - but one of the 'green' units charged in and just would not be repulsed, hanging in there for several turns of melee, which allowed their veteran regiment comrades to punch through the confederate line and take the ridge. Great work!  Tony then had another whole brigade coming up right behind, ready to storm over the ridge - the Confederate position on our left now  looked very fragile in  comparison. That forced Reg to move reserves over there, with the ironic result that a  great big gap opened up in the Rebel position in the middle, which my regular brigade could have just walked through, if only I had been able to get them to move! 

The ridge taken (top left), Rebs look hard-pressed! 

That was pretty much how it ended; the Confederate right was hard pressed by Tony's aggressive advance,  their left holding up well  in a firefight with my Zouaves. It occurred later that neither of us thought to send any units straight up the central turnpike and through the gap, maybe we both  assumed that would be storngly held and therefore avoided it - we assumed wrong! So the game was pretty much a draw between Confederate and Union, but in the competition between Union commanders, Tony won the prize and would assume command of  V Corps. Well deserved!   I was happy to have a learning experience with the rules and see how they worked,  and what tactics might work best,  and I thought it all went pretty well - except for those command rolls!  


view from the Confederate left

As already stated, I liked the simple mechanisms of the rules, which made it easy to get a fairly 'big battle' moving along, and with what seemed like a reasonable ACW period 'feel'.  I'd say the biggest drawback with the rules is the size of the rulebook, which led to a few instances of play being held up while players leafed through the book for a rule clarification. I gather there is quite a lot of 'fluff' and 'eye candy' in the rulebook, which slows down any search. Also the 'basic rules plus supplements' approach tends to muliply this effect, since you need to check in the supplement too, in case it overrules the main rulebook!. But those issues would lessen with further experience - Reg summed things up when he said he has just  played so many more games since finding these rules,  just because they run so briskly and simply, giving a decent chance of a clear outcome to the game. ( Incidentally, for a contrasting view of the same rules, I enjoyed a post from Trebian at Wargaming for Grown-Ups - in particular the comments below that post, which include a pretty good, positive and constructive  discussion between Trebian ( Graham) and Professor Phil Dutre : both making good points, I thought ).

I'm afraid I'm not going to rush out and spend £35(!) on the Black Powder rulebook  (and another £20 for a 7YW supplement?) - sorry Tony! But I'd be only too pleased to join the gents for more games - in fact there were discussions about an ECW game, using the related Pike and Shotte set, which sounds right up my street - watch this space. 

Just to round things off, Tony also took us through a try-out game of Blood Red Skies, the WW2 aerial combat game also from Warlord Games ( Tony is a big fan of Warlord, though rumours of him being on a commission from them are strongly denied..) .  I was very interested to try this, as WW2 aerial games are a favourite that I rarely get to play. 

opposing formations close..

 Please excuse the lack of a nice gaming mat in the pictures, but it was only a trial run.. The scenario was cut-down version of a Luftwaffe surprise attack on Manston in 1940 - Tony took the Germans with a formation of He111s escorted by Me110s,  while for the RAF Reg had Hurricanes (furthest from camera) and I had Spitfires and Boulton Paul Defiants - which were bound to be 'interesting' to use!  As you can see from the close ranges, we very quickly got to 'mix it' with the raiders : 

and getting stuck in!
 

Reg and I soon learned to be wary of the battery of cannon in the nose of the Me110 - Spitfires and Hurricanes were a bit under-gunned by comparison, so don't go for a frontal attack on them!  We lost a couple of Hurricanes and a Spitfire, I think, and were on the verge of having our whole formation broken and forced to retire, but just by the skin of out teeth we won by shooting down 2 of the 3 Heinkels and forcing the raiders to turn for home. A slightly pyrrhic victory! Good fun though, and interesting - admittedly there was quite a lot to take on board with absolutely no prior knowledge of the rules mechanisms, but I'd certainly give it another go.  The game takes an interesting approach to the eternal problem of depicting altitude, and the advantages of being higher than your opponent, and how to portray that in an essentally two-dimensional setup. They have a concept of planes being 'advantaged', 'disadvantaged' ( denoted by the 'nose up' or 'nose down' attitudes of the models ) or 'neutral' . This seems to roll up factors like height, speed and pilot ability into one of those 3 settings for each aircraft at any given point, and the players can spend 'actions' in their move to get into a better level of advantage - I think you can't shoot at another fighter unless you have a better level than them. That seemed quite an ingenious concept. Also worth noting that the rules group aircraft into units, with morale effects, so if losses get too high the unit will be forced to retire rather than every 'plane for himself', which I thought seemed right. So, another game that I'd be interested to try again, and test my supposed expertise in the subject matter. 

Overall that was a pretty good re-introduction to face-to-face gaming, and a very big thank-you is due to Tony and Reg inviting me, your enthusiasm  is highly infectious. Thanks both of you, that was really enjoyable!  Let's hope we can do it again before too long.   

Now I am trying to get back into a painting routine, hopefully finding a shady spot in the garden in the current hot weather. I have some French 7YW infantry progressing nicely, and a possible diversion into a completely different period and scale (oh dear..)  And still need to set up and play a WW2 Italian campaign game with Rapid Fire Reloaded - later this week, perhaps. Until then keep well, everyone.

Friday, 12 July 2024

Fnurban #32: Ranjit Singh: Sikh Warrior King

On a rare sunny day, today I went to that London and visited The Wallace Collection, for their exhibition Ranjit Singh : Sikh Warrior King.  And rather good it was, too. 

Putting it very briefly, Maharaja Ranjit Singh lived from 1780 to 1839, and carved out a Sikh empire ('roughly  the size of modern Germany')  encompassing the Punjab, uniting many smaller Sikh states and building a powerful state which acted as a buffer between British possessionss in India and Afghan and Russian influence beyond the Khyber Pass. 

He was a dynamic warrior, and developed a formidable army along modern Euopean lines, assisted by several Western soldiers, in particular former officers from Napoleonic France ( Ranjit Singh is sometimes referred to as 'The Napoleon of the East' as a result ). This army was designed to be more than a match for the forces of the East India Company, for example.   

I knew very little of this period, but  reviews of the exhibition  looked interesting, and it proved to be well worth a visit. There were quite a few 'arms and armour' exhibits, many of which are reputed to have belonged to Ranjit Singh himself,  and several interesting pictures involving military subjects, including one rather gory battle scene.   I'll show some of the photos I took :


The entrance is dominated by an enlarged version of a splendid picture included in the exhibition, showing Ranjit Singh and his court at Lahore. The picture shows quite a few of his soldiers, including very European style infantry, cavalry and artillery units drilling and firing in the fields  beyond the city walls.     

Battle of Sirhind, 1710

 The Sikhs had famously been a warrior race - the above picture illustrated that, showing a battle from 100 years before. In the centre, an enemy Mughal governor (riding the horse with its lower half  dyed red)  is pictured minus his head, which has been chopped off by a sword-weilding Sikh horseman. A version of the  picture is also enlarged to cover the wall of one of the rooms, so you can see every gory detail.

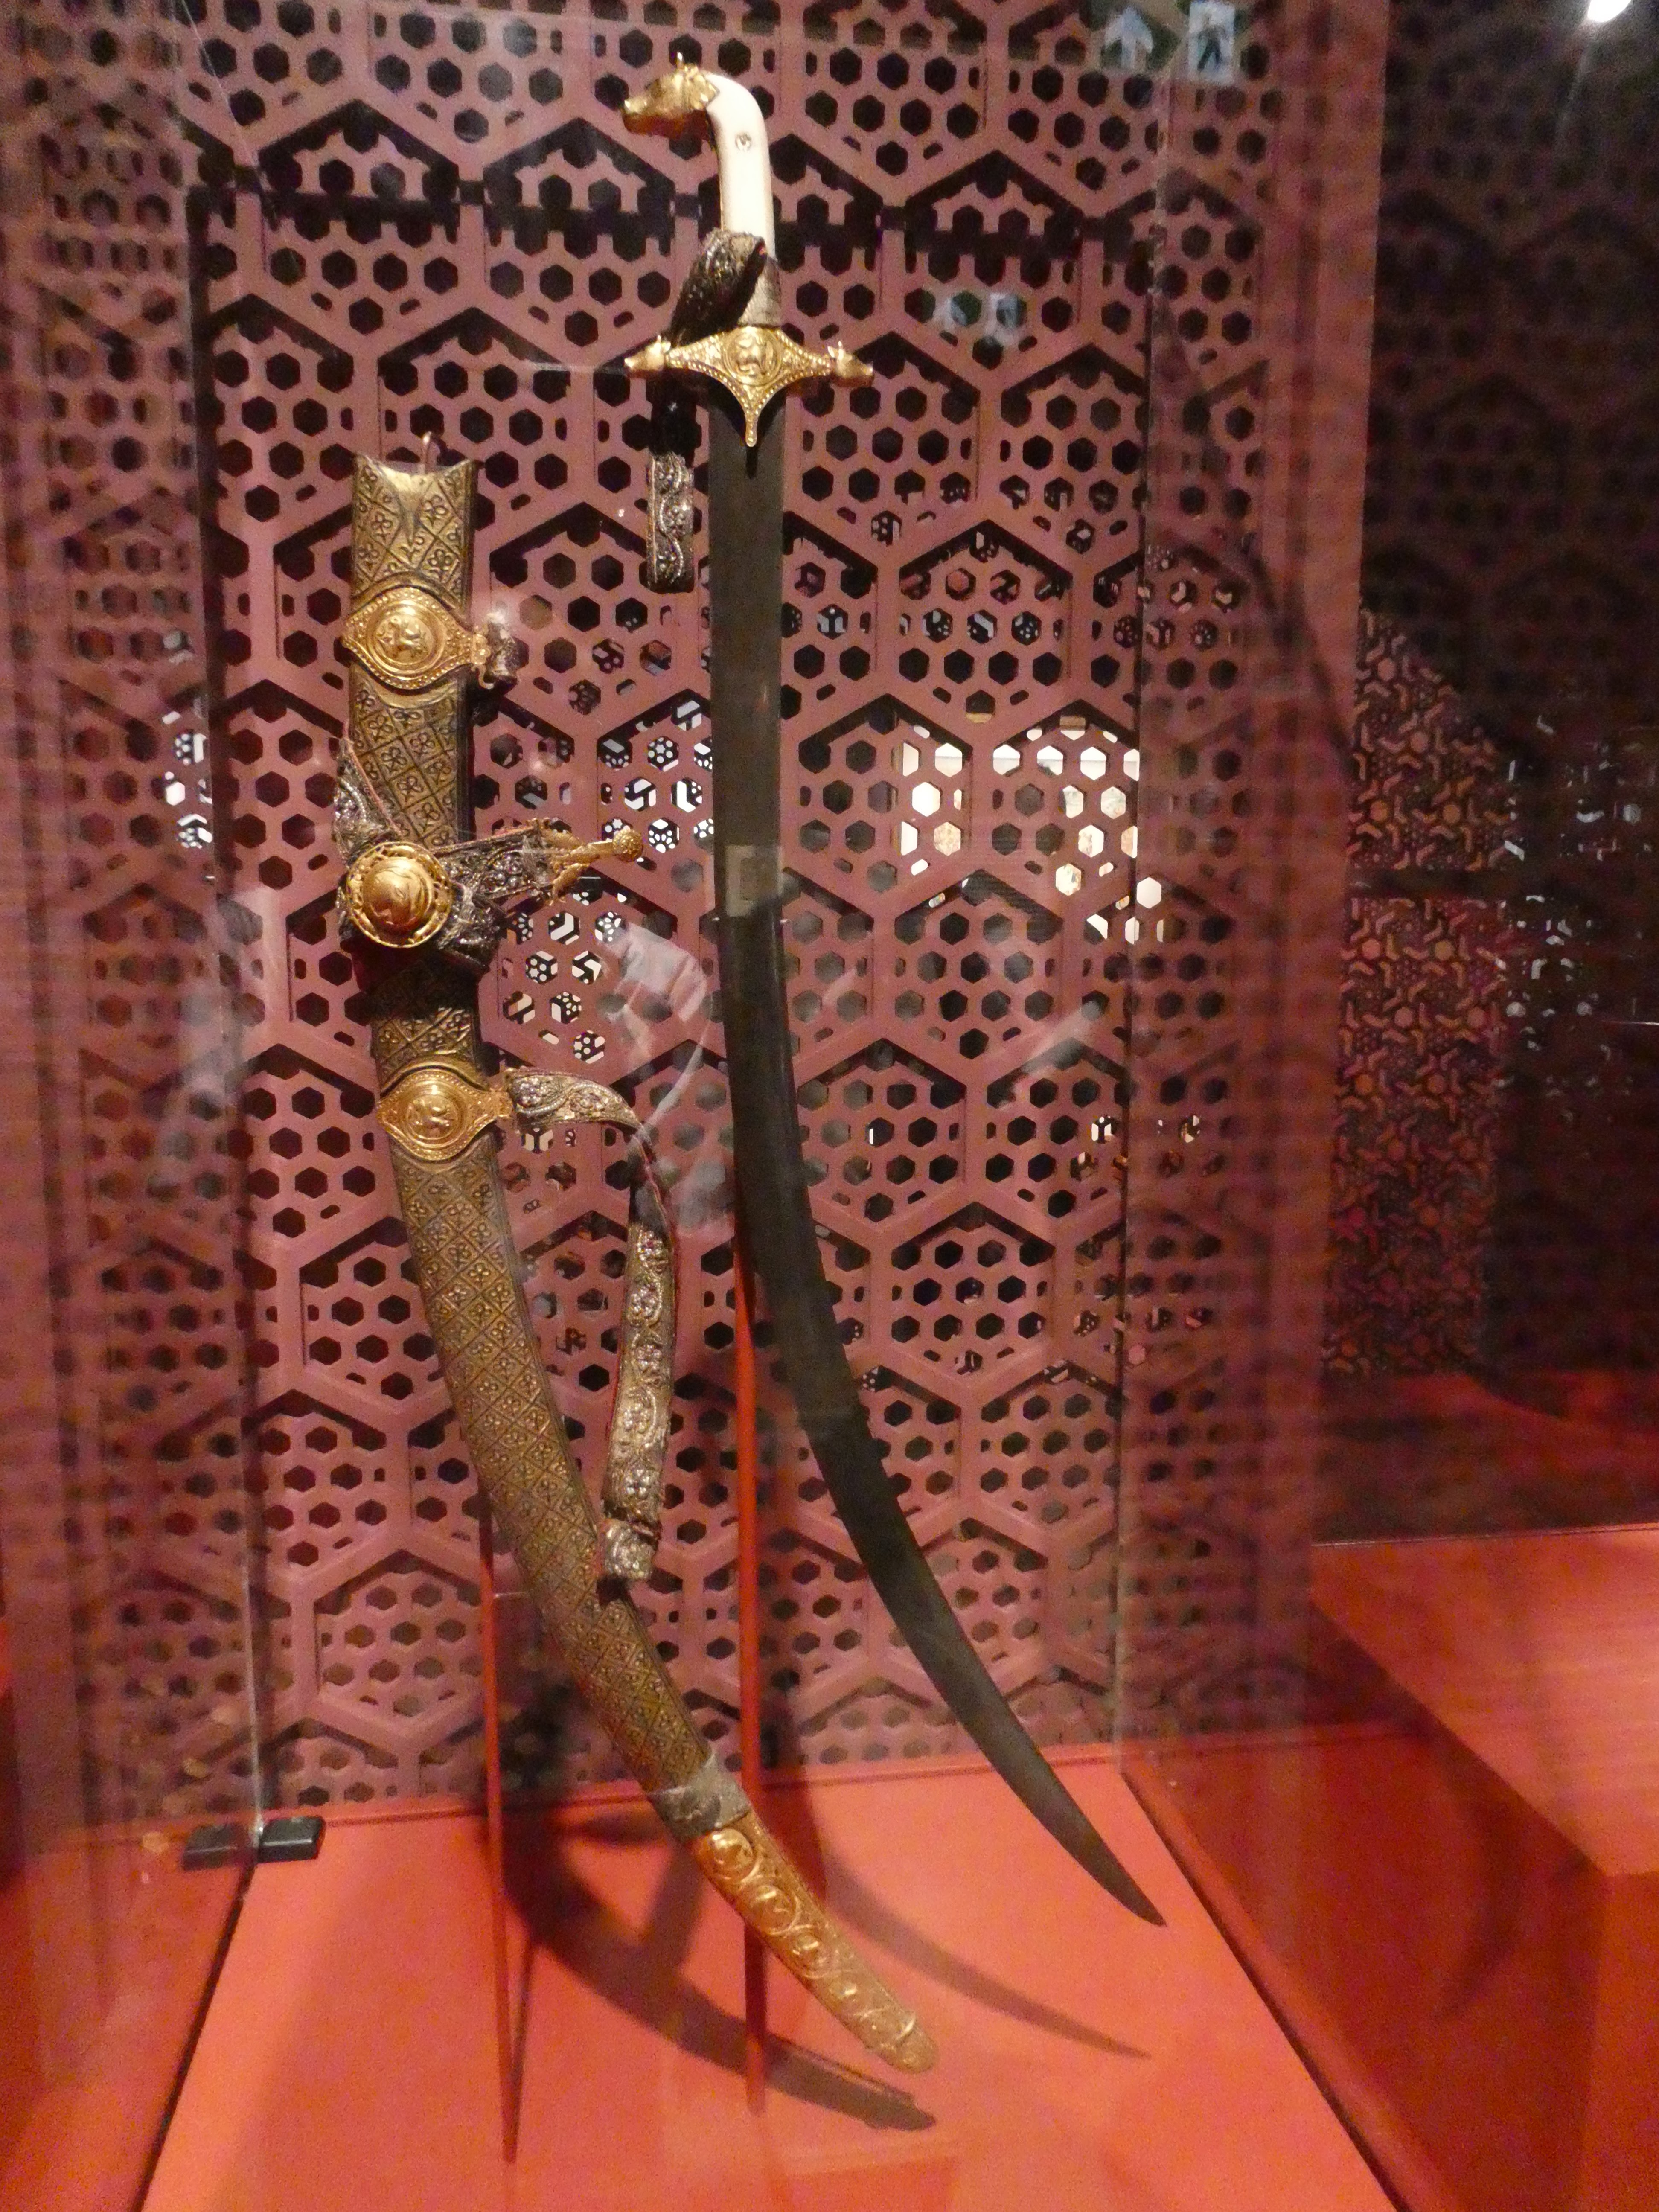
There was a good selection of arms and armour associated with Ranjit Singh himself :  swords, helmet, bow, pistol, musket. The pistol is interesting as its stock is of Indian make, but the lock is English; and the musket is interesting because despite the emphasis on modernity in the army, this personal weapon of the Maharaja is in fact a matchlock.  Given some rather lovely metalwork decoration on it, I suspect this weapon was more for show than actual use!   


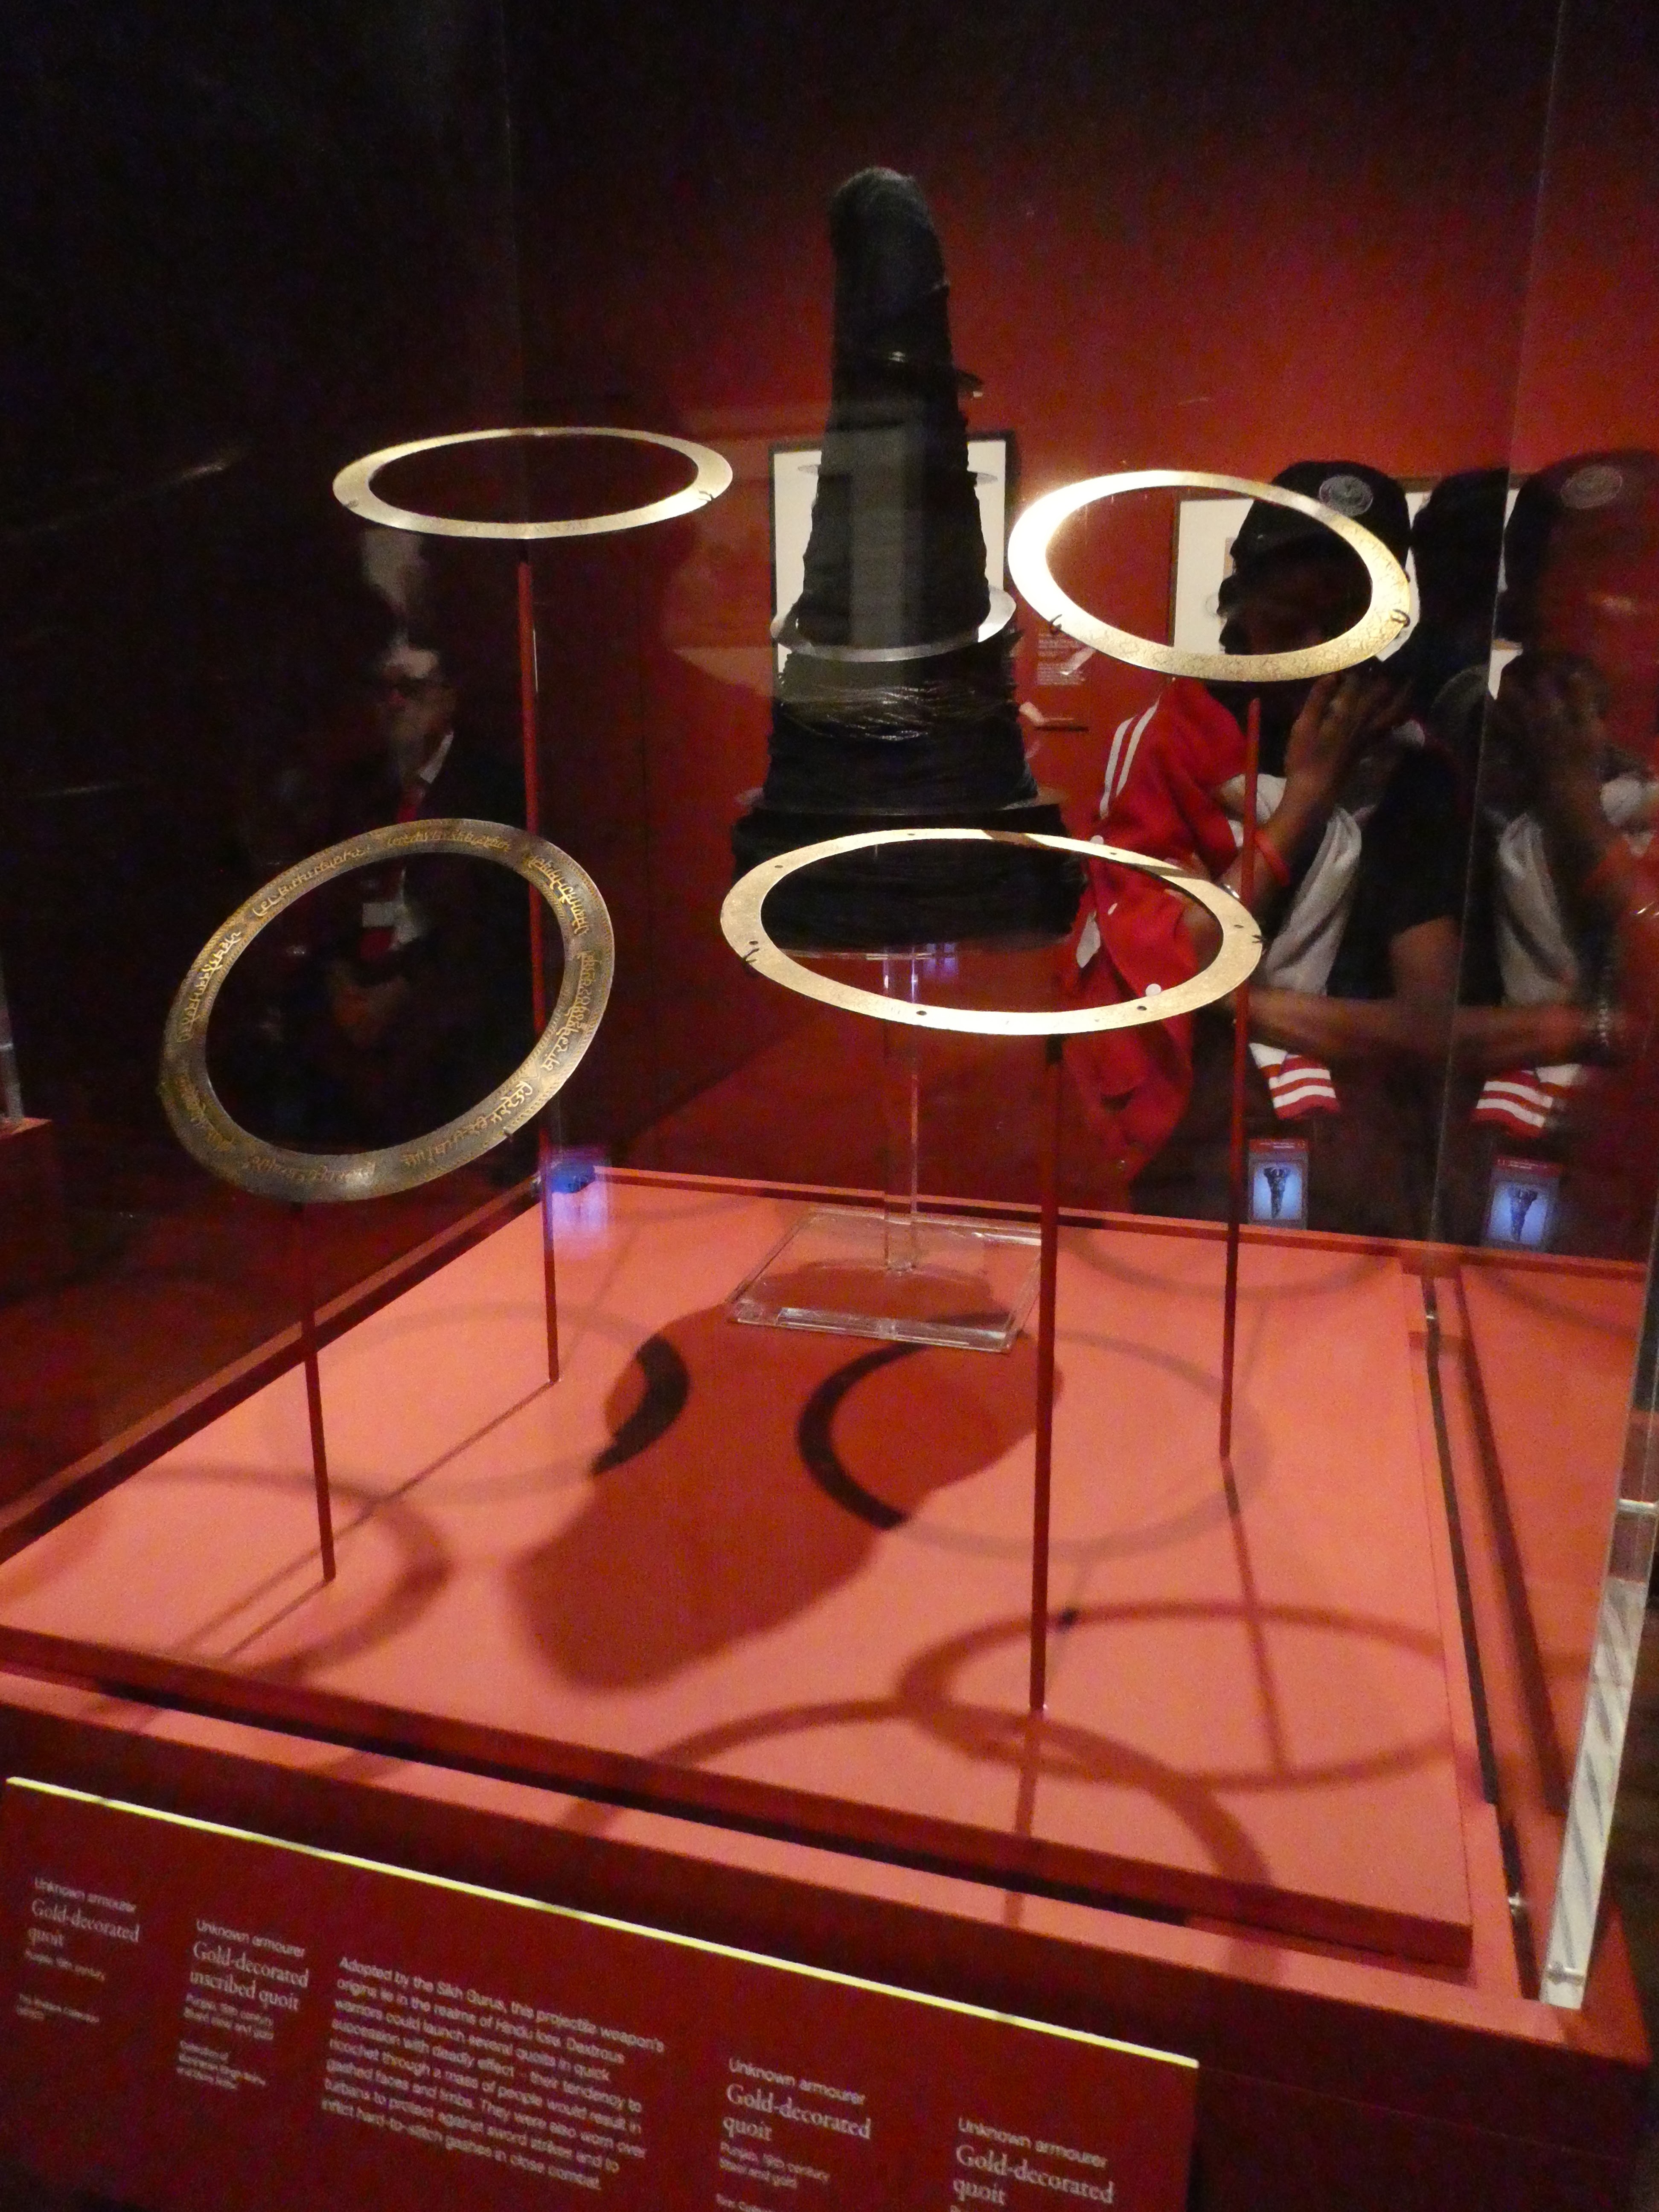
This was a surprising exhibit - I had no idea that Quoits began as a battle weapon! The edges  were sharpened, and they would be thrown at enemy formations - quite nasty. And they could be kept in a handy stack on the conical hat - where they then doubled as armour. 


 More Sikh helmets - note the way the wearer's  top-knot is accommodated 


Armour for a Sikh mounted warrior - note the rectangular  plate armour, which was typical. There would be four plates strung toghether, making an all-round cuirass. Under that is a mail shirt. 

More splendidly-engraved muskets, again matchlocks, with powder-horn and a dagger.


Contemporary picture of a mounted warrior of Ranjit Singh's army 

Amritsar, home of the Sikhs' Golden Temple and part of Ranjit Singh's empire.

Portrait of Ranjit Singh in later life - 1830s. Note the Western style of the soldier's yellow jacket at the bottom.


Some of the 'Firanji'   ( Foreigners ) who were brought in to modernise the army - first is a Frenchman,   Jean-Francois Allard, who was a former officer in Napoleon's army, and was first commissioned to raise a corps  of dragoons and lancers, being then made a General and becoming a close confidante of Ranjit Singh. 

This splendid chap is Scots-American mercenary Alexander Gardner, who is of course wearing a tartan turban!


Gardner it seems wrote an eye-witness account of the political  chaos after Ranjit Singh died in 1839, a rapid series of assassinations of his successors led to the empire's collapse and annexation by the British after what we refer to as The Sikh Wars.  As a result of the British takeover, many of the riches of the Sikh empire passed to Britain,  and of course are now able to be shown in this exhibition. Among the British loot was the Ko-ih-Noor diamond, and the show includes a document which is in effect a 'receipt' for it, presumably an attempt to legitimise its acquisition.  There is also Ranjit Singh''s Golden Throne 


The British governor, Lord Dalhousie, was ordered to send the throne to Britain, but rather took a fancy to it himself, and supposedly tried to have a replica made and sent, so he could keep the real one! 

All in all quite a fascinating exhibition, and well worth a visit if the period is of interest. From a wargaming point of view, lots of inspiration, perhaps?  The Sikh army did end up fighting against the British after Ranjit Singh's death - and a good 'what if' might be to imagine him actually getting into a scrap with the East India Company army while he was in his prime?  Or with the Russians, perhaps if you also  have a Crimean War force?  The show will  be quite timely if you have acquired Andy Copestake's recently published and doubtless excellent Khalsa! A Guide to Wargaming the Anglo-Sikh Wars 1845-1846 and 1848-1849  


 Finally a view of one of the exhibition rooms - the enlargement of pictures to cover entire walls is very effective.  Using my National Art Pass discount, my ticket cost me £7, which was pretty good - normal price £14, though I suspect some might think the exhibition a little too small for that price. There are 'over 100' objects on display.     


It's also woth noting that the Wallace Collection itself is a rather amazing place, including a couple of rooms packed  full of great arms and armour from Europe and Asia,  and a reallyfine  collection of paintings and objets dart. It's like a sort of Mini V&A, and a madly over-the-top Victorian house interior absolutely rammed with 'stuff'  -the phrase 'Tart's Boudoir' springs to  mind, in the nicest possible way!   I made a resolution to go back and spend an afternoon looking at the regualr collections  - all this is 5 minutes from Oxford Street in Manchester Square, Central London. If you are interested in the period and find yourself in the area, I would thoroughly recommend a visit.   Meanwhile keep well, everyone.