Saturday, 22 August 2020

Fnurban #4 : Support your local shops..

Having some time off work last week, I was able to pay a visit to nearby-ish Bury St. Edmunds. It's a pleasant place to wander and shop, with a  'Cathedral City' feel, a nice mix of old and new, chain and independent shops, and very pedestrian-friendly.  We had not been there, however, since before 'lockdown' in March. So, it seemed about time to return, and I had an ulterior motive - there is a decent model shop, and I needed some paints!  Model Junction,  in Whiting Street turned out to be up and running, with no shortage of stock and sensible safety measures - a maximum 4 customers at  a time was not a problem on a quietish weekday afternoon.  Plenty of paints from several different ranges, but my needs were simple and I was happy to plump for flesh, white and black Tamiya acrylics, and some Brass from the 'mig' range. And of course, one has to take a look at the plastic kits.. these resulted in a a couple of nicely matched  impulse buys, the Revell 1:76  'Wespe' and 'Priest' self-propelled guns. Those will fit very nicely into my 'D-Day Dodgers' forces, and I was quite glad to spend a bit more and support a good local shop. I know on-line shopping is the modern thing, but it's great to have a 'real' shop to browse and make serendipitous finds, and in a pleasant location. 

After that, I wandered into WH Smith and looked at the magazine racks - glad to see they are getting back to normal, and I was pleased to see some wargaming magazines. So how could I not support them too?  I came away with 'Wargames, Soldiers and Strategy' no 109,  and 'Wargames Illustrated' issue 392 ( August 2020 ). WSS has experimented with its issue 'theme' ; instead of a single period, it has a run of articles about a single location - specifically Afghanistan. I think this works quite well, with half a dozen pieces  ranging in time from Alexander the Great to 1980s Soviets. Plus the usual run of other articles, including one from Henry Hyde giving a mini-campagin scenario based around a crossroads and river crossing - as you'd expect from Henry and WSS , rather nice maps that are bound to come in handy sometime.  'Wargames Illustrated' is also themed - this time about 'Strategy, Command and Control', which I hope will be interesting.  Rick Priestly  contributes an article on the theme, thus managing to have a piece in both  magazines - his column in 'WSS' is in praise of The Society of Ancients.  'WI 392' also comes with a significant free extra - the rules manual for Warlord Games' new WW2 naval game 'Victory at Sea' . An interesting move, giving the rules away for free - "check out Warlord Games for all the  playing pieces" says the editorial. No doubt they are reassuringly expensive; but for the price of the magazine, you have set of rules as well as the usual articles to read, and no doubt this will interest plenty of naval warfare enthusiasts. Mr Crook, perhaps? 

 I confess I don't buy these magazines on a regular basis, but I will pick them up if the theme looks interesting, and right now it seemed almost a duty to give them a bit of help - the covid-19 crisis has I suspect,  hit them hard, by taking away their high street sales for some months. Equally I find I have just not been spending 'disposable income' in the past few months, while being fortunate to carry on working, and earning as normal. So I had no problem with a bit of  extra hobby spending.   I had a pleasant afternoon ( albeit dodging thundery showers ) and I hope my shopping was a 'win-win' thing for all concerned!

Next time, back to the Seven Years War and the outcome of the Bridgehead battle. Keep well, everyone. 

** UPDATE ** Since the above, issue 393 of Wargames Illustrated has come out, including a special 'freebie' of a set of rules for Wars of the Roses period, entitled Never Mind The Billhooks ( splendid stuff!) written by Andy Callan, no less.  Well worth a look, and a very good initiative from the WI team - good for them!  Much more about that on Norm's most excellent  'Battlefields and Warriors' blog, many thanks to him for highlighting this. 

image from the mag's website: https://www.wargamesillustrated.net/


Monday, 17 August 2020

Battle for the Bridgehead

The Bridgehead: sadly no giant cats here..

 Having gained some new recruits to my forces, I thought it was time to revisit The Portable Seven Years War. What has been happening in our somewhat obsure corner of central Europe? The Prussians, perhaps smarting from the repulse of their earlier incursion, have re-grouped and are essaying  another raid into Austrian terrritory. 

Once again I turned to Neil Thomas'  One Hour Wargames  excellent scenario suggestions, and soon found an interesting example with an element of the cross-border raid. Specifically, scenario number 5 : 'Bridghead'. As Neil Thomas describes it,   

'The Blue  army has discovered a river crossing in Red territory, and is aiming to secure it. The Red general is frantically trying to mobilise every available unit, in order to stop the enemy bridgehead from being formed'.  

'Blue' will be the Prussian raiders, and 'Red' the Austrian defenders. Conveniently I am able to use a 9 by 9 hex layout, which is the same size as Mr. Thomas' suggested 3 feet square table; see the picture above, looking South to North. ( Sadly the giant cat, deployed by  'Red' as shown in Ross Mac's recent Battle Gameof the Month post for the same scenario, was not available to me ).   

The scenario specifies that each side has 6 units, and the Prussians will have just one unit deployed at the start, just North of the bridge. They then add  one unit per turn from Turn 2 to Turn 6, entering on the road at the Southern edge.  The Austrians start with no units in position, but deploy two units on each of turns 1, 3 and 5,  each group's entry point decided by dicing - either at the Western edge by the wood, by  the road from  the North, or at the Eastern edge by the hill. Given this  sequence of events, the defenders will actually outnumber the raiders on Turn 1, Turn 3 and Turn 5, and may be able to isolate and  overwhelm the the invader's  vanguard early on - so it should be interesting stuff.

And so to the available forces: using the random selection method from Neil Thomas' book, I rolled the dice and came up with the following nicely varied brigades  ( with Strength Points  for Bob Cordery's Portable Napoleonic Wargame ) :  

Prussians:  

Three units Line Infantry : two of Line Fusiliers, one of Von Kleist Frei Korps  (each 4SP )

Two units Cavalry :  one of von Kleist Uhlans, one of von Kleist Horse Grenadiers (each 3 SP) 

One unit 'Rifles'  ( singly-based figures detached for this purpose from Von Kleist Frei Korps )              - 3 SP. 

And of course their commander, Eric von Jemanden, his hasty promotion confirmed after the               narrow victory at Heiligtumshugel .

The two units of cavalry should give them some advantage in striking fast to gain the bridgehead. All units are rated Average except the Elite Rifles; with von Jemanden's 6SP, the force total is 27 SP, and thus their Exhaustion Point is reached at the loss of  9 SP. 

And here they are, on the march for the bridge : 

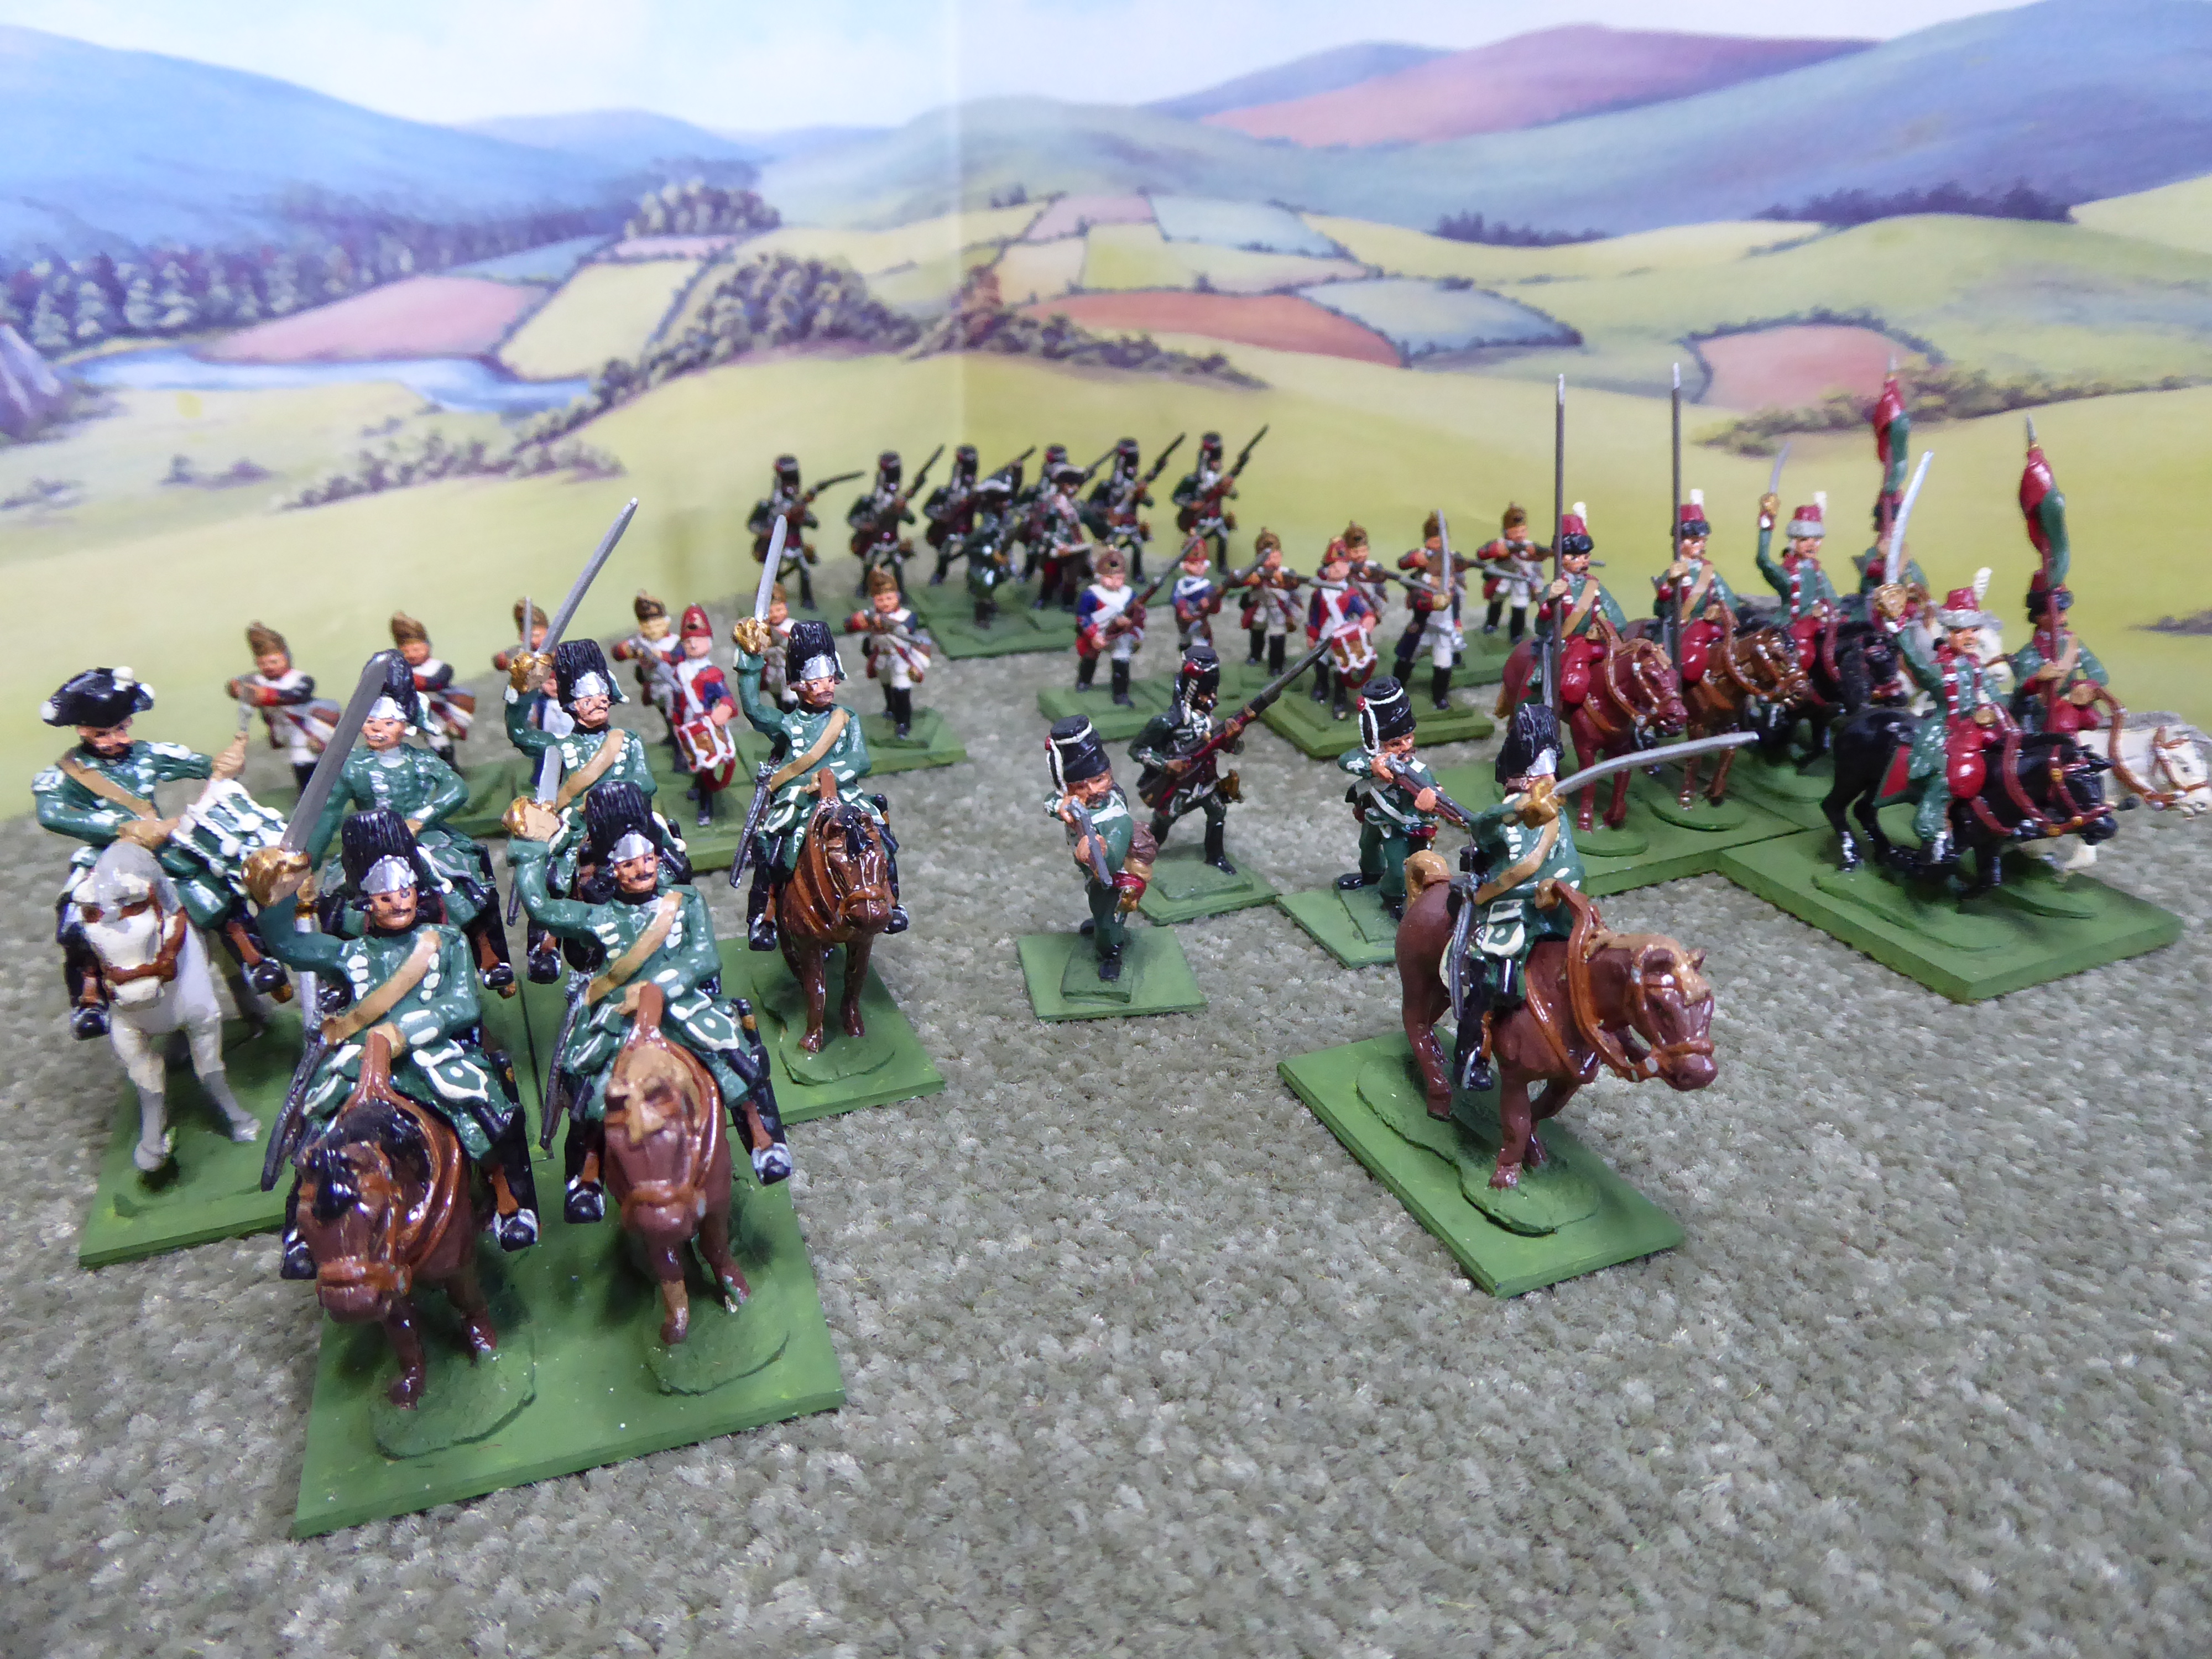
Prussian raiders : plenty of cavalry for a strike force


Austrians: 

Four Units Line infantry - two from the newly-recruited Botta regiment, two from our old                  friends the 'Wildganse' Jaegers (really Prussians, cunningly inveigled into migrating to Vienna)               - each 4 SP.

One unit 'Rifles' , actually  dismounted Grenze Hussar figures  - 3 SP.

One unit Artillery  ( 2 SP).

Their commander, the brave General Dachs, successful in repelling invaders in the previous                    campaign. 

No cavalry, but lots of infantry firepower and some artillery support should be good in defence. All units are rated Average except the Elite Rifles; with Dachs'  6SP, the force total is also 27 SP, and  Exhaustion Point is reached at the loss of  9 SP.


Dachs' defenders: Botta regiment debut

I decided that the Prussians would be able to specify the order in which their units arrived, since they were the attackers and will have planned the operation and their order of march;  while the Austrians would randomly select the units in each  arriving group, as well as the entry point, thus reflecting their hurried scraping-together of a defending force.   Neil Thomas specifies a maximun of 15 turns, with victory to the side holding the bridgehead,  with no enemy units on the North bank of the river within 3 hexes of the bridge.   

And so, let the battle commence. Von Jemanden decided that his advance guard would be the von Kleist Uhlans;  Dachs' die rolling  selected the first battalion Botta regiment and the Rifles, entering by road from the North on turn one.   Sensibly the Bottas deployed into line to receive any possible Uhlan charge, while the rifles took to the hill in dispersed formation: 

Turn One: 'Uhlans, sir!'  'Muskets ready, my lads..'
 

And there we have it. Next time, we shall see how things turn out.  Keep well, everyone.


Wednesday, 5 August 2020

New Recruits and Artillery Support

Foward, Regiment Botta!

Well, I'm not the fastest painter in the world, to say the least, but we have some progress. Here are two Fusilier 'units' of the Austrian  regiment (no.12)  Botta d'Adorno, from the unpainted figures acquired from the collection of the late Eric Knowles, and done as per his painting notes. Not the finest painting either, I fully admit, but the best I could do - and  I am quite happy with them for a first attempt (in possibly 40 years!). I have kept the syle back in the1970s too, no shading/washes - that might come later, if I gain confidence.  For the moment I rather like the cleanness of the white uniforms - clearly  fresh out of the barracks, day one of the campaigning season.  I prefer simple basing too, and the green base colour is from a local DIY store's mixing service ( Valspar ) and glories in the name of  'Ribbet'!  A flag will be added to that empty pole, just as soon as I can work out why my printer isn't working - I think 'Warflags' have something appropriate.

Based for use initially with Bob Cordery's 'Portable Napoleonic Wargame' , they will make two battalions for the Brigade Level game ( or perhaps one battalion in various other rules that might be tried ). Base sizes worked out on the highly scientific criteria of  'must get three bases in line,  inside a 100mm Hexon hex'.  Another two units should join them fairly soon, too.

Meanwhile, I have also received some additions to the artillery park - more of Eric's stuff, via David Crook.  A pair of Prussian battalion guns and a brace of nice stubby little howitzers, with crews and limbers, and a bonus of a couple of ammunition wagons at the back. Painted, I assume, by Eric, they will do nicely. Good to have a bit of variety in the artillery train, and the wagons are giving me ideas, how about some sort of convoy/ambush  scenario?   I hope messrs Charles Grant, Stuart Asquith and/or Neil Thomas can provide some inspiration. Anyway here they are, on the Ercol parade ground..


New to the Prussian Artillery Park


I am hoping I may have some time to set up a small game next week, it's been a while.  There has been some  recent gaming, and jolly good  it was  too, but that has been described by the most excellent MS Foy on his blog  - so  no plot spoilers here..

keep well, everyone.


Sunday, 26 July 2020

Emerging from the Chemical Bath..


In addition to figures I bought from the late  Eric Knowles collection ( and indeed the reason I was interested to buy them ),  I have my small collection of 'vintage' Minifgs 25mm 7YW Prussians; they have been enjoying a long-awaited bath  in Bird Brand 'Eco Spirit'  for the last several weeks.  It looks a bit noxious  ( I keep thinking of  Kenneth Williams shouting 'Frying Tonight!' ), but it's doing the job of removing a dodgy 40-year-old coating of Humbrol Enamels.

    
Prussians in the noxious swamp

Unpacking them ,we have  : 
                48  Line Muskeeters ( Minfigs PSW1 )   
                  3  Line Musketeer Officers (PSW2 ) 
                  1  Line Infantry Standard Bearer ( PSW12 )          
and one rather splendid mounted officer - not sure which he might be. Maybe Frederick himself?! Though I'm pretty sure he was intended for the Colonel of the regiment. 


out of the bath and on parade

This collection was indeed a regiment, bought from teenage 'birthday money' I suspect, as a result of earlier acquiring, reading  and being enthralled by Charles Grant's 'The War Game'.   How I ever imagined I would recruit a full army, with my very limited resources then,  I have no idea!   I think in the interim, they were pitched against a motley collection of Airfix plastic Napoleonics and AWI figures, all pretty badly painted.  I reconciled the eclecticism of the figures by creating 'imagi-nations',  which was of of course in keeping with Charles Grant's ideas, and was probably also fuelled by the serialisation of Tony Bath's Hyboria campaign in 'Battle for Wargamers' at around the same time. 

In the end, I think the advent of  WRG 1685-1845 rules with their 1:50 figure ratio, and battalions of 12 or 16 figures,  was much more budget-friendly and space-efficient, and these chaps probably made 3 or 4 battalions under those rules. Now, I hope they will finally wear their proper colours as Musketeers of the Prussian Line Infantry,  and should provide material for several units - they could perhaps make up to six battalions under Bob Cordery's 'Portable Wargame' system as adapted by me, and certainly  a couple of battalions  for Keith Flint's  'Honours of War', for example. I hope they will go nicely alongside the figures from Eric Knowles collection - indeed, when those became available, my thought was exactly this -  I could finally make use of my  Prussians after all these years!

But still, this is not to forget the original inspiration of Charles Grant's lovely book, that made the much younger me dream of grandiose armies.  As another inspiring chap, who lived and is buried not so far from here,  said:

"Teenage dreams, so hard to beat"

Admittedly, he probably wasn't thinking of toy soldiers!  (it's hard to believe, Peel would have been 81 next month) . 
Keep well,  everyone.


Wednesday, 15 July 2020

Air Support from Aldi, and painting Austrians slowly


The Portable Air Force

Opportunities for real gaming or planning have been a bit scarce recently - 'time and space, time and space..'  but I have managed to spend a bit of time on a couple of upgrades to the capabilities of my forces.  First of all, I always thought the 'D-Day Dodgers' would need an aviation element, as surely no re-creation of 1939-45 battles could ignore the effects of air power. Bob Cordery's 'Developed Portable Wargame' rules include a typically simple and  practical 'bolt-on' set of  rules for the use of aircraft, and I am interested to try those out. So I just needed some aircraft. Step forward the famous  middle aisle of our local branch of  supermarket Aldi,  from where a few months ago I picked up two  1:72 Airfix kits, which came complete with poly cement,  paints and brushes, all for £4.99 each, I think. 

In another 'haven't done this in many, many years'  moment, I settled down to build and paint, and was quite pleasd with the results -  Colonel Badger of the West Suffolks can now call up an airstrike in the form of an RAF  P-40 Tomahawk , while Oberst von Kleist has air cover courtesy of an Fw 190A.
Both went together fairly well even with my butter-fingers, though the engine cowling of the Focke-Wulf looks like the fitters must have bent it quite badly and then cross-threaded a lot of the bolts, and both  cockpit canopies are somewhat obscured in places by excess poly cement, as is entirely traditional!   It was all rather pleasantly nostalgic - in fact I think that the Airfix P-40 ( possibly an earlier version of the kit  )  was the first plastic model kit I ever built, probably about 1971 or '72 !
( Back then, it probably cost about 15p, I think. )
 
They seem  appropriate enough, as I'm sure the P-40 would have still been around at least in the ground-attack role in Italy in 1943 and 44,  and the Fw 190 was a Luftwaffe work-horse. The kit  is actually an 'A8' model,  a later-war 'bomber destroyer'with extra cannon - so I just left them off, not that they are exactly prominent, and I can imagineer it to an earlier version.  Maybe Me 109s would have been more common in the Mediterranean,  but let's not count buttons here - anyway, there weren't any 109s in Aldi.   The paints were fine, just 4 small pots in each kit  but no actual need for any other colours, and easily sufficient quantities. The paintbrushes  were petty terrible, though. I used my own, I am a bad enough painter without scrubby brushes making me worse.  And decals!  ( 'Transfers' in the old days, surely? ) . Cutting around each one, floating it in a saucer of water and waiting for them to float free - positively Proustian. Those shark's teeth on the P40 nose  were hard work, though, and will be kept away from the camera where possible.

They should see action in the next 'D-Day Dodgers' encounter, probably 'flying' on upturned plastic wine-glasses, and it will be interesting to see how the rules work with them ( aircraft are generic 'fighter' or 'ground-attack' , which I think is fine ).


Meanwhile, back in the 18th Century:  I have been making slow progress, rather hesitantly  painting a few of the Austrian infantry that I acquired from the collection of the late Eric Knowles. As per the painting notes found in Eric's boxes, these are going to represent the regiment 'Botta' fusiliers, and I have started with just 16 figures, making two battalions in Bob's brigade-level rules.  


Botta Regiment 'on the bottletops'

As you can see, for a bit more help I am glad to have Osprey's 'Men at Arms' no. 276, 'The Austrian Army 1740-1780 (2) Infantry'  by Philip Haythornthwaite and Bill Younghusband, which has answered a few questions and given me some confidence.  It's going to be a very simple paint job, pure 'block painting',  and no button counting here - even with a magnifying lamp, which has been a real godsend, I won't be painting the buttons!  I just about managed the lace trim on the hats without it being too ragged..  I hope Eric isn't spinning in his grave, but I'm doing my best, actually enjoying doing so, and will be happy with a basic look, for viewing strictly at 'wargame distance'.  Mostly it's the brass, gold and flesh parts still to do, and some nice simple green old-school bases - fingers crossed for finishing quite soon.  And then we'll see how they fight..
Keep well, everyone.


Saturday, 4 July 2020

Fnurban #3 : Sudbury and the Star-Spangled Banner

The original Star-Spangled Banner

        “Oh! say, can you see, by the dawn’s early light,
        What so proudly we hailed at the twilight’s last gleaming?
        Whose broad stripes and bright stars, through the perilous fight,
        O’er the ramparts we watched were so gallantly streaming?
        And the rocket’s red glare, the bombs bursting in air,
        Gave proof thro’ the night that our flag was still there.
        Oh! say, does that star-spangled banner yet wave,
        O’er the land of the free and the home of the brave?”

Of course today is U.S. Independence Day, and the 'Star-Spangled Banner' will be much in evidence. Which reminds me that my adopted ( and almost ancestral ) hometown of Sudbury believes it has a good claim to have provided the raw material from which the original Star-Spangled Banner was made. As an aside, I learned what 'bunting' is, and that Sudbury was the biggest producer of the stuff. Every town needs to be proud of something (we also have Thomas Gainsborough, by the way).

All is explained by our excellent local historian Anne Grimshaw,  on the Sudbury Society website; I hope it is of interest to any American readers - indeed any readers, given its military history angle.  

( Anne  has done quite a lot of local military history research, around our several local WW2 airfields and the US and British aircrew  based here, and was prominent in an excellent project to research all the Long Melford men and women who served in the Great War of 1914-1918 - one of whom was my grandfather).

Have a good day, everyone - keep safe and well.


Sunday, 28 June 2020

The attack on Monte Lucedelsole : as it happened

We last saw the fight for Monte Lucedelsole  just beginning, with Colonel Badger's force appearing by road from the South, and running into fire from von Kleist's  German outposts in the  woods. Now we'll see how it turned out..

Badgerforce to the attack!

The game was played using Bob Cordery's  Early and Mid 20th Century Rules from 'The Developed Portable Wargame', and had the distinction of being the first figure-based WW2 wargame I had played in at least 40 years, and the first outing in that time for many of the ( vintage Airfix and Matchbox ) infantry figures involved! 
It lasted a total of 14 turns, so I will not try my readers' patience with a detailed turn-by-turn  account, just sketch the broader themes and what seemed the important events.

One quite important 'broader theme'  was that the British Commander ( me ) had not really made a thoughtful plan, and was rather improvising as he went along - which had very mixed results ( I'm almost tempted to give him a first name -  'Boris' might seem appropriate? ).   Initially he pushed his two Sherman tank units up the middle, on or close to the road, and brought on M3 half-tracks carrying infantry.  M3 'A' followed Sherman 'A' up the road, and M3 'B' headed to the right and de-bussed its infantry in front of East Wood while his MG unit ( joined by Badger himself ) hunkered down in the walled enclosure, aiming to 'shoot in' the infantry attack.  He sent his Valentine tank unit  forward on the extreme left, and brought on his field artillery ( 25-pdr and quad ) in the centre.

Von Kleist ( also  me ) had an easier job in some ways - shoot at the British when opportunities arose! On turn 2, the German field gun and their Panzer IV both opened up on the Shermans, and forced both to retreat - a taste of things to come.
Turn 3 saw the start of a good run of shooting from the Pz IV and German Infantry 1 in East Wood : taking  1 SP each from Sherman 'B' and British No.2 Infantry in front of East Wood. First blood! Those two German units would distinguish themselves further, it turned out.

Something of a 'firefight' situation continued  in the centre and at East Wood, with the Pz IV doing a splendid job of shooting up Shermans ( two SPs taken from Sherman 'B' by turn 4 )  and German No.1 Infantry unit scoring telling hits on British Infantry No.2 from East Wood ( also 2 SPs ), while the British MG unit threw some pretty poor dice in its attempts to suppress the defenders. The British Field Gun did manage to help, taking 1 SP off the German infantry.  By the end of Turn 5,  losses amounted to : British 4 SPs,  Germans 1 SP.

Turn 5 : Shermans rather 'at bay', British infantry shot up ( 2p piece inidcates 'pinned' )

On the left at West Wood, Badger decided to reinforce by sending M3 'B' forward again, carrying Infantry Unit No.3, giving him two motorised infantry and his Valentine tank against the German No.1 MG unit. But the Machine Gunners were not just sitting there, and successfully 'strafed' M3 'A' and its mounted Infantry unit No.1, forcing a retreat AND taking 1 SP - which under the rules  meant 1 SP from BOTH the M3 and the Infantry - ouch! Machine guns ( and other foot units ) can damage armoured motor transport from a range of 2 hexes, and the MG units 3 dice when firing can make them very effective!  The Valentine extracted some revenge, managing to take 1 SP from the MG, and importantly 'pin' it, reducing its effectiveness.
Losses at end of Turn 7:  British 6 SP, Germans 3 SP.

The following turn, British No.2 infantry unit got into East Wood and carried out a  'close assault' on the Germans there - who the British MG had finally managed to hit and 'pin' - this made the defenders  more vulnerable, and they took a further 1 SP loss before managing to retire on Turn 10, leaving the British in possession of East Wood. At the same time, Badgerforce also took West Wood, having dismounted Infantry unit No.3 adjacent to the 'pinned' German MG and finished them off with a close assault from the rear. Turn 9 was good for the British, as they took 3 SPs from von Kleist's troops ( including the Pz IV, hit by Sherman 'B' ) ,  thus levelling  the score at 6 SPs each.  Badger was also able to bring on his mortar unit and 6-pdr A/T gun in the centre - with the MG and 25-pdr, quite a 'fire base' being developed around the walled enlosure.

German MG 'pinned' and overrun from behind - West Wood taken!

However, German shooting continued good, and the Pz IV destroyed Sherman 'B' unit on Turn 10, and then in combination with the Pak 40 A/T gun took 2 SPs from Sherman 'A' the following turn! Despite having been forced out of East Wood, German Infantry No.1 was not downhearted, and successfully shot up British Infantry No.2 again. After that spectacular sequence of shooting, losses at end of Turn 11 were British  11 SP,  Germans 6 SP.   On turn 12, the Pz IV scored another success  when it destroyed Sherman unit 'A' - so two-thirds of British armour gone, not good at all!

Still all to play for, however, and things were going better on the British left, with the Valentine crushing the German wire and progressing beyond West Wood - now the German fortification by the road and its occupants ( von Kleist's Infantry No.2 ) were the next target, with the aim of 'rolling up' the main position from the West. Turn 13 saw a co-ordinated attack by British Infantry No.s 1 and 3 and the Valentine unit on the unfortunate German Infantry No.2 unit, which had to accept 1 SP loss rather than retreat and give up the fortification - surely they would not survive very long like that. The score at end of Turn 13 : British losses 13 SP ( exhaustion point at 17 ) , Germans 8 SP ( exhaustion at 11 ). Both sides under pressure..

Turn 13: Valentine left hook, both woods taken, but Shermans gone

And then Turn 14 - a bit of a firestorm.. both sides' field guns had been banging away with modest effect, but this turn both scored damaging hits, the 25-pdr removing 1 SP from the German A/T gun (which threatened the Valentine's progress)   and the German 105mm hitting the British MG unit, which had advanced into East Wood. The British attack on German Infantry No.2 by the road continued, with all 3 units close assaulting the 'pinned' Germans - but their dice were very poor, scoring no hits at all!  

Surely they can't hold out?

'They can't hold out for long' , thought Badger, meanwhile bringing on M3 'B' again, ferrying  the final Infantry Unit ( No.4 ) towards his right flank, and keeping up mortar fire on the German positions around the farm, making the German MG Unit No.2 retreat from its dug-in position.     

Badger reckoned without the  Germans' shooting, however.  With rather a traffic jam in the centre, he had put his half-track  M3 'B' unit within range of the German Mortar, which von Kleist himself was overseeing, and it promptly hit and took 1 SP from BOTH the M3 and its passengers in Infantry unit No.4 ;  meanwhile the much-battered German Infantry unit No.1 was not giving up its resistance in front of East Wood, and scored a hit on the British MG unit in the wood - which, having just taken a hit from German artillery, was destroyed.
 
That was decisive - with a stonking British 4 SPs lost ( to 1 German )  in Turn 14, the total losses were now :  British 17 SP,  Germans 9 SP.  Badgerforce had reached its Exhaustion Point - their attack must come to a halt!  And so must the game,  von Kleist being content to watch Colonel Badger's men retire, rather than risk further loss himself in some sort of pursuit.   Heroes of the German hour were their lone Pz IV tank, which scored 5 SPs of hits in its duel with  the two British Sherman units, losing only 1 SP itself, and their Infantry Unit No.1 which survived being Machine-gunned and close assaulted, was forced out of its position in East Wood, but did not give up,  kept shooting, and delivered the final coup de grace to the British MG unit, which spelt the end of the whole affair.  

With my Colonel Badger hat on, I think I need to go back to tactical training school!  Just pushing the Shermans up the middle did very little good except to get them shot up, and I should have directed more effort at taking both woods first, then using them as jump-off points for attacks on the hilltop position - the centre was just an open killing ground which I blundered into. Having said that, wearing the von Kleist hat, perhaps I should have put all my Infantry and MGs 'up front' in the two woods to give the British a harder time attacking them, keeping the hilltop as a firebase for the artillery, A/T gun and mortars. 
Final situation : if only that M3 had stayed back..

Conclusions:  the main one was that I had a lot of fun! I was very happy with Bob's rules, which might well be described as  'deceptively simple'.  Within a few moves I had memorised the Shooting and Close Combat dice modifiers, and could almost instantly work out the 'to hit' score for each unit. Movement rates and ranges are also very simple, especially counting in 'Grid Areas' ( hexes, in this case). 
I found the rules subtle, as well as simple.  I liked the 'pinning' concept which felt true to modern combat, and makes combined assaults work in the right way - one unit can try to 'shoot in' another's attack, hoping to 'pin' the defender and allow a close assault to go in with better effect. See the example of German Infantry unit No.2, which could not retreat for fear of losing its cover, but then had to take an SP loss and suffer pinning, allowing its attackers to storm in. You can 'unpin' a unit , but it takes a whole activation, and can't be done if adjacent to the enemy.   

Machine gun units with their 3 dice for shooting can be particularly deadly against 'soft' targets - but cannot kill tanks, to which they are vulnerable in close assault, having only 1 dice then.  Armoured Transport protects its passengers against infantry fire, but only at ranges over 2 grid areas, and woe betide them if hit and suffering SP losses, as these affect both transport and passenger units. The British lost 4 SPs this way when their M3s were shot up by German MGs and mortars - significant casualties. One thing I would think about adding to the rules would be some concept of 'spotting' - as it stands, units in woods for example can presumably be fired on with no requirement to 'spot' them first, even if they have not revealed their position by opening fire. Bob does have rules on 'line-of-sight' when firing, and he has rules for the use of smoke - which was another thing Colonel Badger needs to go back and revise !

So there we have it: my first WW2 game since the 1970s - which were closer in time to WW2 than we are now to the 1970s. I thoroughly enjoyed it, and hope to do more, as the descendents of my Seven Years War commanders continue the family feud up and down Italy. I hope you've enjoyed reading my account, and if considering 'The Portable Wargame' , I hope it's been useful!  
Keep well, everyone, until  next time.