Sunday, 30 May 2021

A mini Lobositz, with Arthur's 'For SHAME' rules

Look out boys, here they come..

I thought I'd try a game with Arthur Harman's recent 'For Shame' rules from Miniature Wargames magazine issue 457  ( it's been pointed out that 'SHAME' = Simple Horse And Musket Engagements  - thanks, Martin S !) .  As described in an earlier  post, my 'Soldier King' Seven Years War period campaign has thrown up an interesting battle at Wittingen.  I hope the campaign can act as a common thread to string battles upon, and  is  flexible enough to  allow me to try out different rules and methods of setting up scenarios as each encounter comes along. 

And so, to the battle: I showed the attacking Prussians and the  ( heavily outnumbered ) Austrians before,  now we need  a battlefield. Given the unbalanced forces,  I wanted a setup that made things challenging for the attackers - after all, the defending  Austrians  would have taken up as good a  position as they could.  I had a look through some books of scenarios, and lighted upon  no. 21 from Neil Thomas 'One Hour Wargames',  entitled 'Twin Objectives'.  A larger attacking force must secure both a wooded hill and a  village ( which we will promote to represent the town of Wittingen )  - and rather pleasingly the original inspiration was from a Seven Years War battle, that of Lobositz.  Given the Prussian preponderence of cavalry, it seemed particularly appropriate. Another massed charge, perhaps?

The scenario demands that the defenders station one unit on the wooded hill in the North East, and the rest of their forces close to the Southern table edge, anchored on the town ( note that  'North' in the scenario is actually South in my campaign, and all directions here follow the campaign alignment - Prussians moving southward ) . The Prussians enter from the North, and crucially they must control both the wooded hill and the town at the end of the fifteenth turn in order to win the game ( of course, being a campaign, simply 'winning the game' is  less important than the condition of the armies at the end..). So  the Austrians placed one brave battalion on the hill, and another,  plus their gun,  in the town  ( no doubt hastily loop-holed and barricaded ), with their third battalion West of the town  and their Light Cavalry to the East, to threaten the attacker's flank. The Prussian horde entered, led by their three much-vaunted Guard Heavy Cavalry units, the victors of Rahden: infantry massed on the left , ready to assault the hill. 

The rules were 'tweaked' but only very slightly - I translated  Arthur's suggested square grid to hexes,  with move distances and ranges the same. Next, Arthur's  rules for cavalry attacking infantry had a very Napoleonic flavour, assuming that the foot would try to go into square - I gave the disciplined linear infantry of the 7YW period a better chance, by subtracting one attack dice from the cavalry if charging frontally - and of course not requiring the foot to form square. Instead of 'flowing around', I reckoned a cavalry unit that did not break their  infantry target would simply 'bounce back' a couple of hexes  towards their starting position; that  seemed plausible.   Given that these were new rules to me, there was a bit of thinking required, and I will give a bit more detail for the first few moves, to show a little of how ( I think ) they work, I hope this doesn't make for too long a post. The later moves may go at more of a canter! 

Cuirassiers shaken, Horse Grenadiers Charge - on Turn 1 !

It was a case of action well and truly from the start - in Arthur's rules the artillery fire at the start of each turn, and the Austrian gun made great practise immediately. Firing at the Prussian 1st Cuirassiers, the gunners' three dice rolled two 'falling flags' - which caused quite a jolt to the target's  morale, requiring them to halt. One might suppose their  senior officer had got in the way of a roundshot! So immediately, the Prussians' imposing Heavy Cavalry was dealt a blow. This perhaps stung the remaining Heavies - their   Horse Grenadiers immediately launched a charge on 1st Battalion Botta d'Adorno infantry, West of the Town. As 'Guard' quality Cavalry ( normally 4 dice ) charging formed infantry frontally ( less one dice ) they rolled three dice, and inflicted one 'fallen flag' but no 'Sabre' , so  no Combat Value ( CV)  reduction. So the infantry were somewhat  shaken, but kept order - fire with only one dice. That took -1 CV from the cavalry.  Having not broken the infantry, I decided the charge had 'bounced off'.

 Meanwhile the Prussians began dealing with the wooded hill, sending their two Jaeger units to advance on  the 2nd Botta infantry frontally, while the two Von Kleist foot units moved around the hill, threatening the defenders' flank and also  screening their comrades from the threat of the  Austrian cavalry. The hill's defenders ( 2nd battalion  Botta )  gave a first volley to 1st battalion Jaeger, their three dice scoring one 'flag' and one CV reduction - not bad shooting, and the 'Flag' means the Jaeger will get one less dice when they respond. 

From the above you can perhaps see how combat effects work in these rules : I think we can imagine that units  in effect suffer casualties ( CV reductions ) and/or shaken morale  ( 'Fallen Flags' ). Casualties wear them down slowly - lose over half their initial CV, and a unit cannot move or fire offensively, and if CV reaches zero, must retire.  'Fallen Flags' reduce morale, weakening fire/combat power , perhaps causing them to halt or be unable to attack, and if the number of Fallen Flags reaches the unit's quality level ( 3 for Trained/Veteran , 4 for Guard/Elite ) then again they must retire.  Commanders can try to 'rally off' Fallen Flags, but that's not easy - need to roll a 6. Neither of my commanders managed that in the whole game! 

In Turn 2,  battle was properly joined on the hill, with 2nd Botta giving another stinging volley to 1st Jaeger  ( 2 more off their CV , now already down to 4 from initial 7 ) , the Jaegers' volley in response being quite ragged ( and the Austrians on the wooded hill were in cover, so one less dice ) - no effect. 2nd Jaegers tried cold steel - charge up the hill! Less one dice due to the cover, but they inflicted one 'Flag' on Botta, reducing the defender's fire dice by one, and in turn receiving just 1 CV reduction.  The Jaegers not being halted or broken, close combat would continue.

The fight for the wooded hill

West of the town, the Austrian artillery made more excellent practise, finding the Prussian Horse Grenadiers had come within canister range, and promptly peppered them - down 2 CV points for the cavalry. To add insult, 1st Botta stepped forward and used their muskets, and the Horse Grenadiers lost  one  Flag as well! This drew a furious response, with both 2nd Cuirassiers and Horse Grenadiers charging  1st Botta in succession. But the resolute Bottas stood firm, both charges bounced off, and the foot lost just 1 CV, inflicting -1 CV on each of their attackers. Stout lads!    

On Turn 3, things began to go Prussia's way. The Austrian gun spattered the Horse Grenadiers with  more canister ( -1 CV ) , but the Prussian gun had now unlimbered, and opened counter-battery fire, immediately achieving a 'Fallen Flag' on their opposite numbers ( despite their  being in cover in the town - good shooting ), so the Austrian gun would fire with reduced effect.  On the hill, both Jaeger units managed to get to close combat with 2nd Botta, who suffered another 'Flag' down. One more, and they would have to retire..  Meanwhile West of the town, the Horse Grenadiers pulled back from the withering fire,  2nd Cuirassiers charged 1st Botta yet again - and bounced off yet again - but now step forward the Prussian Guard Fusiliers with a crashing volley, and Botta suffered one Flag and 2 CV losses.  In response their own musketry discomfited the Fusiliers - one Fallen Flag.  1st Botta had 'played a blinder' so far, but that Fusilier volley hit them pretty hard, coming after the wear and tear of the cavalry charges. 

Brave Botta vs Guard Cavalry and Fusiliers

 In Turn 4, although the positions of the units changed little, the situation did. The Austrian gun's lucky streak continued as they inflicted another 'Flag' on the Prussian Fusiliers, bringing them to a halt, but Prussian muskets and bayonets proved decisive. On the wooded hill, the Jaegers in close combat inflicted a third Flag down on 2nd Botta, and in the musketry duel to the west,  the Fusiliers did the same to 1st Botta. Both Austrian battalions now had as many 'Fallen Flags' as their troop quality value - so both must retire from the fight. This would leave the hill objective in Prussian hands, and allow them to focus on objective number two, the town - and it left only three Austrian units in play.

Faced with this setback, on Turn 5  the single Austrian  Grenze Hussars  squadron decided for decisive action, with a pell-mell charge into the heart of the Prussian array, targeting their gunners! I like the  charge procedure - the attackers roll their dice, and that determines the defenders' response. The cavalry rolled one 'Flag' and one 'Sabre' - not enough to rout the gunners, but it forced them to fire hastily and then take shelter with the nearby von Kleist foot, leaving the cavalry,  albeit also suffering one Flag,  occupying the gun position ( hmmm.. I don't think there's a rule for 'spiking' the guns? ) .  In return, Prussian 2nd Cuirassiers turned around and charged the  Grenzers from behind - but their dice were very poor, and allowed the Hussars to counter-charge. They too made no impact, and under the rules the combatant units pass through each other and turn about, ready for another charge next move, if willing.  Quite a flurry of action, and it felt 'right' for charge and counter-charge. 

Turn 5 , the whirling cavalry melee: Hussars chase off Gunners but are charged from behind by Cuirassiers ( more Cuirassiers to front are still halted by artillery fire and can take no part, frustratingly for Prussia! )   

 The following turn, the Hussars sensibly  decided to pull back towards the town, while both 1st and 2nd worn-out Botta battalions began to retire, allowing Prussian Jaegers to take possession of the wooded hill.  Their one remaining full-strength Cavalry unit kept the Hussars under threat, and the two Von Kleist battalions began to advance on the final objective - the defended town. 

The Prussian gunners regained their gun and resumed a duel with their opposite numbers, and were getting the better of it despite the Austrian's position in the cover of the town - so on Turn 7, the Austrian Light Horse  tried another desperate 'charge for the guns' ( sadly only a squadron, not a light brigade..) , but to little effect. Poor dice saw them 'bounce' , and they were promptly attacked by Prussian 2nd Cuirassiers. These rolled most effectively, taking 1 CV point and  two Flags from the Hussars, which was decisive - the Austrian Lights had now lost three flags, and they too must retire. Just one battalion and a gun ( also two flags down thanks to counter-battery fire ) remained holding the town. Things looked bad for the Austrians..

Prussian foot assault the town - defenders hold firm
 

The Prussians could now throw two battalions of Von Kleist and one of Jaegers at the lone Botta battalion barricaded in the built-up-area, and their general hoped to 'rally off ' a Flag and get his Guard Fusiliers moving again too, while the guns continued their artillery duel.  BUT he ( that's me, of course) made the mistake of throwing in the three battalions piecemeal as they came up, rather than a simultaneous mass assault.  Given the powerful advantage of defending a 'BUA' in both musketry duels ( reduce fire by TWO dice ) and bayonet charges, on succeeding turns  the Austrian foot saw off 1st von Kleist  ( reduced to CV of 3, may not attack further ) ,   2nd von Kleist  ( also down to CV of 3 ) and 2nd Jaegers ( reduced to CV 4, perilously close to retiring ).  The 1st Jaeger had taken a battering in attacking the hill earlier, so were left to occupy it, in safety.  All attempts to get the Fusiliers moving again had failed, and cavalry may not attack a built-up-area,  so by the end of Turn 10, the attack on the town had effectively stalled.

How it Ended - Bottas hold on, just!

 Finally, at the start of Turn 11 the Prussian gunners saved their commander's wounded pride, by winning the artillery duel. They inflicted  a third 'Fallen Flag' on the Austrian guns  - which must now retire from the field.  This left the 3rd Botta d'Adorno battalion as the sole remaining Austrian unit. The Prussian foot were not going to be able to dislodge them;  the guns might eventually batter them into submission,  but for now they had halted the Prussian attack.  In 'scenario' terms, this looked like an Austrian victory would result if playing on to Turn 15. In 'campaign' terms, the Austrians had four-fifths of their units out of the battle, and the remaining battalion well advised to wait for darkness and slip away, leaving the depleted Prussians in possession of the town. 

"It was the Guns wot won it.."

I'm sure I have overstayed my welcome now, so we can leave it there. I hope I've given a decent impression of how I got on with Arthur's rules,  which I liked, on the whole - it felt like a sort of mix of 'Portable Wargame' and 'Command and Colours'.  Action was fast and furious, as promised, and I hope I understood the mechanisms right, more or less. A few questions arose, and a bit of tinkering might be in order to make them more attuned to pre-Napoleonic combat.  I think those can be the subject of my next post. 

Meanwhile,  I hope you've enjoyed this account, as I did the game;  keep safe and well, everyone. 


Monday, 24 May 2021

Fnurban #9 Norfolk, and Good

Old Ironsides guards the road
 

With Covid restrictions lifting last week, we wound up our courage and managed to book a 'short break', 3 nights in a pleasant cottage in rural Norfolk.  Admittedly it rained every day, but we still had a thoroughly nice time, and there was some military history interest locally. For example, the above splendid Cromwell tank guarding our route, a memorial to the 7th Armoured Division ( 'The Desert Rats' ) who were stationed in Thetford Forest for some months in early 1944, in preparation for the D-Day invasion of Normandy. The damp and gloomy winter forest  will  have been quite a change from the Mediterranean theatre they had been accustomed to..

We stayed in the small  village of Foulsham - here is a not-very-impressive photo ( best view I could get from the footpath in the neighbouring field )   of Foulsham Old Hall, a rather rambling/tumbledown looking Tudor house just on the edge of the village. 

Old Foulsham Hall
 

In the 1630s/1640s this was home to Philip Skippon, commander of the City of London Trained Bands in 1642 ( "Come my boys, my brave boys, let us pray heartily and fight heartily. I will run the same hazards and fortunes with you. Remember the cause is for God, and for the defence of yourselves, your wives, your children. Come, my honest brave boys, pray heartily and fight heartily, and God will bless us" ),   Sergeant-Major General to the Earl of Essex, commander of the Parliamentary  left wing and reserves  at First Newbury, and of the New Model Army's  centre at Naseby, where he was badly wounded.  

About five miles away is the village of Melton Constable, where we stopped on a thoroughly wet morning to look at the church :
 

Melton Constable Church

and we discovered that this village was home to Sir Jacob Astley, Royalist commander, Major-General of King Charles' infantry at Edgehill  ( "O Lord, Thou knowest how busy I must be this day. If I forget Thee, do not thou forget me"...."March on, boys!"  ) , leader of the Royalist infantry at First Newbury, and at Naseby - effectively Skippon and Astley were each others' opposite numbers, as well as near neighbours. Also, both had previously served Maurice of Nassau and the Elector Palatine in the Thirty Years' War on the continent  They must surely have met in local society, and I wonder if they had any interaction in the time after the war ( as Astley had said "Well, boys, you have done your work, now you may go and play—if you don't fall out among yourselves" ) - did they re-live the battles in amicable discussions later, or did old emnities live on? 

Foulsham was also the site of an R.A.F. airfield in the Second World War, and base for a couple of squadrons of 100 Group, Bomber Command, who carried out 'Electronic Intelligence'  - flying Halifixes   equipped with radar detection and jamming equipment   among the main  bomber stream , using 'Window' to create  false plots on German radar to confuse the defenses,  and also using radar-equipped  Mosquito night fighters to detect and shoot down German fighters, and lurk around their bases aiming to catch them on take-off and landing, causing 'Moskito Panik' among the defenders which it seems led to many crashes when worried Luftwaffe pilots attempted hurried landings. So it seems our sleepy village was home of some cutting-edge 1940s aerial warfare technology, and played a valuable part in the air offensive. 

Some of the above knowledge was gleaned from  a purchase at another place we visited - the nearby seaside resort of Cromer.  We paddled around in the rain,  but also vistied 'Much Binding' , a small and slightly eccentric, but well-stocked second-hand bookshop in the town centre. Quite a haul of books was the result -  some guiding spirit seems to lead me to  good bookshops on rainy days! 


Rainy-day haul at 'Much Binding', Cromer


As you see, a book about Norfolk airfields In WW2 was among them - I already have the Suffolk equivalent ( and R.A.F. Sudbury near home ).  We return to the Civil War theme with John Buchan's life of Cromwell, and more 'old-school' history in G.M. Trevelyan's history of Queen Anne's reign , part 3 'The Peace and the Protestant Succession'.  I have had parts 1 and 2 for maybe thirty years in the same edition, nice to finally have a set !  'The Defence of Duffers Drift'  I have already read in one evening,  and it's great - made me wonder how many wargamers would actually really know how to defend a small position with 50 men? I suspect many may be as ignorant ( myself included ) as the narrator professed himself, at the start of his Boer War 'Groundhog Day'.   Finally, back to the Western Desert with a nice old Penguin edition of  Cyril Joly's   'Take These Men : Tank Warfare with the Desert Rats'   first-hand account - I had not heard of this, and it looks pretty interesting.  Not a bad little collection, albeit another extension of my reading  backlog ! 

And so,  as  the Geordies might say : 

"- So, Davey boy, where did ye go on yer short break, and how was it?  

- Wye Aye canny lad, it was Norfolk an' Good..."

Keep well, and safe, everyone. 


Friday, 14 May 2021

Soldier King Campaign : exploiting victory

Back at my campaign using the 'Soldier King' boardgame for an imaginary sideshow theatre of the Seven Years War, we reach campaign turn six - the summer of 1757.
Initial situation: where will  Prussians strike?

 With  Prussia having achieved a major victory at Rahden, and the largest and best-quality Austrian field force in captivity, could the victors  exploit their stunning success?  I rolled dice for initiative, and fortune favoured the Prussians, winning them the right to move first. That seemed 'right' somehow, as the Prussian commanders would be keen to follow-up their victory while confusion and panic swept the ranks of the Austrians.  The Austrian territories wer protected by a scatter of small forces, many units only new-raised; the Prussians' whole army had concentrated at Rahden, and could choose its target. The dice gave them five 'marches' - each stack requires one march for a move, so they had no great constraint on movement. The priority was to prevent the Austrians from concentrating their troops, so the plan was simple - attack the largest remaining Austrian force with sufficient numbers to  wipe it out. 


seek out and destroy the enemy..

And so, leaving a flank guard of infantry at Piesport to cover their left , no less than eight units of Prussians moved to attack the Austrian force of only four units at Wittingen.   The opposing armies stack  up as follows: 

Look at all that Guard Heavy Horse..

It looks very tough for Austria: I did wonder if they should simply try to escape. But the Prussians have three units of Guard Heavy Cavalry against one unit of Lights - there's no way they could cover the infantry's retreat without being overrun. So I'm afraid it's stand and fight, hoping to inflict some damage at the very least, or nothing.

Translating those cardboard counters into troops 'on the table' we have , first the Prussians : 

The Prussian 'steamroller'
 

We have one battalion of the 44th Fusiliers promoted to 'Guard' status, with two battalions of von Kleist Frei Korps and  two of Jaegers ( fighting as Line in this event - this size of force is stretching my resources ! ) making up the veteran foot. Two squadrons of the newly-acquired Spencer-Smiths again represent  the von Preussen Cuirassiers, with  one squadron of von Kleist Horse Grenadiers , all rated as 'Guard', Finally one unit of field artillery seemed proportionate to the overall force.

And their Austrian opponents look like this: 

and the ( possibly worried )  Austrians
Three battalions of the Botta D'Adorno line infantry, one squadron of Grenze hussars and one artillery piece make up the defending force,  who are outnumbered pretty much two to one. 

Now I can imagine some might be thinking 'that's not going to be a balanced game' , but maybe I think the 'balanced' game is a bit of an artificial construct, and maybe one of the advantages of running a campaign is to generate engagements like this - after all, in real campaigns, the last thing any commander is aiming for is a 'balanced' battle.  Surely battles really happen when one or both sides think they have a strong  advantage, or if not, they have no easy way to escape and are forced to fight. In that respect, hopefully this is a 'real' battle. My job now is make it  worthwhile as a game, which  will require a bit of thought - I guess the measure of 'success' will be quite different for each side. I think it also helps that I am playing this solo, so there's not an 'Austrian player' who is feeling like he's on a loser from the start - I have a slightly detached view and can look at  the unfolding narrative as a whole. That's the theory, anyway. I have an idea for a battlefield setting, which will wait for next time - in the meantime, keep safe and well, everyone. 


Tuesday, 4 May 2021

Fnurban #8 : The Show Will Go On ?

We've probably all wondered, in the past few months :  "when will 'normality' return?"

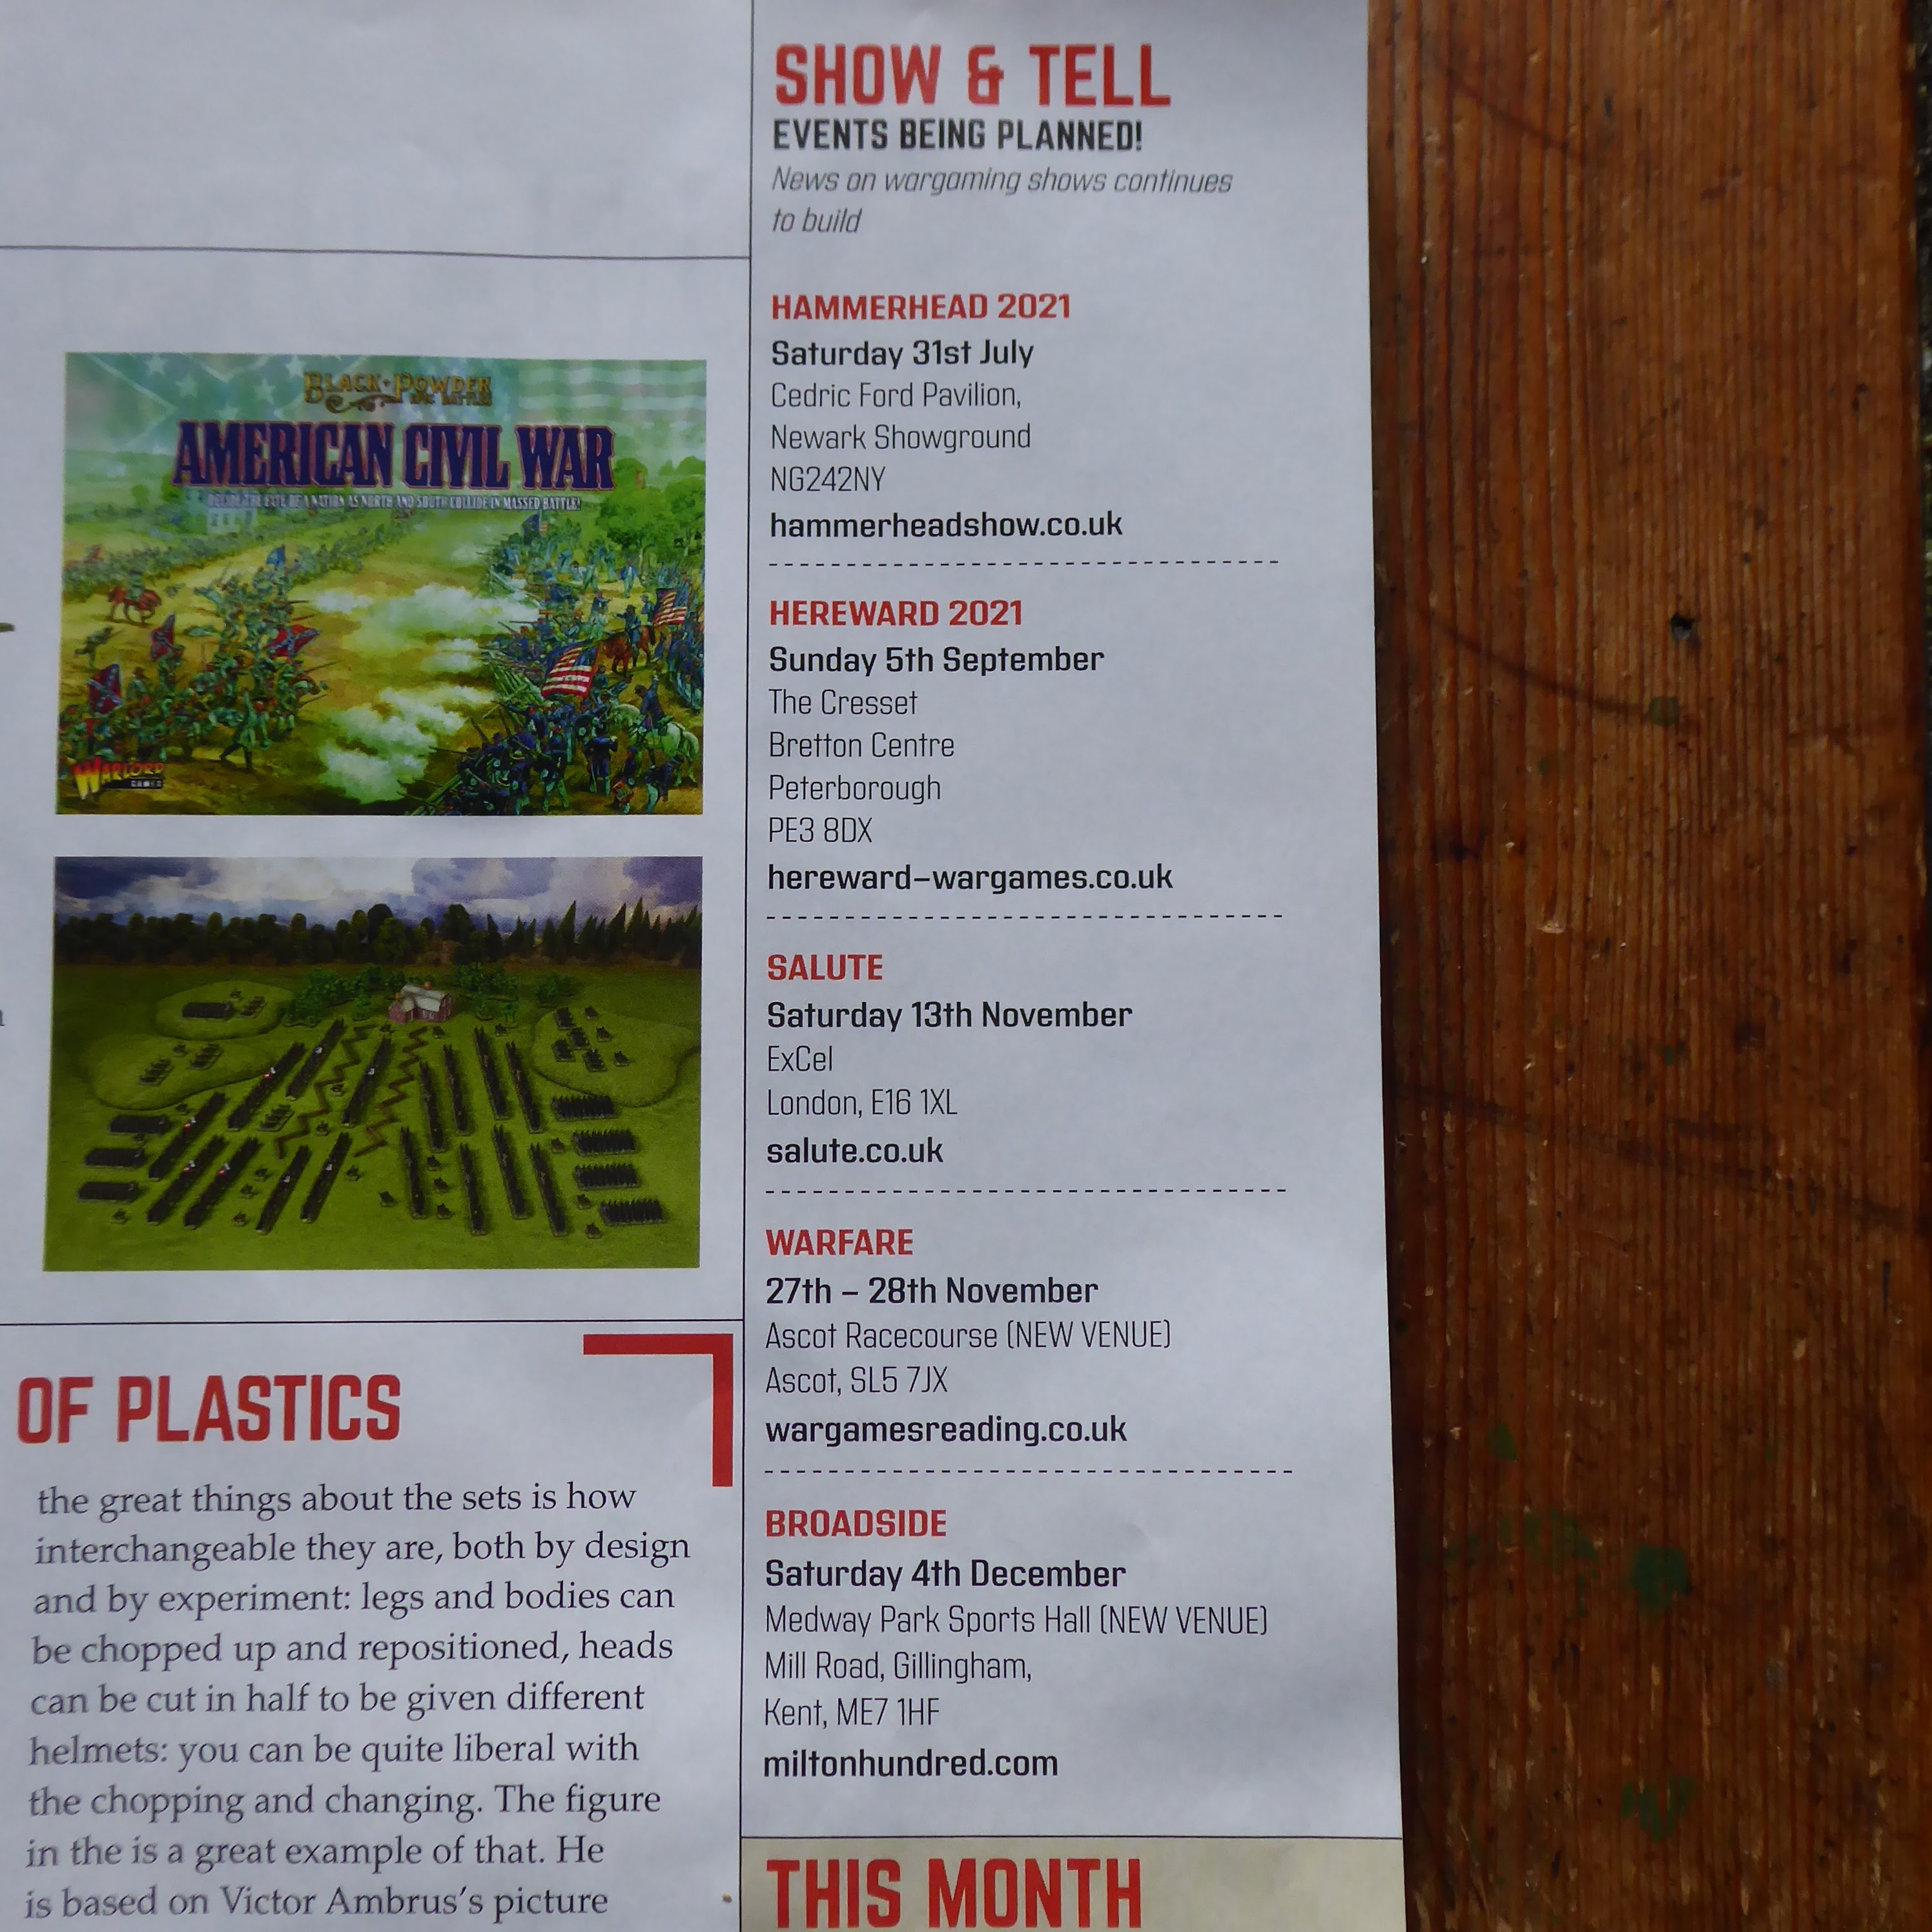
Well, while reading 'Miniature Wargames' issue 457 I noticed one signifcant straw in the wind for our hobby at least,  namely this:

Gosh - actual shows!
 

It seems that the wargames show 'circuit' is  preparing  to resume - no less than five shows planned, starting with Hammerhead, at Newark   at the end of July.  

As an example, the Hammerhead website says this: 

Update: 16th March 2021

With the speed of the Covid vaccination program, and the governments ‘road map’ aimed at delivering normality by 21st of June (remove all legal limits on social contact), we have every belief that Hammerhead 2021 will be ‘good to go’ on the 31st of July.

With nearly 4000 square metres of space across the two halls we have always been able to maintain plenty of space between tables at Hammerhead.  Because it will be a summer show this year, we can let plenty of ‘fresh air in’ and enable any ‘hands , face and space’ requirements to be fulfilled. We will be working closely with the staff at Newark Showground to create a safe environment in line with any government guidelines that may still remain applicable at the end of July.

So, how do you feel about that?  Desperate to get back to shows,  or a feeling a bit cautious about large gatherings?   For myself,  I am hoping to get a second vaccine jab, perhaps this month,  but how will I actually feel about going back to indoor venues?  I have to admit, I really don't know. There are likely to be stages, I suppose - getting back on public transport, going to a restaurant or pub, going to a gallery, or cinema, perhaps?   I suspect that a full-on wargames show is going to be one of the final stages, and there will be a lot of  'seeing how it goes',  in my case! I'm afraid  I am not one of the people champing at the bit to 'get out there' as much as possible when the restrictions are lifted. I'm much more cautious,  and I'll be keeping an eye on the infection statistics. 

The last three shows on the list are the ones I might be most interested in - 'Salute' in mid-November would be real in-at-the-deep-end stuff!  ( they already have a long list of expected traders on their website ) . Given that the  ExCel venue  was used as a 'Nightingale' Hospital in case of Covid cases overwhelming the National Health Service, and latterly as a Covid vaccination centre, there may be some interesting echoes around the place.   I note that 'Warfare' and 'Broadsword' both have new venues - the former seems to have swapped racecourses and moved to Ascot, the latter from a sports hall in my childhood home town of Sittingbourne, to a ( hopefully a bit bigger ) sports hall in Gillingham.    In the summer, Broadsword used to open all the fire doors to increase ventilation - not so sure about that in December,  so let's hope the aircon is good..   More signifcantly,  how will the virus be going by then?  Can we rule out a 'third wave' in the winter?  The news here in Britain is currently good, but if you look at other parts of the world, you can see that this thing is by no means over.  I guess we can only wait and see. Meanwhile keep well, and safe, everyone, and maybe we'll see those shows. 


Thursday, 29 April 2021

Arthur Harman rules - OK?

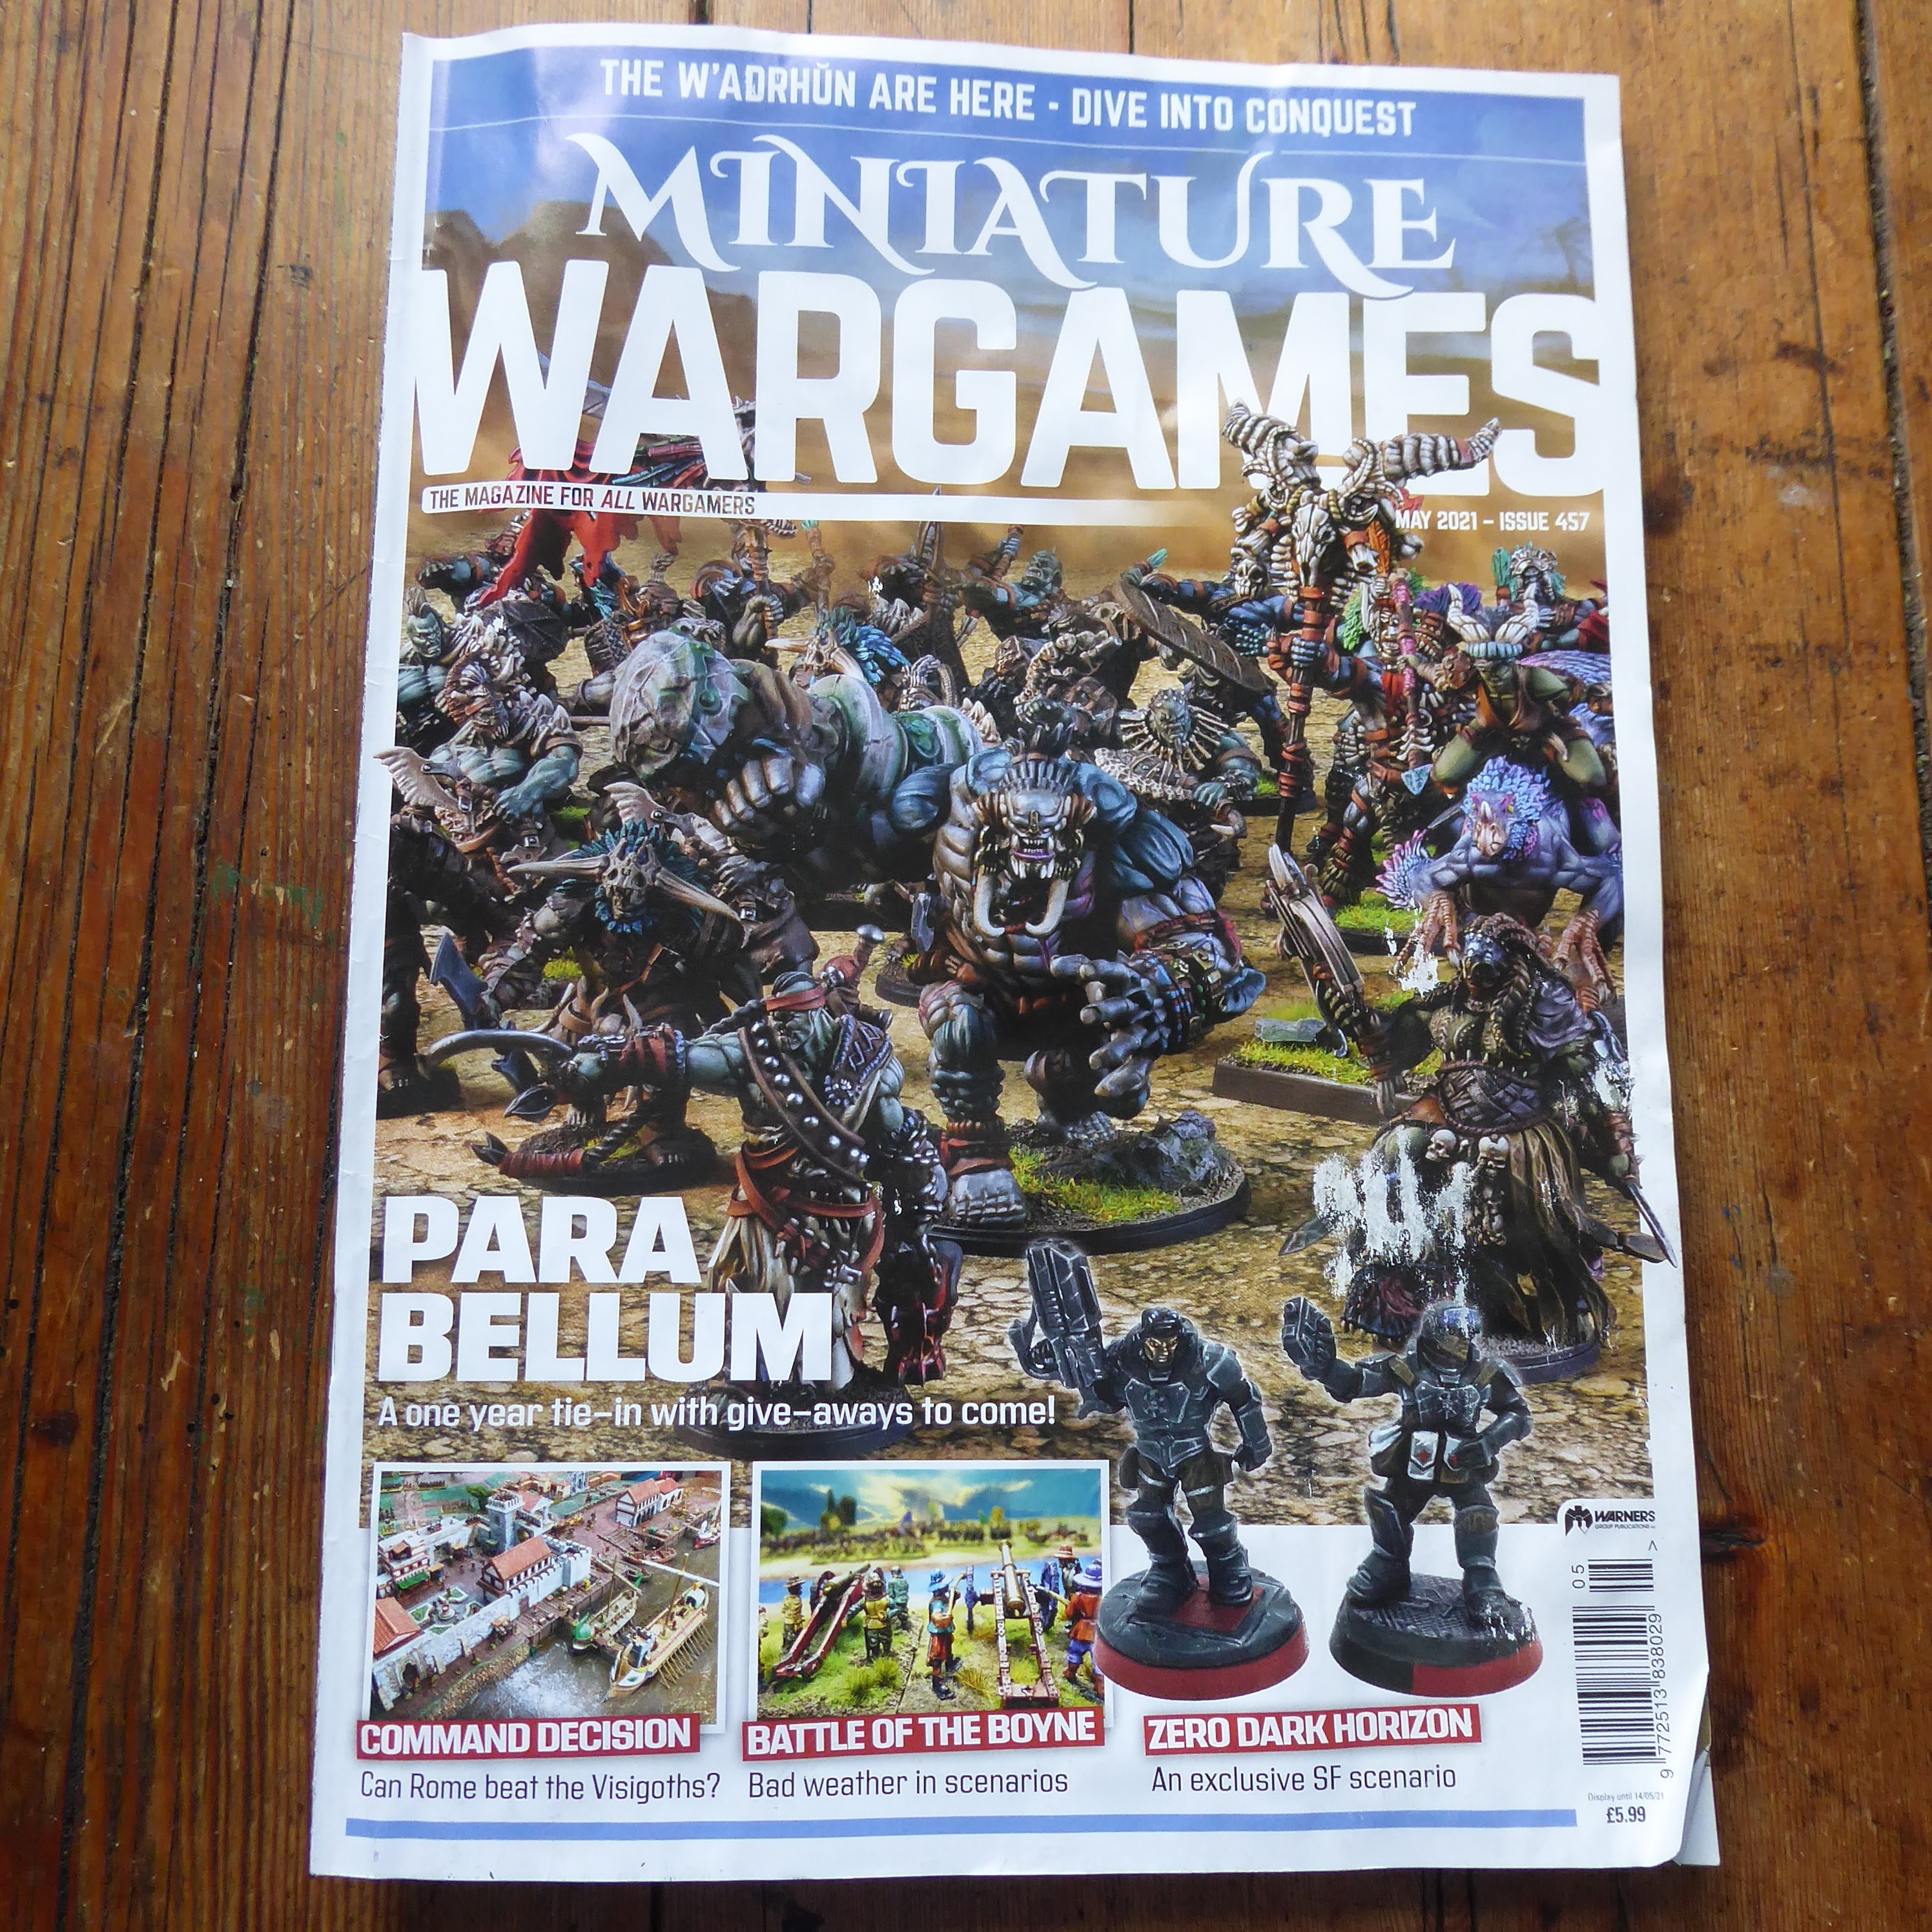
I recently picked up a copy of the current issue ( no. 457 ) of 'Miniature Wargames' magazine, and was pleased to see an article by that most  'old reliable' of authors, Arthur Harman. 

don't judge a mag by..
 

Entitled 'Fighting Toy Soldier Battles: For Shame - Simple Horse and Musket Engagements',    I'm not sure where the 'For Shame' bit has come from - an editor's gag ?   [ no, it was just too clever for me - see comments below, where  Martin S has enlightened me! ]  It describes "a simple toy soldier battlegame, that you may be able to persuade your families to play to relieve the tedium of being 'confined to barracks' during the Coronavirus crisis, while you are unable to visit your club or regular opponents".  It is  presented as a very simple child-friendly game, but  having read through it, I think there is slightly more than that going on 'under the bonnet'  ( or shako? ) , so to speak.

The game uses a square gridded battlefield ,  'the sides of the squares should be equal to the frontage of a battalion/ musketry range'  - a nice feature,  as you can fit your grid to whatever size of unit you fancy,  or fit your units to your grid (  I think my units will fit a four-inch grid quite nicely ).  The units have two important attributes :  Troop Quality  (basically Elite, Regular or Raw ) and Combat Value,  which is a sort of  combination of strength, quality and morale. When the CV is reduced to zero, the unit has to start to retire from the battle - another neat touch, perhaps, as they will not simply be swept off the table, but slowly retreat from the action (and may subsequently be forced into ignominious rout ) .  

don't try to read this - buy the mag !


In combat,  units roll a number of 'tactical dice'  based on their Troop Quality ( with possible modifiers adding or subtracting dice ). The dice are ordinary D6s ,  but they are treated rather like 'Commands and Colours' dice, with each number signifying a particular type of 'hit' such as officer casualty, artillery  or close combat.  Most interesting of these is the 'Falling Flag' hit   -  the number of those rolled  is compared to the 'Troop Quality' score of the target unit, with variable effects on morale. The dice also contribute to the effect of charges - the attacker rolls first, and the number of  'Sabres' and 'Flags' rolled has an effect on the steadiness of the defender, another clever idea. I also like the mechanism for cavalry vs. cavalry charges - if neither side breaks,  two units charging each other may pass through, turn around and  'have at it' again, which seems to capture quite an authentic detail in a nice simple way.


There's a simple Move/Fire/Close Combat turn sequence, 'first player' decided by dice, and there are rules for  Generals and ADCs, foot and horse artillery, and skirmishers. With an eye on involving children in the lockdown household, it's suggested that the general's portraits be drawn,  (an optional bonus combat dice for the best portrait..), and marked with any wounds incurred!  The whole thing occupies just  six pages of the magazine - really only four pages of text - but there are lots of interesting ideas in there. I hope I can  give them a try sometime soon -  subject perhaps to some small tweaks for the Seven Years War - and I think they may well be both fun and maybe rather intriguing.

The article is illustrated with pictures by editor John Treadaway, which are nice,  but clearly not of Arthur's  actual game - they are of a Vienna 1683 game from the Bovingdon show in 2018 - I guess in lockdown, John has to raid his archives.  In fact Arthur suggests you could use the figures from  a 'Risk' set, if you are keeping it simple and don't already have 'horse and musket' armies ( Maudlin Jack Tar, I'm looking at you.. ).  His pieces are always worth a look, and I do like his 'keep it simple' ethos - I remember an article in 'MW' a few years ago in which he encouraged us to field Napoleonic armies in as  'basic' a paint job as possible, shall we say - posh painters went a bit ballistic, but I was with him all the way.     And Arthur has of course been doing this a long time - the oldest article I have by him is from Issue 9 of Miniature Wargames, published around Xmas 1983. That was a 'Bird's Eye View of the Wars of the 19th Century' - in which players emulate the crew of an observation balloon over the battlefield, while the actual commanders sit well back from the table,  and rely on written messages from the aeronauts. Splendid, if eccentric stuff !  Here it is : notice how magazine styles have changed.. (and Duncan MacFarlane was noted for lavish illustration!), and also something of a classic article by Mr Callan on the next page..

Those were the days


Which brings us to the subject of the current incarnation of 'MW'  - and actually, I think this issue isn't bad at all.  It felt a bit thin, on picking it up, and the Fantasy-theme cover picture is not my cup of tea, but there's a decent selection of articles. Conrad Kinch is still in there, with an interesting interview with 'Dave Walker of MS Paints', who is painting and gaming despite Multiple Sclerosis and is clearly a top man ( and we think we are suffering in  a little lockdown? )  and example to us all.  Dave Tuck has a Battle of the Boyne scenario which gives a nod to Grant and Asquith's 'Scenarios for all Ages' ,   suggests simple ammunition supply and weather rules and admits to using positvely old-school large units and figure removal for casualties.   Jon Sutherland's 'Command Decision'  features Narbonne, 436AD , Romans vs Visigoths and refreshingly does not prescribe a particular rule set , and there are lots of book reviews - ooh, Chris Duffy 'Instrument of War', very temptmg... ( and reviewed by Arthur Harman, as it goes!) .  A couple of large fantasy/sci-fi articles I'm afraid I skipped, but I found that from 52 pages of editorial , there were 37 that I will most likely read. They seem to have ditched the 'Darker Skies' middle-pages insert that appeared after Henry Hyde departed, so we are back to a more straightforward fomat, I think, and that's all to the good.   BUT the price - was £5.99.  Six quid for 52  pages of reading, hmm...     

It's intersting to compare with the other leading magazines - my most recent copy of 'Wargames Illustrated' ( issue 399 ) was £5.25 for 106 pages.  ( 19 of which were advertising ), and Wargames Soldiers and Strategy' ( no 113 ) was £4.95 for 82 pages ( 17 advertising ).    By my calculation that's 11.5p per page of editorial in 'MW',  7.6p per page in 'WSS' , and 6.0p per page in 'WI'.  Quite a difference, and I wonder if  a large part of the reason for that is the larger amount of advertising ( and therefore income ) in the other  two mags,  which perhaps allows them to keep both the price down and the number of pages up.  But you pays yer money and takes your choice, and on this occasion I've bought a set of Horse and Musket rules from a veteran and interesting  'game designer' (sorry, Arthur!) for £6 - if they work out well,  that's not too bad a price?

Now I need to find  myself a simple square-grid game mat or board, and give these rules a go! In the meantime, keep safe, and well, everyone.  


Thursday, 22 April 2021

D-Day Dodgers : Reading Around

Having dwelled on the  Seven Years' War recently, and wanting a bit of change, I have been thinking a little about my tentative 'D-Day Dodgers'  WW2 in Italy project, if I might grace it with that title. As you may have already seen, I have a small force of vintage 20mm British and German WW2 figures, with more recently-acquired  equipment and AFVs, and I have a mind to use them to game the Italian theatre 1943-1945.  I have accumulated a few useful books which ought to give me a reasonable grounding in the subject, and am slowly working through them.  

The campaign started in  Sicily,  so it seems only natural that first up would be   James Holland's  recent 'Sicily 43' :   


An account of - you guessed it - the allied invasion of Sicily in 1943. So, when this book was published in the summer, it was a  'must-have'  (  and popular enough to be on special offer at supermarkets, so also a bargain ).

I like James Holland - I first read his account of the defence of Malta, which I've always been interested in, and was impressed. I've also enjoyed his WW2-based podcast 'We Have Ways of Making You Talk' with comedian Al Murray  ( who, it turns out, is no slouch on the subject ).  He is very much of the newer generation of popular military historians, including  Anthony Beevor and  perhaps originating with Lyn McDonald  ( who has, sadly, recently passed away, I gather ), who try to use as many eyewitness accounts from those on the ground  as possible, not just the 'top-down'  story of the senior commanders' thinking and the orders they issued.   Holland certainly finds a lot of witnesses, from all sides and all levels, and there are some brilliant stories: the Canadian 'Hasty Ps' attack on the hilltop town of Assoro, involving climbing a 1000-foot cliff  to reach the summit, is a particularly memorable one. Hmm..how to game that?   However,  I find that this very volume of testimony can make the book a bit of a slog at times, just like the actual campaign - especially during the description of the initial landings, the narrative would quite abruptly switch from one account to another, and there were so many of them that it was difficult to remember who was who, and where.  There are a commendable number of maps, which is great, but still it's hard to keep stopping and trying to work out where the action just moved to.  However, that is only a small criticism, it's a very good book on an overlooked subject.  

Previously I had read an older account of that campain,  'Sicily: whose victory?' by Martin Blumenson (1968, in the Purnell's History of the Second World War' series) - much more of a top-down look, and  with something of an agenda to paint the campaign as a missed opportunity, even a German 'victory' in that they managed to evacuate most of their troops and equipment safely onto the mainland.  I don't think I'd agree necessarily - as James Holland points out, this was the largest seaborne invasion ever mounted up to that time, and was planned by British and American staffs  new to working together, and intially a long way from the target. In truth, their main concern was simply that the landings  must not  fail, and this they achieved.

I have two accounts of the  Italian campaign as a whole : Richard Doherty's 'Eighth Army in Italy  (The Long Hard Slog )', from Pen and Sword books,  and  Eric Linklater's 'The Campaign in Italy' ,  the 'popular' version of the offical history , from HMSO and published 1951. 


Both are 'top down' accounts, describing the actions of Divisions, Brigades and sometimes Battalions, but not often any lower level and with only occasional eyewitness accounts. But they will tell the basic story, and I was particularly glad to find Eric Linklater's volume. He is an excellent and properly literary writer, having published many novels  ( I have mentioned  'Private Angelo' , set in this same time and place, in an earlier post )  and several non-fiction works, and his elegant prose is a pleasure to read :  the problem may be just finding the time.  Richard Doherty's book is more recent (2007) and a bit more brief, about half the length, so I suspect it will be read first!

Another useful find has been Anthony Tucker-Jones'  'Armoured Warfare in the Italian Campaign 1943-1945' in the 'Images of War' series from Pen and Sword. It gives a  very brief account of the campaigns, but concentrates on photographs of the combatants, especially their AFVs. Very useful, and it shows the rather polyglot nature of the forces, what with British, American, German and Italian types all involved, and the 'mid-war' nature of the equipment - so not all Tigers and Panthers, thankfully.  I certainly need more Bren carriers, and some Italian stuff is a must - I must look out for a Semovente, someone must do a model.  There's an inspiring picture at the front, of a unit of Churchill tanks on a typical Italian hillside near the river Marno - I can just see a gaming  table emulating that. 

Speaking of the terrain leads me to Pat Smith's  'Setting The Scene : volume 2 Creating a Wargames Layout for the Mediterranean' ,  published by the author and Steve Lampon, available from Steve's website  ( I was able to collect in person last summer from Steve's home, in Saffron Walden - I could see a wargames table set up through the window! ). 


 For what seems to be a self-published book this is pretty classy ( I think it helps that Steve runs a design consultancy ),  glossy A4 format, 150 or so pages and giving step-by-step illustrated guides to making terrain mats, mountain boards, buildings ( complete and  battle-damaged ), olive groves, vineyards, pillboxes and block houses and all manner of 'terrain clutter',  plus chapters on figure and vehicle painting.  The focus is on Napoleonic ( Peninsular War )  and WW2 ( Sicily and Italy), so I thought it would be interesting, as I think there needs to be a distinct 'look' to the games to give that Italian ambience.   There's also  guest spot from  Moiterei's Bunt Welt blog on the Italian WW2 army, which is interesting. It's all rather lovely,  I thoroughly recommend it to anyone who wants to really go for it with Mediterranean style terrain, and the authors have a couple of other books available  - one is on 'Winter Wargaming' -  so more power to them.   The only reservation I have is, I'm not sure I'm up to their standards!  There are some serious pieces of modelling in there, which are perhaps beyond my abilities and resources. But there are loads of ideas,  and some will rub off, I'm sure - for a start, Olive Groves and Vineyards are a must.. 

 And finally - a bit of a punt from a recent sale at the Naval and Military Press, I took a chance on 'The Tiger Triumphs - the story of three great divisions in Italy' .

This is an N&MP reprint of a volume from  the officially sponsored "Tiger Trilogy"  and tells the story of the 4th, 8th and 10th Indian Divisions in Italy 1943-1945.  It was originally published by HMSO in 1946, the two earlier volumes, covering  Eritrea, Syria, the Western Desert and Tunisia having been  published while the war was still going on. As I've said, I am interested in the multi-national nature of the forces involved  especially on the allied side, so I feel I can't just have generic 'British', and some Indian units seem a very good idea. The book reads well, and has descriptions of terrain and actions that may be quite inspiring for gaming the campaign. There are also orders of battle for the three divisions, which could be useful, I wonder if Colonel Badger's ( entirely fictional ) West Suffolks might have found themselves attached..?  Of course, doubtless  all the commanders, and the viewpoint of the authors. will prove to be very much 'white British',  but from reading the introduction and some early pages  the general tone is of pride and admiration for the Indian troops. I think it may  make a very interesting read. 

 Phew - so that's a lot of reading for me, and a lot of writing to describe it, I  hope it has been interesting!  I like the whole idea of  'something different' that  I hope an Italian setting will give my games, and with luck these volumes will provide plenty of inspiration.  Let's hope I can translate that to the table top!

Keep safe, and well, everyone. 

Wednesday, 14 April 2021

The End of the Affair

 We left the battle outside Rahden  at an early stage, with pursuing Prussian Cuirassiers charging determinedly against the  Austrians at bay.  I will give a fairly 'blow-by-blow' account of the ensuing battle, as ( plot spoiler alert! ) it didn't take up too many turns.

Austrians stand fast..

Von Gehirne's Prussians won the initiative and moved first in Turn 2,  bringing on their third cavalry unit ( von Kleist Horse Grenadiers ), and opening ineffective fire with their gun. Their 2nd squadron von Preussen Cuirassiers charged into action against the Austrian Cuirassiers,  forcing them back to the hill they had started from - the Prussians used the 'follow up' rule to attack again, and the dice was with them, taking 1 SP from the Austrians, quite a reverse. The Austrians fought back in their turn, their Cuirassiers pushing back 2nd Von Preussen, while the 1st Battalion Botta infantry counter-attacked 1st Von Preussen and pushed them back, too!  The fighting was really back-and-forth stuff.  At the end of the Turn, losses were even at 2 SP each.

getting stuck in - Turn 2

Turn 3 opened encouragingly for  Baren's Austrians, their gun and 2nd Botta infantry's fire taking 2 SPs from the Prussian infantry, while 1st Botta's musketry further pushed back their Von Preussen Cuirassier opponents. But the Prussians swept back - their gunners found the range and took 1 SP from their opposite number, and their Horse Grenadiers followed-up by charging the Austrian gun, forcing the gunners to retreat ( the alternative, of losing 1 SP, would have wiped them out), and following up, forcing them back yet again! This gave a small rules quandry, resulting in me concluding  that only the crew would retreat, leaving the gun behind them ( it seems unlikely that gunners would be able to trundle their piece backwards with them under cavalry attack!), I decided that if they could subsequently return to the same hex as the abandoned gun, they could resume firing. This was a major blow against the Austrians. To add to the pain, von Kleist foot opened fire on 2nd Botta, and took 1 SP.  After Turn 3,  losses still level at 4SP each.. 


Disaster - Austrian gunners do a runner

The Prussian cavalry had torn a big hole in the centre of the  Austrian position, but the fightback was determined - their Cuirassers and 1st Botta pushed back   2nd Von Preussen and the Horse Grenadiers, while 2nd Botta's fire inflicted casualties on the Prussian Fusilers. On the Prussian turn the Horse Grenadiers suffered further, losing 1 SP in the continued melee with Erzerhog Ferdinand Cuirassiers.  6SP to 4SP in favour of Austria,  perhaps the tide was turning?

 Turn 5 began well  for Austria,  Den Baren winning the initiative, and his Curiassiers hit the Horse Grenadiers for another SP loss -   but the Prussians fought back savagely.  Their Fusiliers attacked 2nd Botta, pushed them back and took the wood they had been holding, while both von Preusssen sqaudrons surged forward - 1st squadron pushing back 1st Botta, following up and then taking 1 SP from the battered infantry,  while 2nd squadron tore into the Austrian Cuirassiers, taking their final SP - the end of the Austrian horse. Disaster for the Austrians : 3 SPs lost in one turn,  gun out of action, cavalry gone.  Score at the end of Turn 5, still level at 7 SPs each lost, but things look desperate for the Austrians. 


Turn 5 - guns abandoned, no horse: Austrian foot holding on - just

Turn 6 was the coup de grace - aided by good die-rolling, the Prussians 1st Cuirassiers and Horse Grenadiers now thundered into 1st and 2nd Botta infantry, taking 1 SP from each of them, while Prussian foot and guns began to move around the open flank of the Austrian position.  But the Austrian foot were still fighting - their 2nd battalion pushed the Prussian  fusiliers out of the wood, while 1st and 3rd battalions fire forced the 1st von Preussen 'yellow riders' back,  twice. A spirited defence, but crucially their gunners had not been able to recover the guns, and those 2 SPs lost to the Prussian cavalry had pushed the Austrian losses to 9 SPs, meaning that  Den Baren's men had reached their Exhaustion Point. From now on, defensive fire and retreat moves only - and  those Prussian reinforcements would arrive soon. 

Turn 6:  Cavalry coup de grace
 -

And so to Turn 7 - the Prussians won initiative, and could now roll for entry of their 4 battalions of fresh infantry - rolled a 6, success!  An imposing mass of foot marched into view, leaving the three Austrian battalions facing  six Prussian foot units,  three heavy cavalry and two guns - surely an impossible situation?


Prussian masses march into view

And so it proved. Rupert Den Baren's men could try to make a fighting retreat, but would surely not be able to take a further 8 SPs from their pursuers to inflict exhaustion. More likely, the three battalions would simply be overwhelmed and destroyed.  Recognising the reality of the situation, Den Baren went forward to seek out his opposite number under a white flag, and agreed to surrender his remaining troops.  His previous panicky decision to abandon the city of Rahden and its fortifications had led him to this, but at least he could save his surviving units from decimation.  And so, into captivity they go - a major blow for the Austrian campaign.  If only they had stayed in the city and faced a siege or storm, they might have held out until a relief force could be sent.  Even during this battle they might have got away -  6 to 4 up at one point, and even having reached 7 SPs lost each on Turn 5, some better dice luck might have inflicted exhaustion on their enemy and allowed them to retire safely -  but now we will never know. The Prussians had the advantage of numbers and those fiercesome heavy cavalry, but their task was not easy, and their horse had performed well against a desperate defence - Fortune  ( in the form of dice )  had certainly been with them. 

What next for the campaign with a large part of the Austrian army eliminated?  Will the rampant  Prussians simply overrun them?  We shall see.. Meanwhile, I hope you've enjoyed reading this, as I did playing and reporting it. Keep safe, and well, eveyone.