Showing posts with label Air Combat. Show all posts

Tuesday, 30 July 2024

Retired Wargamers Reunited..

Last week was the second anniversary of my retirement/redundancy from work (which is not missed at all!),  and what better way than to sit down to a tabletop battle with old friends?  Having recently re-established contact with Tony and Reg, formerly (very formerly -1970s/1980s!) fellow members of Rainham Wargames Club,  it turned out that Reg lives only 40 mins drive from me, and Tony was visiting for a couple of days - so I was honoured to be invited to join them for a game. The first time in several decades that we three had rolled dice and moved figures together - and indeed, given that my gaming since starting this blog has been essentially solo.or remote (using Zoom)  this was probably my first 'face-to-face' game using figures in many years.  I must give a very big 'thank you' to them both for a warm welcome and excellent gaming! 

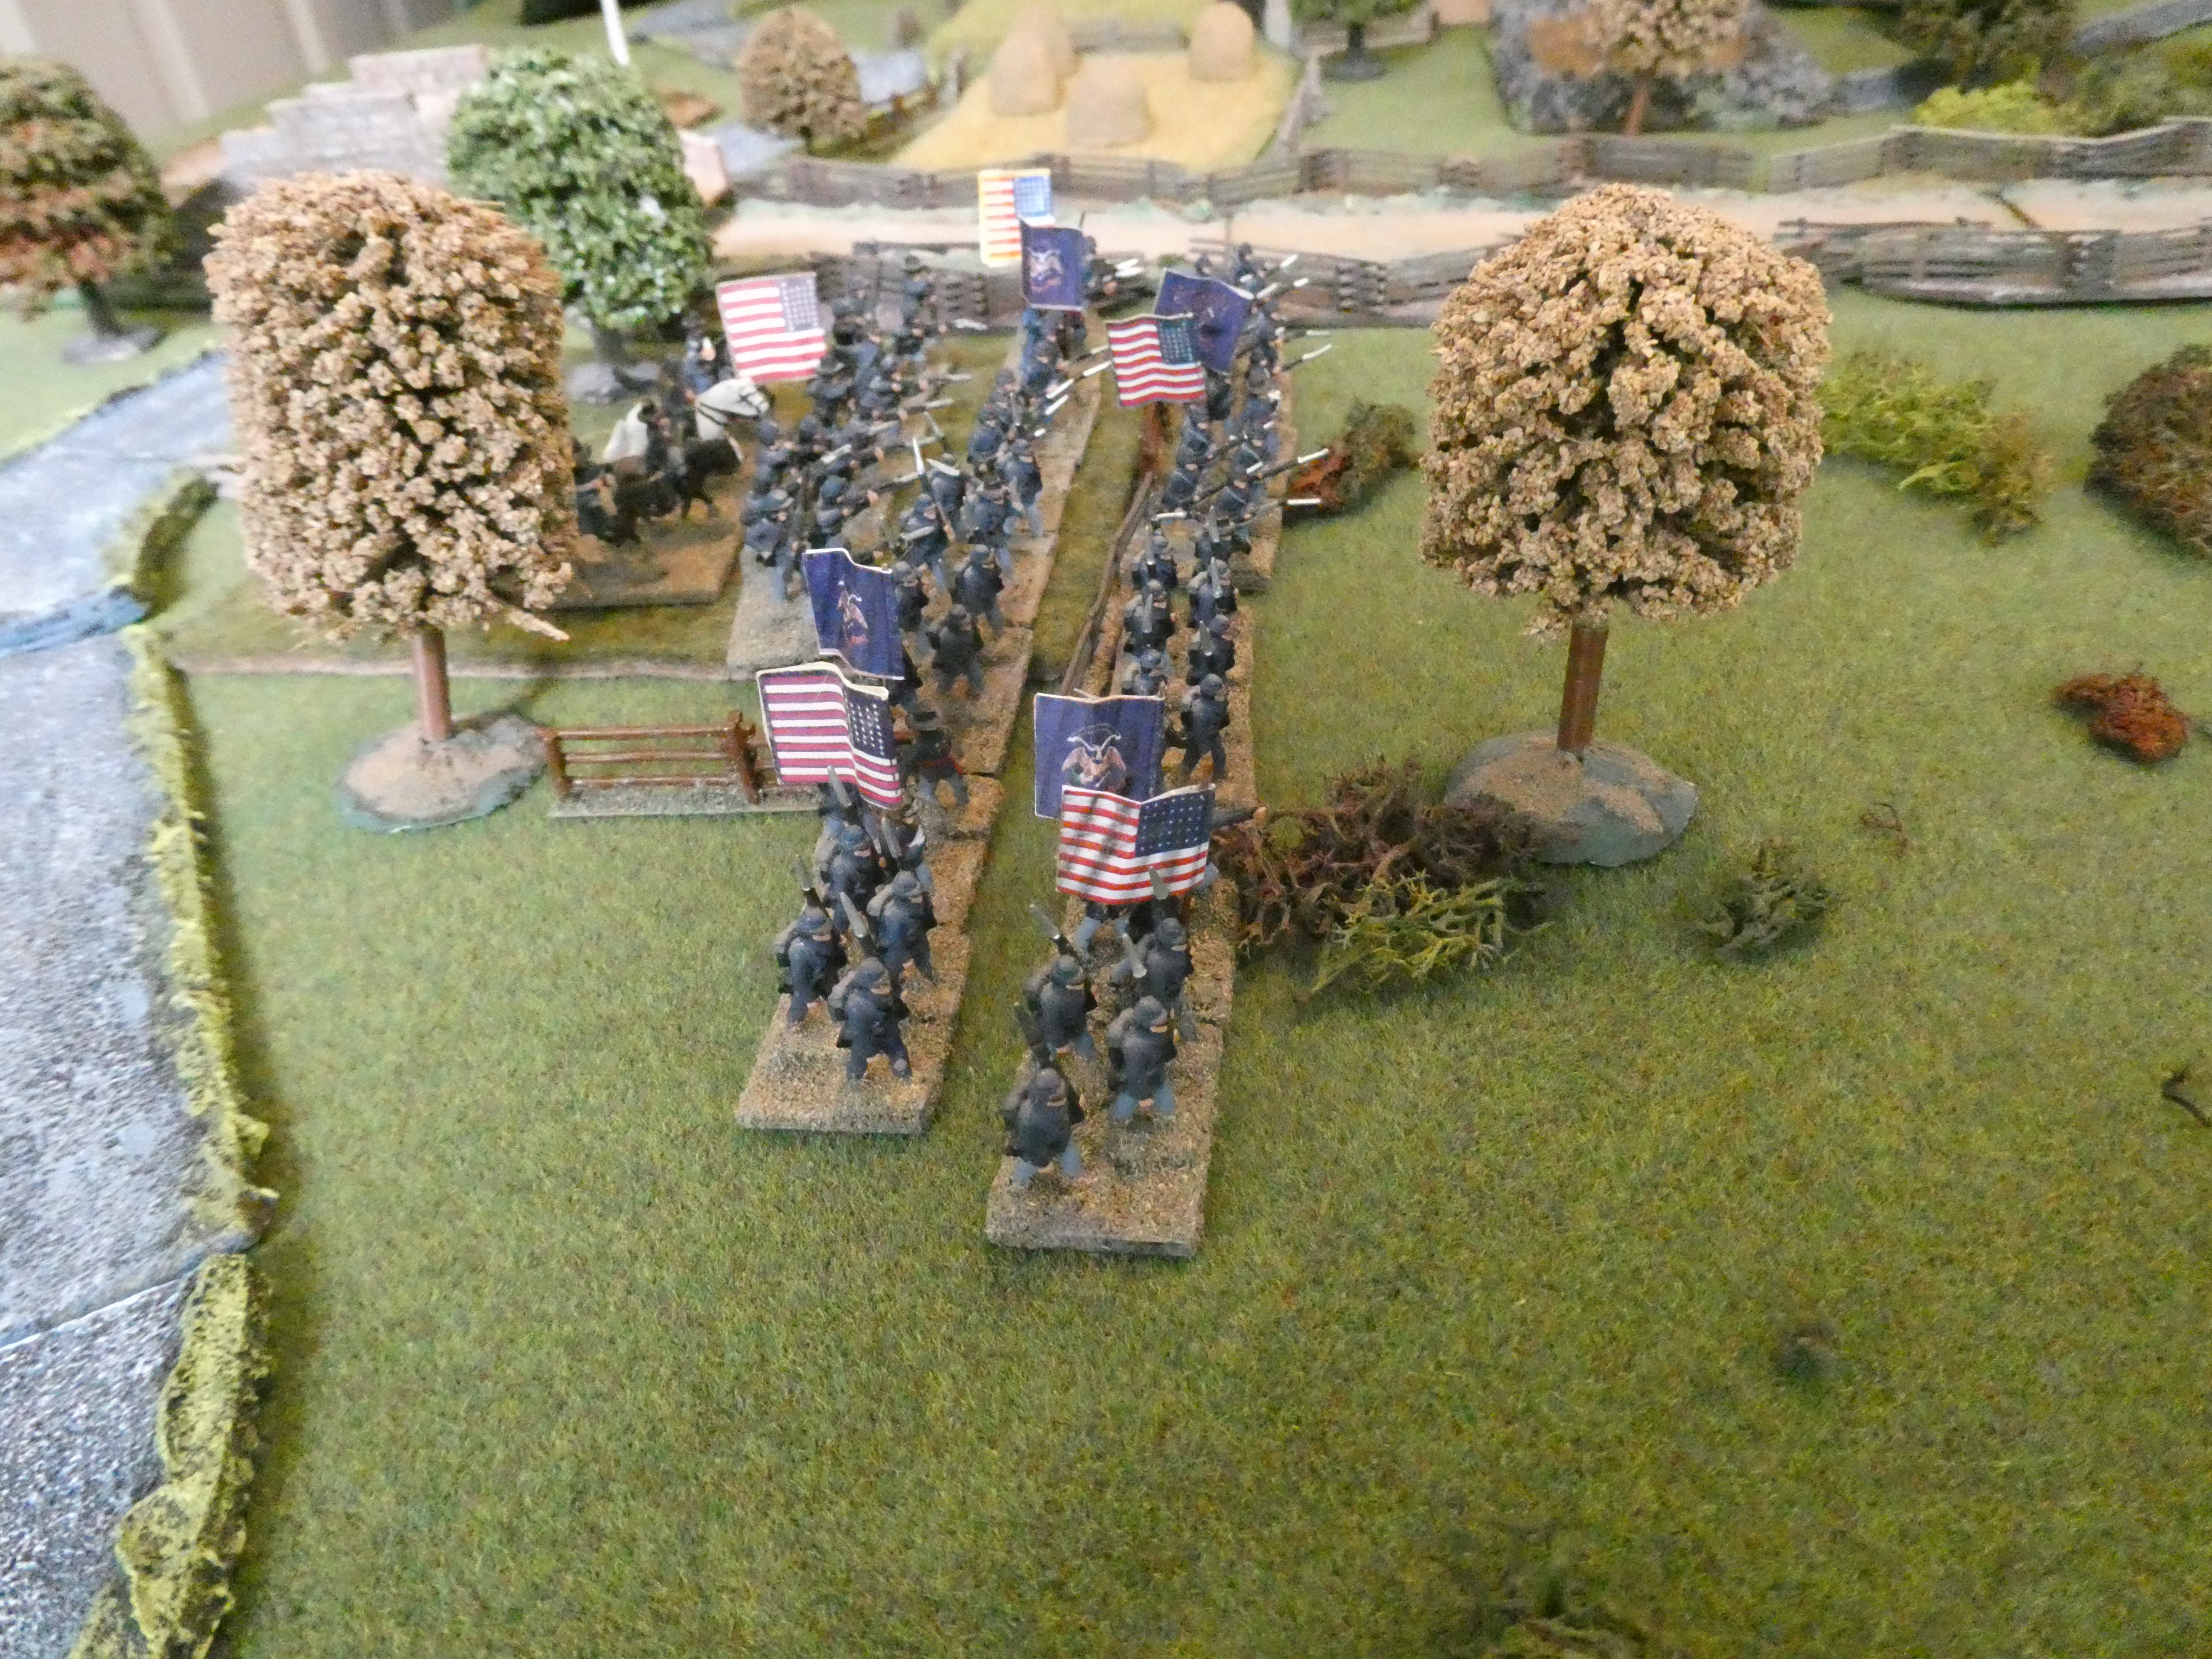
Union troops enter right - my zouaves in foreground

The main event was a game using Reg's  ACW 15mm collection (mostly Minifigs, I believe), played with Black Powder rules, with some tweaks from the ACW supplement. You can see the table above - I liked Reg's copious use of trees, scrub etc denoting  the rough terrain beyond the river, these were purely for visual effect and could be shifted to accomodate units moving through, but made the table look really good.  

The setup was that Tony and I would share the Union force, with Reg taking the Rebel side. He provided a briefing, the core of which was as follows: 

Time and Date: The date is 22 July 1862. The location is in the Shenandoah Valley near Winchester.
Forces: You are divisional generals in Major General Nathanial Banks V Corps. You each command a division, which together completes the corps.  A division consists of two brigades with supporting artillery.
Scenario: The corps has camped overnight south of Crampton’s gap on the Valley Turnpike. Orders were received during the night to move through the gap to relieve General Shield’s division which has sent word for help after being attacked by T. Jackson.
Sadly Banks died during the night from a heart attack. The corps needs to go to Shield’s rescue. The only way is through Crampton’s gap.
You have no knowledge of size or where Jackson’s forces are. He could be lying in wait or come on from either flank. If Early’s division is with him you will be outnumbered.

Notes on Troops
You both have a command value of 8, your Brigadiers are 7.
You each have a division of two brigades.
Each Brigade has 5 regiments plus artillery. The composition of each brigade is
different and you will draw for them.
You each have a spare brigade but it will cost you victory points to bring it on.
 

Victory against me [i.e. against Rebels]:
    Level 1 getting supply train across the creek.
    Level 2 getting supply train across and into gap.
    Level 3 getting supply train off of board.
 

Victory against each other :.
Points for routing my forces - per unit.
Points for Crossing stream - getting on hills and exiting board. Per unit.
Minus points for using spare Brigade. Cost reduces as time goes on.
Winner gets to replace Banks as corps commander.
 

All of which gave some nice twists to the game : Tony and I started with no idea of what opposition faced us, and had a 'co-operative but competitive' relationship in  aiming to beat Johnny Reb ( or Johnny Reg? )  but also jockeying to become the Corps commander!  See the picture above for the table layout - Union entering from the left (South), the river is crossable  by infantry at all points but guns must use one of three fords ( two at the roads ),  but the area North of the river is all deemed rough terrain, and Confederate troops may be concealed there. To the right hand side (North) of the table the land rises to ridges, with the central road going through at Crampton's Gap. 

The four Union brigades were shared (two each)  randomly between us, each brigade having its own distinct character - one containing mostly 'Green' but enthusiastic regiments stiffened by one veteran unit,  another made up of colourful Zouave regiments with high  morale plus a unit of sharpshooters, the other two comprising  more straightfoward 'regular' regiments.  I drew the Zouaves and one of the regular brigades, Tony took the 'Green' brigade and the other regular one.  Not being an ACW expert and having never played Black Powder, I thought of myself as an inexperienced Division commander, in his first campaign. Maybe I was acting the son of a US Senator, with no military experience,  who had joined up to do his bit for the Union and been gifted a Division  to  command after a bit of Senatorial/Parental string-pulling?  I was happy to watch and learn from my more experienced colleague, and I figured he was probably going to get to be the Corps commander! 

I knew nothing about Black Powder and was pleasantly surprised - the simplicity of the rules made them easy to pick up, and  allowed the game to move along at a good pace, with quite large forces - the Union commanders had 20 regiments between them, but this didn't seem to be a particular  burden. The 'command dice roll' mechanic is  simple  (each Brigade Commander rolls 2 dice for each order they issue, requiring to score less than or equal to their command rating for the order to be successful )   and seemed to work pretty well, ensuring that not all orders got through or got obeyed, but also that units could obey the orders with different levels of enthusiam - taking a normal move, or a double or even triple! You need to be careful how you describe the orders you are suggesting - 'advance as far as possible' can spring a surprise if you roll up a triple move, as I was to find out.  

The 'dice gods' tended to take a hand with interesting results - my Zouave brigade was more keen than I expected in marching up the right-hand turnpike ( I did specify 'go as far as possible' ) with the result  that the leading regiment was caught in column by a volley from Confederates concealed behind cover on the ridge - causing some damage and disorder, and hurried re-deployment into firing line!  The brigade shook out into lines and began a slow advance towards the enemy lining the ridge, exchanging fire and giving and taking hits and 'disorder' results.  The firing mechanism was simple but gave reasonable results, I thought - aside from casualites,  a 6 on the 'to hit' dice caused disorder to the target for the next move, reducing their effectiveness, so with luck you could 'keep their heads down' while you advanced, unless you took a disorder yourself!    . 

Zouave brigade shooting its way forward..
 

On the other hand, my 'regular brigade' started off steadily advancing, crossed the river OK but then on hearing the firing as other brigades made contact, failed a string of command rolls and basically sat tight, going no further forward, even when my Divisional commander galloped over to give direct orders! I pictured my inexperienced commander perhaps trying and failing to persuade his brigadier that he really ought to finish lunch and get the men forward, and not get too involved with that looted whiskey bottle...

'Regular' brigade having a long lunch.. 
 

What with all the excitement I didn't take many pictures, but I can give an ideas of the main features of the game : essentially while my chaps either got embroiled in a firefight or sat things out, Tony was much more dynamic and aggressive, and made good use of his 'green' brigade on our left  - the 'green' units had lower 'stamina' (taking less hits before having to check morale), but were also more likely to get stuck in with a charge to contact, so Tony used them to lead the attack. 

Tony's 'cannon fodder' lead the charge
 

He expected them to be cannon-fodder, I think, hopefully weakening their opponents for the more experienced brigade to finish off - but one of the 'green' units charged in and just would not be repulsed, hanging in there for several turns of melee, which allowed their veteran regiment comrades to punch through the confederate line and take the ridge. Great work!  Tony then had another whole brigade coming up right behind, ready to storm over the ridge - the Confederate position on our left now  looked very fragile in  comparison. That forced Reg to move reserves over there, with the ironic result that a  great big gap opened up in the Rebel position in the middle, which my regular brigade could have just walked through, if only I had been able to get them to move! 

The ridge taken (top left), Rebs look hard-pressed! 

That was pretty much how it ended; the Confederate right was hard pressed by Tony's aggressive advance,  their left holding up well  in a firefight with my Zouaves. It occurred later that neither of us thought to send any units straight up the central turnpike and through the gap, maybe we both  assumed that would be storngly held and therefore avoided it - we assumed wrong! So the game was pretty much a draw between Confederate and Union, but in the competition between Union commanders, Tony won the prize and would assume command of  V Corps. Well deserved!   I was happy to have a learning experience with the rules and see how they worked,  and what tactics might work best,  and I thought it all went pretty well - except for those command rolls!  


view from the Confederate left

As already stated, I liked the simple mechanisms of the rules, which made it easy to get a fairly 'big battle' moving along, and with what seemed like a reasonable ACW period 'feel'.  I'd say the biggest drawback with the rules is the size of the rulebook, which led to a few instances of play being held up while players leafed through the book for a rule clarification. I gather there is quite a lot of 'fluff' and 'eye candy' in the rulebook, which slows down any search. Also the 'basic rules plus supplements' approach tends to muliply this effect, since you need to check in the supplement too, in case it overrules the main rulebook!. But those issues would lessen with further experience - Reg summed things up when he said he has just  played so many more games since finding these rules,  just because they run so briskly and simply, giving a decent chance of a clear outcome to the game. ( Incidentally, for a contrasting view of the same rules, I enjoyed a post from Trebian at Wargaming for Grown-Ups - in particular the comments below that post, which include a pretty good, positive and constructive  discussion between Trebian ( Graham) and Professor Phil Dutre : both making good points, I thought ).

I'm afraid I'm not going to rush out and spend £35(!) on the Black Powder rulebook  (and another £20 for a 7YW supplement?) - sorry Tony! But I'd be only too pleased to join the gents for more games - in fact there were discussions about an ECW game, using the related Pike and Shotte set, which sounds right up my street - watch this space. 

Just to round things off, Tony also took us through a try-out game of Blood Red Skies, the WW2 aerial combat game also from Warlord Games ( Tony is a big fan of Warlord, though rumours of him being on a commission from them are strongly denied..) .  I was very interested to try this, as WW2 aerial games are a favourite that I rarely get to play. 

opposing formations close..

 Please excuse the lack of a nice gaming mat in the pictures, but it was only a trial run.. The scenario was cut-down version of a Luftwaffe surprise attack on Manston in 1940 - Tony took the Germans with a formation of He111s escorted by Me110s,  while for the RAF Reg had Hurricanes (furthest from camera) and I had Spitfires and Boulton Paul Defiants - which were bound to be 'interesting' to use!  As you can see from the close ranges, we very quickly got to 'mix it' with the raiders : 

and getting stuck in!
 

Reg and I soon learned to be wary of the battery of cannon in the nose of the Me110 - Spitfires and Hurricanes were a bit under-gunned by comparison, so don't go for a frontal attack on them!  We lost a couple of Hurricanes and a Spitfire, I think, and were on the verge of having our whole formation broken and forced to retire, but just by the skin of out teeth we won by shooting down 2 of the 3 Heinkels and forcing the raiders to turn for home. A slightly pyrrhic victory! Good fun though, and interesting - admittedly there was quite a lot to take on board with absolutely no prior knowledge of the rules mechanisms, but I'd certainly give it another go.  The game takes an interesting approach to the eternal problem of depicting altitude, and the advantages of being higher than your opponent, and how to portray that in an essentally two-dimensional setup. They have a concept of planes being 'advantaged', 'disadvantaged' ( denoted by the 'nose up' or 'nose down' attitudes of the models ) or 'neutral' . This seems to roll up factors like height, speed and pilot ability into one of those 3 settings for each aircraft at any given point, and the players can spend 'actions' in their move to get into a better level of advantage - I think you can't shoot at another fighter unless you have a better level than them. That seemed quite an ingenious concept. Also worth noting that the rules group aircraft into units, with morale effects, so if losses get too high the unit will be forced to retire rather than every 'plane for himself', which I thought seemed right. So, another game that I'd be interested to try again, and test my supposed expertise in the subject matter. 

Overall that was a pretty good re-introduction to face-to-face gaming, and a very big thank-you is due to Tony and Reg inviting me, your enthusiasm  is highly infectious. Thanks both of you, that was really enjoyable!  Let's hope we can do it again before too long.   

Now I am trying to get back into a painting routine, hopefully finding a shady spot in the garden in the current hot weather. I have some French 7YW infantry progressing nicely, and a possible diversion into a completely different period and scale (oh dear..)  And still need to set up and play a WW2 Italian campaign game with Rapid Fire Reloaded - later this week, perhaps. Until then keep well, everyone.

Wednesday, 31 January 2024

Wing Leader: Air Combat Over China, 1942

I have owned a copy of the  aerial combat board game Wing Leader : Victories 1940-1942 for several years (pre-pandemic, at least) without really finding the time to give it a proper go. It's a very interesting game, so I've been glad to finally devote some time to it, and at least play the first couple of scenarios.


Among the aspects that I found interesting were (i) the counters represent 'units' of aircraft, specifically Flights (about 5-6 planes)  and Squadrons  (about 10-12 planes) rather than single aircraft - this seems appropriate as it was generally how air battles were run in the period concerned -   and most interesting, (ii)  the portrayal of  altitude.  

It has always seemed to me that the absolutely most important factor in portraying  air combat must be the height that the aircraft are at. Read any eyewitness account of aerial combat - having height advantage (which translates into speed advantage, for attack or escape ) is crucial. You might argue that in 1914-1918, combat once joined tended to be mainly turning fights ('dogfight' is the perfect word!),  but 1939-45 saw the triumph of height and speed against manoeuverability, as the pilots of nimble but lightly-armed and armoured Japanese and Italian fighters, for example, found to their ultimate cost against American and British aircraft built to prioritise height, speed and heavy weaponry. 

All the game systems that show aircraft moving over a map of the land, with markers denoting  altitude,  just don't look right to me: the aircraft seem to move more like ships in a sea battle game, or tanks on the land.  Things can be improved by putting the models on stands with adjustable heights, but that always seems a bit awkward too, and quite difficult to put together.  A solution was suggested 45 years ago (ulp!) by Mike Spick in his book Air Battles in Miniature - he dispensed with 'depth' on the table, and having its two dimensions represent (i) distance along the ground and (ii) distance above the ground. The model aircraft were  shown in profile, the altitude and attitude (nose up or down)  of the aircraft were perfectly represented - it looked like an air combat!  As I've mentioned before, as a youngster I was enthralled by Mike Spick's book, and a few of us fought some exciting (if completely unhistorical) mass air battles at our club using 1:72 scale models 'cut down the middle' - I can tell you that a B-17 in that scale looks pretty impressive! Happy days, indeed. 

 Therefore it was fascinating to see that the Wing Leader designer Lee Brimmicombe-Wood has taken Mike Spick's concept and used if for his game - the unit  counters show their aircraft in profile, and the board represents distance along the ground and height over the ground in the same way.  As an example, here is the intial setup for Scenario 2 'Birthday Present' which I have played through:   


And a close-up of the Japanese raiders, stalked by American P40s:


With apologies for variable quality of photos in this post, I hope you can see how the format works. The scenario is set in April 1942 near  the Chinese city of Lashio.  A Japanese raid is launched, with two squadrons of Japanese Ki 21 'Sally' bombers ( 12 aircraft each) escorted by 1 Squadron (12 aircraft) and 1 Flight (6 aircraft) of Ki-43 'Oscar' fighters.  American forces of 1 Squadron (8 planes) and 1 Flight (4 planes) of P-40B Warhawks, plus a Flight (4) of the improved model  P-40E  are sent to intercept, with the P-40Bs climbing from below a layer of wispy cloud toward the Japanese formations, and the P-40Es  approaching from behind.  On the counters, Squadrons are  denoted rather neatly by showing two aircraft profiles on the counter, Flights by only one. 

Movement rules are very simple - it's basically 2 movement points (MPs)  for bombers and escorts which have not yet been alerted to the presence of the enemy,  3 MPs for  fighters operating independently as interceptors or a 'sweep', and usually 1MP per square in level flight, and 1MP if changing facing by  more than 90 degrees.  If they dive, add 1 MP/square  - and climbing one level requires more MPs, depending on the aircraft type and current altiude (for example P-40Bs take 2MPs to climb 1 level starting from levels 4 to 9,  3MPs if starting from level 10 or higher).  This is quite a contrast form the old Mike Spick system, which I seem to remember involved calculating each aircraft's speed to the nearest 1mph, and moving correspondingly precise distances in mm, then re-calculating according to changes in height and throttle setting - it was all admittedly a bit like airborne Bruce Quarrie or WRG rules..! 

The game introduces the concepts of  'Vectors' and 'Tallies', markers for which can be seen on the board. Each interceptor unit starts with a 'Vector' which is the target square their ground controller has directed them to aim for,  but they can then attempt to spot enemy units, taking a die roll check which is modified for distance, weather conditions (those clouds)  etc. If successful,  the Vector counter is flipped to 'Tally' and placed on the enemy unit that was spotted, and the interceptor unit can then move to attack the enemy unit.  The sequence of movement means that the target  unit has to move first - thus if you spot ( Tally )  an enemy unit, you can follow it and move to attack.  All fighter units can Tally, and the result can be a 'chain of Tallies' which deternines the order of movement -  quite a neat system for representing the importance of spotting and tailing enemy aircraft. The poor old bombers have to just lumber along in straight lines, I'm afraid, and always move first.. 

Turn 1 : 'Tallies' obtained, action will follow..
 

In our game,  early on several Tallies were gained and had interesting effects - the P-40E ( labelled 'P') unit spotted the rearmost bombers (unit 'Y') and climbed, ready to swoop, but in turn were Tallied by the Flight of Ki-43s ( unit 'D' ),  who in their turn were spotted by P-40B Flight 'B'. So a 'chain of tallies' occurred, and that determined move order - first bombers 'Y', then P-40Es 'P', then Ki-43s 'D' and finally P-40Bs 'B' - several levels of 'cat and mouse' being played! Meanwhile the remaining P-40B squadrom 'A' had seen the leading bombers 'X' and climbed to engage, but the Ki-43 Squadron 'A' remained blissfully unaware ( and in this scenario have no common radio 'net', so can't be alerted by their comrades ) and just beetled along with the bombers, having a lovely day..

However, that squadron 'A' of Oscars woke up in the end,  spotted P-40B squadron 'A' below them, and dived to attack through the wispy clouds, while the other units were all still closing in on each other in their chain of Tallies.  Combat commendes in the bottom left of this picture, from Turn 3 : 

Turn 3 : first combat, and 'chain of tallies'
 

Once two or more opposing units reach the same square, combat ensues, and this is a bit more involved. The basic mechanism is to compare combat values for each aircraft type, work out the differential between them, then roll dice for 'hits' against a combat table where the differential denotes which column to use - so if your combat value is better, you should get more hits. The attacking unit can choose whether to use 'Turning Fight' tactics or 'Hit and Run' - different aircraft types can better at one or the other (the Oscars are better at Turning, P-40s are better at 'Hit and Run'),  and there are modifiers for 'Veteran' or 'Green' units, whether climbing (hence slower) or diving, or formation has been distrupted, etc. 

aircraft stats cards are rather nice
 

Each 'hit' then triggers another die roll, modified by 'Firepower' of the attacker  and 'Protection' of the victim - this can result in no effect, a  damaged  ( 'Straggler' ) aircraft or a 'Loss'  representing one plane destroyed - remember your unit may be a Flight of say 6, or Squadron of 12.  Obviously if all 4 or 6 in your flight become Losses, the unit is eliminated - but usually formations  will break up long before that - which leads us to unit cohesion. 

After hits and losses, there's a Cohesion check for every unit in the combat, which is rather akin to morale - after a bout  of combat,  your formation may be disrupted and therefore less effective, or it may simply break up altogether.  I quite like this idea, as it reflects the common experience of pilots reporting going into a combat where the air seems full of machines of both sides, only to suddenly find themselves seemingly  alone in the sky  as all formation has been lost, and they might as well head for home.  This has some interesting implications,  in that a unit could attack an enemy unit from a good position, roll well in the combat, score  several hits and convert them to 'kills', but then roll low in the 'cohesion ' check and become 'broken' because the pilots have lost touch with each other, and are  obliged to head for home. Flights are more likely to suffer this than Squadrons, and Fighters more than Bombers, who after all depend on keeping close together.   This mechanism can mean that combats can be rather short, and highly unpredictable!  

In my opening fight between Ki-43 Oscars and P-40Bs, the attacking Oscars chose 'Turning fight' which gave them an advantage, and gained for being 'Veteran', so rolled on the '+2' differential column - rolling 7 on 2 dice gave 1 hit on on the P-40s. In turn the Americans, at a '-2' differential , rolled '10' and also got 1 hit.  Then in the determination of losses, the Oscars rolled poorly and suffered from their poor armament ( low 'Firepower' ) - so the 'hit' had no effect, but the P-40s rolled higher and had better Firepower, and claimed the first kill of the game, as one Ki-43 went down, presumably in flames..  In the cohesion checks, both squadrons suffered one point of disruption, but remained unbroken - it takes 2 disruptions to break a squadron.  So the combat continued in the next turn  - an actual 'dogfight'.. In Turn 4, neither side could score any hits, but the unfortunate P-40 squadron 'A' rolled low in the Cohesion check, took another Disruption level and was thus 'Broken' - and out of the fight, with the small consolation of having claimed one Ki-43 'Kill'. Units are brittle in this game!

Turn 5 : Oscars, Sallys and P-40Es get stuck in
 

The other units on both sides continued stalking each other, and on Turn 4 the Flight of P-40Es ('P')  caught up with the rearmost squadron of  'Sally' bombers , shooting down one bomber , only to be caught up with on Turn 5 by  Flight 'D' of 'Oscars'.  The fighters battled it out, each Flight scoring one 'kill' on the other - but crucially the P-40 Flight failed its Cohesion roll and took one Disruption point - enough to break a Flight. So by turn 5,  two of the three US units had been Broken and forced out of the fight - actual losses standing at 1 P-40E from the US force, and 1 Ki-21 'Sally' and 2 Ki-43 'Oscar's from the Japanese. Interesting - despite more  casualties, the Japanese  formations had held together better and were gaining the upper hand. The remaining  P-40B Flight comprised 4 aircraft ( and were 'Green' pilots ) now up against about 40 Japanese planes!

Perhaps any sensible US pilots would have dived for home at this point, but I decided these guys were keen to fight - they had a Tally on Ki-43 Flight 'D', though were by now also being stalked by Ki-43 Squadron 'A'. So inevitably on Turn 6, all three units met in a climactic combat.. 

final mass brawl: 4 P-40s vs 16 Ki-43s..

 With the Ki-43 Squadron 'A' moving last they were the attackers and chose a Turning fight, which gave them the advantage, plus being Veterans against Green, and having two units agianst one - the Japanese player then rolled 11 on 2 D6, scoring 4 hits! The P-40s scored none, unsurprisingly. Those 4 hits could wipe them out - in the event, they suffered one Loss and one Straggler (damaged), thanks to the Oscars' light armament.   In the Cohesion check, the P-40 flight took one disruption point and was Broken - no suprise there! But it didn't go all the Japanese way, as the ki-43 Squadron 'A' also took one Disruption point, which added to one from the previous combat, left them Broken too.  Broken units must make for home, so with all 3 of its units now Broken, in effect the US force was finished.  

Turn 7 : P-40s dive away, but are pursued
 

Broken units can simply drop out of the game by mutual player agreement, and I had done that with all previous examples, but it's not automatic, and they may be forced to try to escape, pursued by the enemy - so I thought I would try that with my plucky 'Green' P-40 Flight. Accordingly on Turn 7, the P-40Bs dived away towards their baseline - but were pursued by the remaining Ki-43 Flight, who continued the combat with some advantage.  The 'Oscars'  scored 2 hits , which resulted in 1 more Loss to the P-40s - now reduced to just two planes, one of them damaged. They were saved finally by the Cohesion check - after several rounds of combat ( depletion of 'ammo' is tracked and this reduces cohesion ), the Ki-43 Flight failed its check, and was also required to make for home. With that, all fighter formations  on both sides had broken up and retired to base, leaving the two Japanese  bomber squadrons to continue on their mission - this being to simply reach the American baseline and release their bomb loads. With no opposition remaining this was a done deal, and the game ended.  A tot-up of Victory Points (basically 1 VP per fighter Loss, 2 VPs per bomber, and 6VPs per unbroken Bomber Squadron reaching 'target') followed.  Losses were 2 P-40Bs and 1 P-40E  (3VP) versus 1 Ki-21 and 2 Ki-43s  (4VP), but with 12VP for the unbroken bombers, the Japanese had scored enough to claim a victory - as was pretty much apparent. 

So there we are - I have strapped in, started up, taken off and flown my first  missions, and returned to terra firma relatively unscathed and with a little more confidence to face further sorties. I must admit I rather like this game system, not least because of its use of  Mike Spick's clever concept of portraying the all-important third dimension  ( I have never understood quite why other rule-writers have not followed his lead in all these years! ).  The movement rules are simple but effective, and I like the 'Tally' system.  Combat rules with their three stages of calculating advantage and hits, incurring losses, and checking cohesion took a little getting used to, but quite soon seemed to flow quite naturally. The 'Cohesion' rules did give me pause slightly, as they make fighter units (especially smaller ones)  very fragile once committed to combat - they can seem like a one-shot weapon, and combat can be pretty brief.  I did wonder if that was a bit too impactful  -  I suppose a possible 'tinker' with the rules might be to increase the number of Disruptions that cause a unit to become 'Broken'? But would that then mean long,  drawn-out combats and unrealistically high casualties?   If the Cohesion rules are giving a good version of what happened in reality - and I think they might well be - then I should be satisifed with that, perhaps. One is not playing the role of a single heroic ace fighter pilot doing battle at 'Angels One-Five',  but more likely the Wing Leader, or even the  Ground Controller watching plots moving on his radar screens and plotting tables,  committing squadrons to battle and hoping for the best as you listen to them excitedly reporting ( or not ) the outcomes over the radio..       

Now so far, of course I have only used the basic rules - there are 'Advanced' rules still to come, covering among other things Drop Tanks and fuel limits, special tactics, special weapons, Jets and Rocket Planes, Surface Units and Flak Units, Barrage Balloons,  and last but by no means least,  Bombing.  I'll try to take it slowly!   I like that the game covers 1940-1942 only - the 'early war' period is just as interesting in the air as on the ground, as the combatants are on a learning curve and pre-war concepts  and designs are tried and sometimes found wanting. Me-262s and Mustangs can wait, I want to try Gladiators and Fiat G.50s first!  There are 23 scenarios in this edition, covering China,  the Eastern Front, the Battle of Britain (of course!), Malta, Greece 1941, the Pacific, France 1940, the Western Desert, and France 1941-1942. There's a huge Dieppe 1942 scenario with about 15 units each of RAF and Luftwaffe, and a Midway scenario where 5 units of Japanese 'Zeros' have to try to deal with 3 times their number of American Fighters, Torpedo- and Dive-bombers in multiple waves - challenging stuff indeed.   On a much more modest scale the third one in the scenario book is 'Stalingrad Airlift' , whereby 2 units of He-111s acting as supply carriers have to fly very low, escorted by a single Flight of Me-109Fs  (4 machines),  and are intercepted by 2 squadrons (18 planes!) of Russian Yak-1s. The Me-109s have 'Experte' ( i.e. an Ace ) status and the Russians are 'Green', but it will be a hard one for the Germans, I suspect - they'd better do well on the Cohesion checks! 

I hope this has been interesting for anyone thinking about  WW2 aerial combat games  and looking for  a different and interesting approach -  I think you can see this fits that bill.  I am quite pleased with the game, and will try to work my way through the scenarios.   Hmmm... do you think it could work on a 'bigger scale' ?  I mean , a board with  larger  squares, and actual models for the units - perhaps 1/144 kits could be used? It could look really good at a show(!)..  Does the spirit of Mike Spick look over our shoulders..?

Now I really need to crank up the painting production line - there are 7YW, WW2, and Pike and Shot waiting for attention, and some gaming with such figures should also be lined up.  A planning session is required, and then some execution, to be shown in future posts. Until then, keep well, everyone ( that means YOU, Ray..hope you're on the mend! ).