Wednesday 30 December 2020

The Grenze Who Stole Xmas..

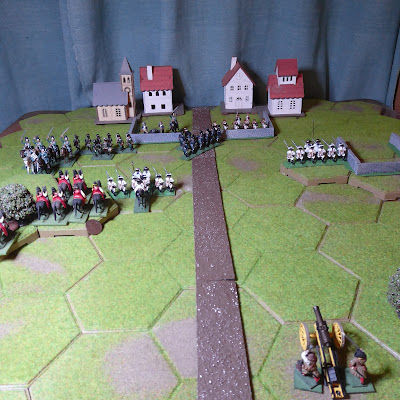
 Twas the night before Xmas... and in the small town of Weihnachten,  Prussian troops warily guarded the wagons containing supplies for their  seasonal feast, having been warned that Austrian Grenzers were in the area.. 

Wot, no hexes? Prussians await old-school onslaught
  

Having recently acquired some very pleasing  model houses from The Works, I found that as they are really table decorations, they actually light up.  So, a night action seemed very much  in order. Not played too seriously, of course - this is the Ragged Soldier's  works Xmas 'do'..

I've been meaning to try ( I  confess, for the first time )  the elementary rules from Young and Lawford's 'Charge' , and this seemed an ideal opportunity - I have just about enough figures to stage a small action, similar in scale to their 'Blasthof Bridge'.  So, the opposing forces as follows: 

Deployed in and around the town, the Prussians under the command of Generalleutnant von Krapfen  consisted of  : 

                44th Fusiliers  ( 22 line infantry ) 

                Von Kleist Uhlans  ( 16 cavalry  ) 

                1 Gun with 5 crew.

Their task was to defend the two supply wagons containing their Xmas dinner, which were quartered  for the night in the main street, near the church.   As they peered into the inky darkness beyond the lights of the town, the garrison  did not know that   an Austrian raiding party was indeed approaching,   led by General Rupert den Baren.  He could call on the following: 

           Botta Fusiliers  ( 32 infantry ) 

           Creutzer Grenze Hussars ( 16 cavalry ) 

           Dismounted Grenze Hussars ( 12 skirmishing infantry )

The town of  Weihnachten lies at a 'T-junction' of two roads, one running  East-West through the town, one stretching  from the South, as far as  the town. Nearby to both South and East are small woods, and a minor eminence lies to the South-East.  For this game, I have dispensed with the hex terrain and gone back to a good old-fashioned green cloth and model hills, and the table is 3 feet square. 

The Prussians divided their Fusiliers into two companies, one on the Eastern  and one on the Southern edge of the town, with the gunners in a walled enclosure at the South-Eastern corner. The Uhlans were split into two squadrons, one just West of the town and one on the small height to the South-East.

The Austrians similarly, had divided their infantry into two 'companies'  and cavalry into two 'squadrons', the skirmishers acting as a single unit. They approached from  the South and East roads - it might be tricky to co-ordinate attacks from both directions in the winter darkness. 


Turn 1 : Hussars and Uhlans pass all unaware..
 

Given a night-time scenario, I wanted to introduce plenty of uncertainty:  given the nature of the  Charge! rules, I also wanted to keep things simple.  So, I used a good old D6, as follows.  

 The Austrians would enter from the South and East table edges - each edge divided into 3 equal sections, labelled 1 to 6, each unit rolls a D6 to decide its entry point.   

 How many units each turn? Roll a D6 for Turn 1, scored  3 : three units.  The remaining two units on turn two  ( further dice rolls to decide exactly which units each turn ). 

Thus entirely randomly selected,  on Turn 1, enter  the 2nd  Hussar squadron and the dismounted skirmishers on the Eastern table edge, and the 1st Hussar squadron from the Southern edge. 

Now for movement and 'spotting' in the dark: again, keep it simple:

Movement - it's hard to keep direction in the dark, and unseen obstacles may slow progress. So, roll a D6 for each moving unit. Score  1 or 2, veer 45 degrees left; 3 or 4, go straight ahead; 5 or 6, veer 45 degrees right.  Also roll for Move Speed :  score 1,2, or 3 - half speed. 

Spotting - troops may quite easily miss each other in the darkness. At up to 6 inches distance, spotting is automatic, but at 6  to 12 inches must roll 4,5 or 6 on a D6 to spot an enemy unit, and at 12 to 18 inches, must roll 6.  Units opening fire are automatically spotted by all others in line of sight. Once the enemy or the town is spotted, normal movement can resume, but until then, it's random! 

So to the first Austrian move. The 2nd Hussar squadron  and the Skirmishers in the East  had clearly mastered this whole night marching thing, and pressed on straight towards the town at full speed,  but in the South the 1st Hussar squadron immediately veered left, and did not spot the Uhlans on the hill - who in turn, did not see the passing Hussars. 

 Prussian first turn:  to the East the approach of the Hussars had brought them within 6 inches of the 2nd Fusilier company - open fire! A ragged volley rang out, and the first casualty of the night was one Grenze Hussar - at short range, not very good shooting, they must have been a bit sleepy. The Prussian gunners were clearly fast asleep, and saw nothing.  South of town, the Fusiliers spotted the wandering 1st Hussars, but were out of musket range.  So far, so frustratingly/pleasingly random. 

Turn 2.  Hussars blunder into woods: Uhlans awake!

On to Turn 2 : enter the Austrian line infantry, both on the Southern table edge. 2nd Company Botta admirably straight ahead, perhaps guided by the nearby road,  while 1st Coy. veered left - directly towards the Uhlans on the hill.    Meanwhile the 2nd Hussars East of town, stung by musketry, charged the Prussian fusiliers, while the Grenzer skirmishers probed towards the Northern edge of town, albeit at half speed  ( Skirmishing foot only appear in the 'advanced' rules of 'Charge!', but the authors very  sensibly suggest that advanced features can be optionally added as required.  Movement rates and ranges were adjusted, to keep the right  relationship with Line infantry speed and range ). The Prussian 2nd Coy. Fusiliers fired at the charging Hussars - 10 figures, dice for range vs. cavalry  gave long range, so one dice.  Rolled a 1 - no hits! Still half asleep?   Then melee - the Hussars gleefully sabred two fusiliers, before both sides fell back. Short and sharp. 

The stars of the show, however, were those blindfolded 1st Hussars - having veered left, they now pressed straight ahead at full speed, straight into a wood!  And still, they saw no enemy.  They had been spotted, however, by the Prussian 1st Fusiliers , who woke them up with a volley, emptying one Hussar saddle.   Finally in the South,  1st Squadron Prussian Uhlans spotted 1st Company  Botta , downhill and straight ahead - Charge!

Turn 3: closing in
 

Turn 3 , the Austrian move saw the resolution of that Uhlan charge, and proof that these old school rules can be fast and furious.  Botta 1st Company levelled their muskets,  'won' the dice roll for range,  so close range , with 16 men rolled two dice  - scored 5 and 6, and shot down six of the eight Uhlans! To add insult to injury, the two remaining Uhlans inflicted no hits in the resulting melee, and lost one more trooper. Only one out of eight survived! Quite a blow for the Prussians. Meanwhile, the erratic 1st Hussars emerged from the wood, looked around  and promptly spotted 2nd Uhlans to the West of the town, while the skirmishing Grenze to the East of town started sniping at 2nd Fusiliers. With Hussars advancing again,  things looked worrying for the Fusiliers;  made worse by some of the skirmishers now infiltrating into the Northern part of the town, sniffing out those wagons.  

Nothing daunted, Prussian musketry opened up, the 2nd Fusiliers hitting back  at the Hussars who were again in front of them, and their gunners finally woke up and joined in with  canister: 3 Hussars lost. In the South,  1st Fusiliers opened fire on 2nd Botta at close range - 3 hits, not bad shooting.  However, West of the town their 2nd Uhlans dozed,  failing to spot the approaching Hussars,,


Turn 4 : Grenzers smell Xmas dinner
 

Turn the Fourth, and the Austrians now really pressed home their attacks. In the South,  2nd Coy. Botta and 1st Coy. Fusiliers continued their  firefight, each inflicting 2 casualties on the other.  In the East,  the 2nd Hussars charged again at the Prussian 2nd Fusiliers : between the defensive fire and melee, honours even at 2 losses each, but those Fusiliers were being worn down rapidly, and had no support, and crucially behind them, Austrian skirmishers captured one of the supply wagons!  Now battle was joined to the West also, with the fortuitously wandering 1st Hussar squadron charging the sleepy 2nd Uhlans in flank , dismounting 2 - a rude awakening.  Things now looked very bad for von Krapfen's Prussians,  and  losses were tallied up : Austrian casualties were 12 out of 60, and Prussians 17 out of  43.  The elementary 'Charge!' rules only concession to morale is 'when the number of casualties suffered by an army is more than half the number with which that army started the battle, that army is out of action...'    Only five more losses would finish off the Prussians. 

End of the affair: Prussians at bay, Grenzers everywhere!
 

And on Turn 5, the final blow - Austrian musketry delivered it, with 2nd Coy. Botta in the South taking no less than four figures from 1st Fusiliers, and sniping from Grenze skirmishers another one from 2nd Fusiliers.  To add insult,  the skirmishers also laid hands on the second supply wagon, and out to the West, 1st Squardron Hussars charged again at 2nd Squadron Uhlans. who at least had been able to turn and face them this time.  But that combat became irrelevant, with the Prussian losses reaching 22,  therefore over 50% , and both supply wagons being led away by greedy Grenzers.  'Twas a terrible blow and a hungry Xmas day for those Prussians, ejected from the warmth of the town and denied their festive feast! 

And a good game, of course! Fast and furious, as 'old school' games should be - those unfortunate Uhlans paid the price, and probably lost the game.  Perhaps I  should have given the defenders stronger forces, as once losses started to mount they reached 50% very fast.   I had anticipated that the gun would be more effective - but its crew proved not very alert, and once the enemy got close in, its fire was often masked by its own Fusilier comrades. The small table made for rapid action, with fire being opened on Turn 1 and units very quickly involved in close combat, and my improvised night movement and spotting rules worked pretty well, I thought,  introducing some entertainingly random outcomes, especially those wandering Hussars!

I hope you've enjoyed reading this, as I did both playing the game and reporting the outcome (special thanks to my old mate 'LiverpoolDave' for suggesting the title).  I hope you have had a good Xmas break, given the circumstances many of us find ourselves in. Thanks especially for all your friendly  and encouraging comments and support of this blog, which has certainly  helped keep me going through these 'interesting times', and I hope will long continue to do so.  Keep safe and well, everyone, and here's to a Happier New Year.


Tuesday 22 December 2020

Not a Prussian Was Stirring..

Twas the Night before Xmas.. and in the little Ruritanian town of Weihnachten,  a small detachment of the Prussian army were sleepily guarding the wagons containing their seasonal feast.  


Rumour had it the despised (and notoriously hungry) Austrian Grenzers were in the vicinity...


Thursday 10 December 2020

More Affordable Housing

Just a quick update following my earlier post about model buildings :  I popped in to my local branch of The Works the other day, and they did indeed have some more of their  'Light-Up Wooden House'  table decorations for sale. 

the cute deer has to go, though
 

Slightly different to earlier models, perhaps a bit more fussy, but still  useful looking. And £3 each was a good price, I thought - until I reached the till, and was informed they are currently on offer , two for the price of one!

So, if you like the look of them, hurry on down to your local.. etc 

I will give these the same simple paint job as I did with my earlier examples, and they should be ready for a bit of  'twas the night before Xmas' gaming fun in the near future.

No further forward with gaming recently, alas - time and space, dear boy - but a few ideas being mulled over for future games and posts here.  Until then, keep safe and well, everyone.


Wednesday 2 December 2020

Battle for Rahden : Conclusions

A couple of posts ago, we left the battle for the 'Soldier King' campaign town of Rahden interestingly poised after seven turns, with the defending Prussians  expelled from the eastern hill in front of the town, and attacking Austrians hoping to press home their advantage.  After a longer than expected hiatus, with the opposing troops snarling at each other inside their storage box, I was able to unpack them, re-set the battlefield and resume the game. 

Turn 8 :  Austrians advance

The picture shows the situation at Turn 8 - the defenders have a problem, in that their Fusiliers East of the road are facing two Austrian battalions, and being bombarded by artillery. That battery took a few turns to get the range, but once it did, things got tricky. Meanwhile on the other flank, Prussian Horse Grenadiers face twice their number of Austrian  cavalry on the hill.  The Horse Grenadiers didn't lack courage, making three charges in the next three moves - sadly they were  'bounced back' twice and then suffered 1 SP loss. But they certainly kept the Austrian horse busy!  The supporting von Kleist infantry fought well,  keeping up a steady fire - for example repelling an Austrian cavalry charge and coolly volleying to force the  2nd Botta battalion to retreat, all  in one turn. 

Turn 9 also saw the Austrians really get stuck in - taking advantage of the road, their  remaining Jaeger infantry battalion charged the Prussian guns! There followed several rounds of suprisingly inconclusive close combat as the gunners stuck to their guns behind the shelter of the wall,  and neither side would give way. 

Turn 9 : Intrepid Jaegers charge Prussian guns
 

In Turn 10, things really heated up, with the Austrian gunners getting their eye in and hitting the Prussian Fusiliers - who could not risk retreating from their protected position, and so had to take a loss of 1 SP. To make matters worse, musketry from 1st battalion Botta also hit them, and took another 1SP.  The Fusiliers gave almost  as good as they got,inflicting 1 SP loss on 1st  Botta, but it was a bad turn for the Prussians and left the losses at 7 SPs  each.  

The Prussian infantry defended stoutly, their mustketry repeatedly finding its mark, but the Austrian gunners were even more effective, hitting the Prussian Fusiliers every turn- and those Fusiliers couldn't give up their position, so the casualties kept on  mounting.  On Turn 12 the cannonade  left them with only one SP strength remaining, and then  a volley from 1st  Botta battalion  scored another hit - the fusiliers finally retreated, to avoid destruction. At which point, the Austrian Jaegers were able to take advantage, jumping over  the vacated wall.  

Oops -  by making that move, I had broken a rule.  The Jaegers had been in contact with the Prussian gunners, and according to Bob's 'Portable Napoleonic Wargame' rules,  'if a unit is being faced by an enemy unit that is in an adjacent grid area..it can move..providing it does not move into a grid area that is adjacent to another enemy unit'. So they shouldn't have been able to move adjacent to the retreating fusiliers, only to withdraw away from the guns.  Oh dear!  I only realised this when looking through my notes to write this account, so at the time the game simply went on.  Maybe that's the best way to deal with rules mistakes - just keep calm and carry on. It's possibly both an advantage and a disadvantage of solo play - no aggrieved opponent annoyed at being 'cheated', but equally no second pair of eyes on the rules to point out mistakes and prevent them happening.  Oh well, c'est la (jeux de)  guerre.

Jaegers over the wall : oops, illegal move!


Also in turn 12,  the Prussian Horse Grenadiers charged yet again, and finally took 1SP from their Austrian opponents - some reward for their persistence. That left the losses at Austrians 10 SP, Prussians 9 SP - and crucially the Prussians reached their Exhaustion Point. 

Prussian General von Gehirne could use his brains, and knew the game was up - the best course now was to retire with as much as possible of his force intact.  Starting from  turn 13 the Prussian gunners limbered up their pieces and began to retire, while the von Kliest foot and Horse Grenadiers pulled back slowly, with the brave Fusiliers holding position, keeping up constant fire to deter the Austrian follow-up - their Jaegers were repeatedly hit and forced back.  But the rest of Dachs' attacking force made a general advance, the guns limbering up and moving forward to East Hill,  and both their cavalry units charging the Horse Grenadiers, inflicting casualties on them.     Turn 15 effectively ended the game: with all Prussian units near table edge, a volley from 1st Botta finally forced the Fusiliers to retreat off-table, taking their commander with them. 

At this point I called a halt, with the Prussians retiring  and the Austrians taking possession of the town of Rahden.  Casualties were even - 10 SPs lost each, though of course that was enough to bring the Prussians to their  Exhaustion Point.  Both sides had one 'veteran' ( i.e. average ) infantry  unit destroyed and a scattering of SP losses shared evenly  among  various units - though the Prussian Fusiliers were hard hit, losing 4 out of their 5 SPs. All this needs considering in terms of the campaign - it's not just a one-off battle, there are consequences, and I hope that's part of the fun. 

The End of the Affair - two remaining Prussian units retire
 

Many of the units should easily replace their losses, but the Fusiliers will need longer to recover. A simple scheme suggests itself - I'll say that  replacements and recovery of the wounded can restore 1 SP per unit per campaign turn, for the moment - only a very small amount of book-keeping will be required.  I've decided that the two routed/destroyed units are gone for good, their survivors having scattered to the four winds, or perhaps been allocated to make up losses in less depleted units.

 Just for fun,  I played out the battle using the 'Soldier King' board game's combat system - and it was a disaster for the attacking Austrians! The fortifications of the town gave a big advantage to the defenders and negated the Austrians' cavalry superiority: after 3 rounds of combat they had lost 8 points out of 12 and only inflicted 2 points - total defeat!   Maybe I should have given more advantage to the defence  on the tabletop, but what the heck, it was a fun game. 

I hope to continue with the campaign. Let's see where it takes us. How will the Prussians respond to this reverse?   Until next time,  keep safe and well, everyone.


Thursday 26 November 2020

Solving the Housing Shortage

The usual issues of Time and Space have meant that the battle at Rahden remains in hiatus - impatient grumblings may be heard from the troops confined to their storage box.  I hope to return to that very soon, but in the meantime a small diversionary effort  may be in order - let's look at some scenery. There were a couple of approving comments on the buildings of 'Rahden' that featured in the game, so I thought I'd show you them here. 

Keen-eyed readers will have noticed that none of  the previous 'Portable Seven Years War' battles have involved villages or towns - because I had no buildings in the right scale. Or so I thought:  but casting around for scenery for the town in my recent game, I remembered a few likely models acquired from The Works - I think they were sold as Xmas table decorations, at about £3 each. 


 I think they look suitably Central European. 

They needed some colouring, though. Being anything but a skilled painter, and also being in a hurry, I went for an extremely simple scheme - starting with thinned PVA as a sealer, then just a red/brown or grey roof, and white or buff walls, and a grey-brown base. 


Keeping the paint quite thin allowed the etched details of roof tiles, doors and the the clock on one of the houses  to show through, and the  simple overall effect seems in keeping with the generally nostalgic feel of my Seven Years War setup.  They bring to mind Charles Grant's home-made Germanic-looking buildings, as featured in his 'The War Game' and 'Battle - Practical Wargaming',  images imprinted on my mind since childhood. I couldn't really do anything else, could I? 

As you've seen, they were ready in time to play the role of 'Rahden' in the recent game, and looked fine, to my eyes.  I think they may see plenty more action. 

Finally, I should also show their special extra feature - not sure if it will ever be used in a game: 


Night actions, perhaps?  

I don't know if they are still available from The Works, but I think I've seen similar things in other gift/general merchandise type shops ( a shout-out to Roys of Wroxham, for East Anglian readers!), and it's the right season.. I'll take a look in my local branch once they re-open, as I think we are promised for non-essential shops in England next week. A couple more houses could be useful. 

Next time, back to the battle.  Meanwhile keep safe and well, everyone. 


Monday 16 November 2020

Soldier King Campaign: Battle is Joined

My attempt at a 7YW-based campaign using the 'Soldier King' boardgame has thrown up its first battle, as the Austrians sieze the intiative to strike with superior force at the town of Rahden, where the Prussians have the advantage of what the game map calls 'fortifications'. I don't have any model fortifications, so I will take the excellent suggestion from Neil Patterson and simply assume the town is in a naturally strong defensive postion - assisted by my new-minted walls ( from my  previous post ).

So here we are: first the Prussian defenders of Rahden,  translated from the  ratings from the board game to the Strength Points (SP)  of 'The Portable Wargame'  - essentially  'Guards' become 'Elite'  and 'Veteran' become 'Average'.  All cavalry conveniently the same, i.e. 'Heavy', and I allocated each army one artillery unit , as artillery pieces  are not included in the board game, presumably just 'factored in' to available forces. 

von Gehirne and his gallant ( and suprised ) defenders

        Generalleutnant  von Gehirne  ( 6 SP )

        Von Kleist Horse Grenadiers, rated Elite    ( 4 SP ) 

        1st Battalion, 44th Fusiliers, rated Elite ( 5 SP ) 

        1st and 2nd Batalions, Von Kleist Frei Korps infantry, rated Average, ( each  4 SP )

        1  gun and  crew, rated Average  ( 2 SP ) 

    A total  of   25 SP, with Exhaustion Point after loss of 9 SP. 


  And the attacking Austrians, led by the experienced General Dachs : 


General Dachs' strike force
  

         General Dachs ( 6SP ) 

        1st and 2nd 'Grenzer' Cavalry, rated Elite ( each 4 SP ) 

        1st and 2nd Battalions Botta  Infantry, rated Elite ( each 5 SP  )

        1st and 2nd Battalions  'Wildganse' Jaeger,    rated Average ( each 4 SP ) 

        1 gun and crew, rated Average ( 2 SP )

    Totalling 34 SP, with Exhaustion Point after the loss of 12 SP. 


Now to the battlefield, and the battle!  The Southern outskirts of the town of Rahden, with the road from the south passing between hills and woods, and with some convenient walled enclosures making good defensive positions. To reflect the Austrian's grabbing the initiative in the campaign, I decided von Gehirne's troops would start in and around the town rather than fully 'dug in' on those hills, for example, as Dachs' Austrians hurried up the road to attack - entering in march column on Turn 1. The picture below looks South to North, with Austrians arriving in the foreground.


Raus! Raus! Prussian defenders at starting positions, Austrians arriving 

Von Gehirne placed his gun and his elite  Fusiliers behind the walls by the road, with the von Kleist foot divided between the two flanks , and his Horse Grenadiers on his right (West) flank, hoping these three could race up to defensive positions on the hills outside the town.  Precious few units, though, and the cavalry outnumbered two-to-one.   

I gave the Austrians first move in Turn 1, and I used Bob Cordery's card-driven unit activation system,  whereby each side gets to activate a number of units each turn according to card draws.  The Austrians would be able to activate 3, 4 or 5 units each turn  and the Prussians 2, 3 or 4. The Austrians drew a '5' on turn 1, and accordingly 5 units marched onto the table from the south: both their cavalry units, their gun and one battalion each of Jaeger and Botta ( 'Guards' ) infantry. The Prussians drew only a two, still a bit sleepy perhaps? Von Kliest 2nd Foot in march column raced forward to secure the Eastern hill and stone-walled  enclosure,  while the Horse Grenadiers reached the Western hill. 

The fighting started on Turn 2, with the Prussian gun, overseen by Gehirne himself, getting first blood with a hit and 1 SP taken from 1st Austrian Jaegers ( caught in Column ), and the Horse Grenadiers charging downhill in line to catch the Austrian 1st Cavalry in column, hoping to knock them back, though in the event the melee was indecisive.  The Austrian 2nd Cavalry came to the rescue, charging into the Grenaders' flank and pushing them back onto the hill, whereupon something of an epic cavalry fight continued back and forth over the West Hill for  the next several turns. The Horse Grenadiers, supported by the 1st Von Kleist foot,  did a fine job against twice their number, while the dastardly Austrian horse even took to charging from the cover of the woods. By Turn 7, the Prussians were pushed off the hill but still intact, while the Austrian horse had suffered losses of  2 SPs  ( I used pennies as loss markers ). 

Prussian Horse Grenadiers dispute West Hill, heavily outnumbered


Meanwhile the Austrian foot and gun concentrated on the East Hill, bravely defended by the 2nd Von Kleist infantry, with the Prussian gun firing in support from the town. The Austrian gunners were not shooting very straight, making only one hit from five turns of shooting!  Their Jaegers were more determined, charging straight up the hill repeatedly, being repulsed no less than three times by musketry and close combat, and suffering 3 SP losses by turn 6, but crucially taking  2 SP from von Kleist, with the gunners' sole hit taking another SP. The defending Prussians could not afford to take 'retreat' results when hit, for fear of abandoning the walled enclosure, so were forced to take SP losses. 

Austrian Jaegers bravely - and repeatedly - assaulted  East Hill

I found the card-driven activations added a level of uncertainty and challenge to the commanders' task.   They could not assume they would be able to do everything they might like  to each turn, with limits on the numbers of units that could be activated. One result was that for a while the Austrians were too busy fighting with the units on the table to be able to spare activations to bring on their last couple of battalions!  The need to  keep attacking East Hill with infantry and bring up guns, meant that Dachs had to resist using too many activations on the possibly less decisive cavalry fight on the other flank, however demanding of attention  the swirling mass of horsemen might be! 

On Turn 7, something of a turning point, as the Austrian 1st Jaegers stood off and gave the Prussians a musket volley, scored a hit and took the last SP from 2nd von Kleist foot, breaking them and leaving East Hill there for the taking - only for the Prussian Fusiliers to let fly with their first volley, at long range from the town, and inflict the same punishment on the Jaegers, who were destroyed at the moment of triumph! 

End of Turn Seven - all to play for?
 

Which leaves us, at the end of Turn 7, with an 'interesting' situation - the Austrians have cleared the East Hill and pushed the Prussians back from West Hill, but the fight for the latter is by no means over, and the  main town is still defended by a gun and two foot units, one elite and manning the walls. The losses so far : Austrians  6 SP ( Exhaustion Point 12 SP ) ,  Prussians 4 SP ( Exhaustion Point 9 SP).  General Dachs has made progress, but the town looks a tough nut to crack.

Time ran out and the troops have been packed away, but the battle will resume another day. I hope this has been interesting to read, as it was indeed to play. Until the next time, keep well, everyone. 


Sunday 8 November 2020

We're Gonna Build A Wall..

Botta Regiment wonder if the Mexicans paid for this?
 

Having set up the premise for the first engagement of my 'Soldier King' boardgame-based campaign, considerations of  Time and Space have been in play, what with work and some chores arising from the renewed 'lockdown' - hence my apologies for a period of silence here. Now turning my mind to the promised battle, I realised I had set a trap for myself by taking note of the 'fortified' nature of the fictional location to be fought over.  Visions of Vauban-style fortifications and elaborate sieges I will leave to the most excellent MS Foy - here at The Ragged Soldier, resources are more limited. I thought about horse and musket period 'Lines' a la Marlborough and Villars 'Ne Plus Ultra', but I'm not certain how to quickly and simply model such an installation  ( must have a go one day, though, having recently read Maurice De Saxe's Reveries on how to attack and defend 'lines' ) .  In the end, I've decided on a much simpler approach - I will just allow the defending Prussians plenty of good stout stone walls to line up behind. 

So, taking a look at available scenery - oops, no walls.  Well, some quite nice model walls ( acquired a few years ago from Total System Scenic ),  but all 15mm scale, which come up roughly to the  knees of the 25mm Seven Years War figures - that's not going to worry the attackers. I want to get the game going pretty soon, therefore there was only one thing for it.  In the immortal words of the 45th POTUS (now, who was that exactly?)  "We're Gonna Build a Wall.."

Score along the lines, fold and glue..
 

Resources were available: good old-fashioned cardboard cereal boxes. I'm glad to say, it proved fairly simple even for a handicraft klutz such as me to come up with a one-piece, scored-folded-and-glued  'box',  100mm long, 15mm high and about 5mm deep, and then glue that to a card base. What's more, when allowing the glue to set, all those elastic bands that the Postman drops on the street, and I pick up because 'they'll come in handy someday' finally did!   The choice of 100mm is a cunning plan - they are therefore exactly the width of my Hexon terrain hexes, if laid along the centre line.  

Waiting on the glue drying - thanks to Royal Mail
 

As to finishing, all  equally improvised. A quick coat of grey acrylic paint, then a very approximate 'stonework' pattern drawn on with a black fineliner pen. It's not exactly Flemish Bond, and I assume that any wall actually built to this pattern would fall down even before it was finished! But it looks like a wall, more or less.   I did try applying a wash of  Army Painter 'Light Tone' to one section, only then realsing that the fineliner pen's ink is not permanent. Debate rages over whether the resulting blurry effect is an improvement or a disaster - for the moment that one is going to be kept at the back, like my school woodwork efforts inevitably were at Parents' Day. 

Based and painted: the one ruined/improved by Light Tone wash is at back right

At this point I'd like to fondly remember a lovely old friend of my parents, now long deceased, whose actual job was to do this sort of thing - gloriously titled 'Cardboard Engineer'. I think he designed advertising materials for shops.  Presumably he was very careful when going out in the rain. George, if you are looking down now and wincing, I'm very sorry. (  I also  remember a line from Alexei Sayle "my girlfriend works as a model - this week she's being an Airfix Stuka Dive-Bomber".  I'll get my coat..).    

So there we are - The Ragged Soldier's beginner-grade scenery.  I still need to think of  something to 'weather' them a bit - maybe dry-brushing rather than a wash? And I need to use permanent ink in future!  The green bases need a second coat, there are some rough corners to be trimmed off, and gaps to be filled with PVA glue and painted over,  and no doubt any sensitive soul  taking a close look will be shocked to their aesthetic core - or just laugh at my pathetic attempts. But from a distance on the gaming table, they will do fine.  I've got some walls, and battle can commence. On time and zero budget - how did your wall go, Donald? 

Next time, to battle - keep well, everyone. And of course, on this Remembrance Sunday: 'Lest We Forget'.


Monday 26 October 2020

Soldier King Campaign : hostilities commence

I have been taking tentative steps with a Seven Years War campaign, using the fictional setting of my old 'Soldier King' boardgame. I thought about perhaps drawing a map of a real Central European theatre of war,  but 'time and space, dear boy'.. To get a campaign going and see if the idea works, why not use the game's ready-made map?     The game assumes four belligerent states, but I only need two, so I have only used the eastern half of the map, depicting the little-known Prussian Provinces of East and West Argozia,  and the equally obscure Austrian regions of North and South Arcadia.


Next,  some forces: the game suggests starting with twelve units per nation,  made up of eight 'veteran' and four 'guard'.  That seemed about right, given that my table setup  will probably allow perhaps six or eight units for a battlefield force.  I thought I'd try to vary the makeup of the armies, so started with a 'base' of two-thirds Infantry to one-third cavalry, and rolled a couple of dice to randomise a bit.  As a result, I finished up with the following: 

Prussians :  Guards - one Infantry, three Heavy Cavalry    

                    Veterans - six Infantry,  two Light Cavalry 

Austrians :  Guards - two Infantry,  two Heavy Cavalry

                    Veterans - five Infantry,  three Light Cavalry 

Thus the two sides each  fielded  seven infantry and five cavalry units,  but with different mixes of guards and veterans , and heavy and light cavalry. That seemed quite pleasing - I didn't want identical armies. The Prussian Heavy Cavalry looks powerful, but the Austrians are strong in Light horse, which seems appropriate, lots of Hussars perhaps?

Final preparatory step was the initial billeting of troops : the game system specifies that each player turn is made up of up two to six  of  'marches', so why not start with six 'Divisions' each of two units?  These were stationed three to a province, using the main 'recruiting cities' and fortresses.  Thus the first turn or two will likely involve both sides gathering their divisions into field armies.  The picture at the top shows the intial deployments - Prussian units are blue,  and Austrians gold. Both sides concentrated their Guards formations in the North-Eastern corner of the map, where their provinces directly bordered each other.   At which point, news reaches the respective provincial military governors from far-off capitals -  'war is declared!' and both sides begin to mobilise their forces. Let hostilities commence...

I decided to dice for  first move  each turn  - on Turn 1 ( Spring , and let's call it 1756 ) , the Prussians won the initiative, but then rolled a '1' for the number of 'marches'. Under the game rules, a player always gets two marches, so that was the Prussian allowance. They concentrated two 'Divisions' ( 4 units ) at the Fortress of Rahden , near the hostile border and advanced  their Light Cavalry into neutral Banst, aiming to threaten the Austrian left flank.  A slow start, obviously some issues with getting orders out..   I decided that the protagonists could move into neutral provinces, allowing for a wider field of operations and more strategic manoeuvre, and I will try to use the boardgame's system of  'recruiting cities' - capturing neutral provinces and cities allowing increased recruiting resources.  The imaginary populations of these imaginary provinces are no doubt told that this is  'for your own protection, we have to move to keep out that other beastly lot'..  

The Austrians in contrast, were all action and rolled a '5' , thus could carry out 5 marches. They concentrated  6 units in their Northern city of Piesport , close to the border, and began moving  4 units up from the south  in support, finally sending two Light Cavalry units westward into neutral  Lower Waldow, capturing the recruiting city of Selters  and covering their left. 

Then Turn 2 - Summer - the Austrians' rapid start continued,  winning the initiative dice roll and moving first - they again rolled  5 marches.  Their light cavalry spread out over  Lower Waldow, occupying both its significant cities and effectively capturing the province - meaning more recruits later. Also on their Western flank, four units used two marches advancing into Upper Waldow, occupying the city of Stauffen.   Last but by no means least , the northern force of six units went on the offensive, advancing to attack the four Prussian units at the fortress  city of Rahden before the Prussians could reinforce. They have a superior force for now, though the Prussians have more troops quite nearby, and Austrian supports are quite a long way away - striking now may be their best chance.  So we have a battle!  

Austrian attack!  But Prussians have support nearby


 The opposing forces in  boardgame terms are as follows: 

 Austrians:     2 Guard Heavy Cavalry,  2 Guard Infantry,  2 Veteran Infantry

Prussians:      1 Guard Heavy Cavalry1 Guard Infantry,   2 Veteran Infantry

And here's an ( entirely gratuitous )  picture of the clashing forces

First battle: opposing forces
 

 So, now I just have to translate those onto the  tabletop, using the figures I have, and devise a suitable attack and defence type scenario,taking into account the 'fortification' of the city on the map, which should lend some protection to the outumbered Prussians.  I'm sure Bob Cordery's Portable Wargame rules will be able to accomodate all this, albeit perhaps with a little judicious tinkering.

Finally for this time, a not entirely unrelated aside. Since we are talking about an old boardgame, here's another one -  a lucky find in Sudbury Oxfam shop the other week.  I must have spent a very large amount of my free time when aged about 12, on this long-lost game, and have often wondered if I might turn up a copy, so I was very pleased to acquire this for the princely sum of £2.99! 


Positively Proustian

In very good condition, complete and maybe not used much. For  any 'Campaign' nerds out there,  it's a 1976 edition, I think I had a slightly  earlier  one, perhaps 1974. I remember that one had a potted history of the many Coalitions against Napoleon, which captured my imagination somewhat, and I also remember that in my childhood solo games one power invariably seemed to sweep across Europe defeating all others.  That power was - Spain.  I'll have to give it another go sometime.. 

So there we are,  look out for the next exciting episode featuring the opening battle of the campaign. Meanwhile keep safe and well, everyone. 

**POSTSCRIPT **  Many thanks to everyone, this blog's 'Total Pageviews' count has reached 10,000. I'm rather amazed, and honoured. by the response of readers ( and even followers, wow! ) over this past 9 months. Also many thanks for  the  supportive, entertaining and instructive  comments from many of you ( though I was sadly unable to take advantage of the offer of 'Best Silage Machines Price! Silage machines for sale in Pakistan' ) ,  I  think that's a big hint that I must be doing something right.  The blog has also been a great motivator for actually getting some games on the table and even a few figures painted  - quite apart from the fun of writing. I hope to continue in the same vein in the coming months - I hope you continue to enjoy it .


Monday 12 October 2020

A Possible Campaign 'Engine' ?

I've enjoyed playing some loosely-linked scenarios with my modest  Seven Years War forces, but I'd like to find a way to run a 'proper' campaign, albeit as simply as possible.  I've been looking at the possibilities offered by a vintage board game : Frank Chadwick's 'Soldier King', which dates back to 1982.  I thought to look at it because of its setting in a fictional version of the relevant period, and its simplicity.

This is 'a game for two to four players covering the war of succession in a leaderless empire. Each player controls one army and must struggle.. to capture a majority of the Imperial electoral cities, thus assuring his election as Emperor. Movement of armies is from point to point along roads and waterways, thus emphasising the key role played by lines of communications in the 1700s, the age of soldier kings.' 

The armies consist of units of Infantry, Heavy Cavalry and Light Cavalry, and units may be have status of Levies, Veterans or Guards.   There are rules for resolving battles , but of course if using the game to drive a campaign then the whole idea is for the battles to  be played out on the tabletop.  

The 'Estavian Empire': note roads, highways and rivers

..and in a little more detail
 

The game map depicts a fictional continent , the 'Estavian Empire',  but I don't propose to actually use it! What looks interesting  is the very simple rules for movement,  supply,  recruitment and promotion of units.  I'm thinking I could probably come up with a map showing a real ( or perhaps  imagined ) region of 18th Century Germany, where Austrian and Prussian forces might contend for control. I wonder if  the fine maps from Christopher Duffy's book on Marshal von Browne might give some inspiration here. Bohemia or Silesia, perhaps?

I like the game's very simple point-to-point movement system and the importance  of river transport  (perhaps often forgotten) as well as roads.  I was recently interested by comments on campaign movement in Mr. Nundanket's excellent blog, which to my mind explains why such movement in this period seems likely to be mostly 'point to point', i.e one town to another  - essentially the roads may be poor, but if you stick to them, you know where you will arrive next, and that's the most important thing!  

I also think that the game's  counter mix could be quite useful in generating armies - in the board game the units seemingly represent 10,000-20,000 troops each, each player starting with 12 units ( perhaps an unfeasibly  large force!),   but for a more limited theatre of operations,  a unit could equally represent a battalion for  Bob Cordery's 'Portable Wargame' rules, for example. There are no artillery units, but those could be factored into the battlefield armies in a pre-defined ratio.

Unit types: L to R Infantry, Heavy and  Light Cavalry

I have owned this game for a long time, indeed I think I probably bought it when it first came out thirty-eight years ago  ( blimey! ), and I think a few games of it were played at the time with my then regular gaming buddies during my university holidays.   I'm afraid it's not been played in many a long year, so it will  be nice if I can  make some use of it, even after all this time!

Not good news on the pandemic front here in the UK, so it looks like even more time at home as autumn and winter progress - our hobbies may help save our sanity.  Keep well, everyone.


Monday 5 October 2020

Fnurban #5 : Serendipity on a Rainy Day

Last week we enjoyed our first proper holiday of this topsy-turvy year. We were in the Peak District,  at a small cottage on a farm, in a tiny village on top of a hill - so  no problem maintaining social distancing, at least. 

Mostly the weather was good, but there was one disctinctly wet day. We elected to look at Cromford and  Arkwright's cotton mill - a World Heritage Site. That was interesting, but the rain defeated us eventually.  Fortunately we had already planned to look in at nearby Scarthin Books, described in our guide book as a 'world of books, curios and comfy armchairs'.


A warm welcome on a wet Wednesday

Well, it lived up to the description - a great example of what a good bookshop can be. Three floors, crammed with bookcases, including on the stairs; there's a cafe in there too, hidden behind a curved bookcase ( one shelf of which I noticed holds the 'English County Regiments' series ) which swings open and closed, like something out of a storybook itself. 

I can't vouch for the tea/coffee as I was spending too much time looking through the books, especially (of course) the military history section.  I came up with quite the little hoard, as you can see:   


Best of all for this blogger 'The Army of Frederick the Great' by Christopher Duffy - 1974 hardback edition ( bookshop's pencil note inside "not common - a bit stained" which might describe many things).  Having just been reading Duffy's book on von Browne, this is just what I wanted next -  it's as if this was just  waiting for me, and it will immediately go to the head of the reading pile! That made the whole day worthwhile on its own.

Not only, but also : 

'Military History for the Staff College Entrance Examination' by Major E.W. Sheppard - 'revised in accordance with Staff College Regulations 1937' .  It's a set of 'crammer notes' for student officers, with chapters on major campaigns from Napoleon in Italy 1796 to The Third Afghan War, 1919, and each with a fold-out sketch map. I think this is going to be very interesting - another pencilled note says 'from the collection of MJ Peter Cavendish'  - I suppose that 'MJ' is 'Major', so it looks like he passed!

[ update: the original owner would appear quite likely to be the late  Brigadier-General Peter Cavendish, who lived nearby and passed away in 2011. Being only a few miles from the Chatsworth estate, the surname Cavendish also indicates a certain social status, I suspect. I hope the book doesn't mind being now in the possession of  'salt of the earth' - my only military ancestor rose to the dizzy heights of Lance-Corporal ]   

'The Gun'  by C.S. Forester. As mentioned in an earlier post, I am working my way through Forester's war stories, and this one, it turns out, has relevance. The eponymous Gun is abandoned by Spanish troops of Blake's army retreating from the disaster at Espinosa. Having recently taken the part of 'Blakey'  under the auspices of M.S. Foy ( here ) , during which the Spanish artillery performed rather poorly, I feel a sort of  connection. I hope The Gun redeems itself here.  

'Ripeness is All'  by  Eric Linklater. Having started with the excellent 'Private Angelo' I have been picking up anything I see by Linklater, and quite a few have military themes. This is from 1935 and starts promisingly : 'Sergeant Pilcher was not one of those bull-mouthed swarthy red soldiers. common enough twenty years ago, who larded instruction with oaths and kept conversation bouyant on their flotsam of Hindustani and a flood of beer"..  Eric having served in the army of 'twenty years ago' i.e. 1914-1918, I think he speaks from experience here. Having said that, the first modern on-line review I looked at "found it tedious, slow-moving and far from fun".  I don't think our Eric would be seen as  very 'Woke', though the Sergeant is clearly no  'Gammon'.   We shall see..

Shire Books 'Discovering Model Soldiers' by Arthur Taylor , 1970. What can I say? It cost the princely sum of  40p, a bargain for a nice little piece of nostalgia.  One section is headed '20mm - The Wargamers Size' : so that's you 28mm people told, from the old school. 

All in all a thoroughly worthwhile visit - if you're ever in the area and like a good bookshop, I'd recommend Scarthin Books. Now I just need to magic up the time actually read all these, and the rest of my worryingly large books backlog. As ever,  'time and space, time and space'...

Keep well, everyone.


Friday 25 September 2020

Deeper into the Seven Years War

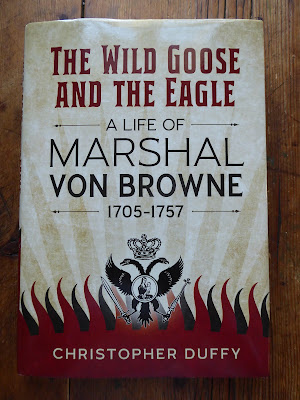
After the dramas of the Bellona Bridge battle, I am encouraged to continue progress with the Seven Years War collection.  I really don't know an awful lot about the period, so some background reading is certainly in order.  Thanks to David Crook, I was alerted to the Naval and Military Press summer sale,  and especially 'The Wild Goose and the Eagle', a new edition of Christopher Duffy's 1964  biography of Marshal von Browne - a bargain at about £7 !

I am admittedly going slowly, but there's plenty of interest. Browne represents a phenomenon of the time, the exiled  'Wild Geese'  Irish Catholics  making  careers in the various armies of Europe, after their fathers left Ireland following the overthrow and defeat of James II, and with 'no other patrimony than his sword'.  Britain's loss was perhaps  Europe's gain, especially for the Catholic powers such as Austria, France and Spain. Interestingly though, even while the Jacobites under The Young Pretender threatened the Hanoverian regime in Britain fifty years after James, English commanders and even  King George would welcome a man such as von Browne into their camp and councils, when sent as an envoy of their Austrian ally, and were happy to deal with him.  As an officer in the Austrian army of the time, he was bound to see varied  campaigning - not just in Silesia and Bohemia but on the Rhine, in Italy, the Alps and Provence, and against not just Prussians but French, Bavarians, Spanish and Turks. Every chapter  opens a new campaign, and there is masses of interest and inspiration here.  I also really like Duffy's style - how about this, on the encounter at Mollwitz : 

'Frederick had attained his surprise by crossing the Neisse at Michelau and Lowen, but the victory would probably lie with the army that first accomplished the mechanics of processional deployment from column of march into line of battle : a process which, before the innovations of the last years of the Ancien Regime in France, may be compared with the ordered complexities of music before its liberation in the integrated harmony of Haydn and Mozart. At least we should not deny a very considerable technical competence to the minor 18th century masters, whether of music or war'.

You really don't get that sort of thing in your average Osprey.

I also very much like the maps, which  are Duffy's own drawings ( see below ) , and for once a book which gives accounts of military campaigns has maps and diagrams  which adequately illustrate the theatres of war and fields of battle. My favourite so far, I think is von Browne's daring, if unsuccessful,  attack on Velletri, near Rome in 1744, attempting to surprise and capture King Charles of Naples.    

I do like these hand-drawn maps

Finally a chance find in the bibliography : 'DE LACY-BELLINGARRI, The Roll of the House of Lacy, Baltimore,1925. A Most misleading and unreliable work, which should not be read on this or any other connected subject. Mentioned here only as a warning' .

 In the same sale were a couple of the recent Helion books on the same period - 'Between Scylla and Charybdis'  on the Saxon Army , and 'For Orange and the States'  on the Dutch Army.   I have an idea that these might inspire me to recruit  some mercenary units to join in my campaigns, in addition to the Austrians and Prussians.  I especially like the idea of fielding some regiments from Saxony.  Total cost for the three books in the 'summer sale' was about £20 - not bad!


The auld enemy 'time and space, time and space' has got in the way a little recently, but I have had a few opportunites on sunny September afternoons for painting.  I have accordingly got started on the second half of the Austrian Botta infantry regiment. Also, in what feels like another big step forward, I have half a dozen cuirassiers of the Austrian regiment Erzherhog Ferdinand primed and ready. They will have nice cheerful red facings to their white uniforms, and should look splendid. Painting horses may be an interesting challenge -  but hey, they are mostly brown, aren't they? Same colour as muskets...

Primed and ready..Cuirassiers
 

That's enough for the moment, I hope all are keeping well despite the looming 'second wave' of you-know-what. If we are all to spend the winter indoors, I suppose we will just have to get on with our hobbies. 

Keep well, everyone.


Friday 4 September 2020

Bridge on the Bellona - down to the wire!


The Austrians have it all to do..
 

We left the battle for the Bellona Bridge at an interesting point - Prussians holding the bridgehead, Austrians needing to advance, but nervous of  cavalry threatening their flank. It looked like Von Jemanden's Prussians just needed to sit tight, shoot down the Austrians coming forward, while the Uhlans and Horse Grenadiers created mayhem on the flamk. Losses of 4-2 Strength Points in the Prussians' favour, both sides Exhaustion Point of 9 SP. What was Austrian General Dachs to do? 

On Turn Seven, Dachs won the initiative die roll went first - and decided to trust to his musketry and cannon fire.  Every Austrian unit stood and gave fire. The gunners, having unlimbered on the hill with a good field of fire,  contrived to miss with their first shot of the game, but the infantry's muskets found their mark. As volleys rolled along the line, both battalions of the Botta regiment scored hits and took Prussian SPs from Horse Grenadiers and Uhlans;  the Rifles took 1 SP from their Prussian counterparts;  and 2nd Jaeger battalion forced 1st Prussian fusiliers to retreat. Good shooting - and it brought the  score to  5-4 in Austria's favour.  Quite a turn around, and as it transpired, more to come.

On the Prussian turn, a positive start as 2nd Fusiliers' volley forced 1st battalion Botta to retreat, whereupon the same battalion  was attacked  by both regiments of  Prussian cavalry  (stung by the flurry of Austrian fire, they acted on instinct - charge!).  Things looked bad for 1st battalion Botta - and in their first engagement, too. 

1st Botta's trial by cavalry: 'stand firm, men!'

... and then the dice took a hand. Two separate melees, one for each cavalry unit, the foot having to face the jeopardy of die-rolling twice in succession, their only consolation being that neither horse unit had  been able to get round their flank, so the die scores would be unmodified, no plus or minus factors.  

The dice rolled - as is right and proper, low scores are bad.  In both combats, no-one rolled better than a two!  Both sides suffered a hit in each combat; once a hit is scored, the effect is diced for, and for 'average' troops the result is: 1-3  lose 1 SP,  4-6 retreat one hex or lose 1 SP.  All four rolls came up  1 to 3.. so that's 1 SP loss for both cavalry units, and 2 SP lost for the 1st Botta battalion.  The foot could take this - just - having 1 SP left. The Horse Grenadiers, too  had just 1 SP remaining,  but the Uhlans had lost their final SP, and were broken.  When the dust had cleared, the 1st Botta stood resolute if battered, and the power of the Prussian cavalry had been shattered.   With that, Turn 7 ended, and the total Losses were : Austrians 6, Prussians 7. The Prussians had suffered  5 SP losses in a single turn, and were only 2 SP under Exhaustion Point. How suddenly fortunes can turn about..

Perhaps unsurprisingly, the next few turns were rather quieter. In Turn 8, the Austrian gun and all foot units on both sides gave fire, scoring hits a-plenty, but no losses - no less than 4 Prussian units were forced to retreat, and their depleted  Horse Grenadiers fell back to nurse their wounds. On subsequent turns the Prussians held their ground as best they could with not particularly accurate fire, while General Dachs ordered a general advance , then another massed volley on Turn 10.  At this point, the disadvantages of defending a river line became apparent, as the Prussian 1st Fusiliers took a hit and 'retreat'  result , but with their backs already to the river, could not retreat, and had to take 1 SP loss. Score now 8-6 to Austria;  Prussians only one point under Exhaustion, with five turns remaining, not a good position at all. 

Turn 10 - Prussian backs to the River

Turn 11 sealed their fate : in the artillery fire phase at the beginning of the turn, the Austrian gunners aimed at the Prussian rifles - scored a hit. Roll for effect - retreat or lose 1SP,  but again, no place to retreat. So the Prussian rifles lost their last SP,  but also reached their army's Exhaustion Point. No more attacking  moves after this turn; could they hold the Austrians off, keep them more than three hexes from the bridge, and still claim victory? 

Austria won the initiative, and elected to keep firing - a further 1 SP taken from Prussian 1st Fusiliers.  Prussians next - last chance to attack! It started well - their 2nd Fusiliers' fire finally destroying the  1st battalion of  Botta, and Frei Korps forcing 2nd Botta to retreat. This allowed the Horse Grenadiers a last chance to strike back   - charging at the rear of 2nd Botta. Surely they could do some damage, and slow the Austrian advance?  Well, not by throwing a '1' to their opponents '5'.. Roll for effect - almost inevitably,  the Horse Grenadiers lost their last SP and were destroyed - the end of the Prussian cavalry.  Three out of 6 units gone, a loss of 11 SP to Austrian 7, it's almost all over, surely ?   

Last charge of the Horse Grenadiers..

Not quite. Under Bob's Cordery's Portable Wargame rules, reaching Exhaustion may be taken as losing the game, but under Neil Thomas'  One Hour Wargames  scenario victory conditions,  until and unless  Dachs' Austrians could get within three hexes of the bridge, Prussia would still hold the bridgehead - and win the game. Could they hang on?

The three remaining Prussian infantry units doggedly held their ground, von Jemanden directing their fire - until Austrian 1st Jaegers' fire hit 1st Fusiliers, von Jemanden at their head - and he was wounded. Another 2 SPs down for a wounded commander - and 1 SP from the Fusiliers. And then yet again, on Turn 13,  a further loss for 1st Fusiliers saw them destroyed in their turn - and their General wounded AGAIN !  Only 2nd Fusiliers and Frei Korps left,  their commander barely alive,  and their losses now at a massive 17SP  to  Austrian losses of 8SP.   But still, despite everything, holding the bridgehead, two turns to go..

Turn 14;  General Dachs kept a cool head, 'no need to hurry, men, don't just rush forward, give them more musketry!'  The remaining Prussian Fusiliers were forced to retreat again, sheltering in the woods, while the Frei Korps lost yet another 1 SP  and were forced to retreat - back onto the bridge they went. And finally - Turn 15, the last gasp.  The Austrians won the  initiative - nothing for it now but to advance.  No less than three units made it to within three hexes of the bridge. With only two Prussian units left, unable to charge forward owing to Exhaustion, and only the Fusiliers  able to fire - they missed -  it was hopeless.   The twice-wounded Von Jemanden was escorted away, 'a broken man'. Well, he was only Somebody or other..

As it ended,  a Prussian catastrophe - or was it?
 

With the final tally of losses at Austrians 8 SP, Prussians 18 SP, and only two Prussian units out of six remaining - one of which was trapped in the woods and unlikely to regain the opposite river bank - it looked like a complete disaster for the Prussians. But, look at the victory conditions: 

"Victory is achieved by there being no enemy units on the North bank of the river, within 12" [three hexes ] of the bridge". 

Of course the Prussians could not win, as multiple  Austrian units bore down on the bridge. But the 2nd Battalion, 44th Fusilers still lined the edge of the woods - only two hexes from the bridge!  So, going by the book,  the Austrians could not win either , and  the game was a draw.

As may be apparent, I had a great time with this game; I hope you've enjoyed following it.  The Scenario ( number 5, 'Bridgehead'  from Neil Thomas'  One Hour Wargames )  was excellent, a real challenge for both sides, and I couldn't have asked for a closer finish, despite the huge disparity in losses.  In particular I think the random entry of the second and third bodies of Austrian troops made for plenty of uncertainty - things might have gone quite differently if Austrian units had arrived at the woods, near the river, early on.  See Ross Mac's   and Maudlin Jack Tar's recent games of the same scenario!

 A couple of small notes - observant readers may have noticed pennies and tuppences used as markers. I thought I'd try them to mark 1 and 2 SP losses from units, rather than removing bases, thus keeping units looking suitably  impressive on the table. The coins were an improvised measure, but I think worked OK - though perhaps they could be coloured - either brightly  ( maybe red )  to make losses very apparent,  or equally perhaps green, to merge into the scenery and not divert the eye. 

Also on the rules, I wonder about cavalry vs. infantry melee?  In Bob's original 'Portable Napoleonic Wargame' , Cavalry get a big die roll modifier for attacking Infantry in Line - Napoleonic infantry deemed to be vulnerable unless in square. I removed that, as 7YW infantry in line should be able to drive away cavalry with disciplined volleys - but I think they should perhaps be more vulnerable if taken in the flank or rear.  Perhaps some additional modifiers when cavalry charge the flank or rear of  infantry in line?  I'll have a think. 

So strictly, the Bellona Bridge Battle was a hard-fought draw;  but General Dachs, as he advanced in expectation of accepting the surrender of the Prussian Fusiliers, and watched the Frei Korps retreating over the bridge, thought he knew better..

Keep well, everyone.