 |
| Turn 9 situation - Austrians holding out well |
We left ( far too long ago, unfortunately ) the Prussian attack on the Austrians at Zouche, in my 'Soldier King' inspired campaign, after Turn 8. As a quick recap, at the Western road the Prussian cavalry force of
three regiments of elite Cuirassiers had scattered a defending regiment
of poor-quality Grenzer foot, and now came up against the sole
Austrian Heavy Cavalry unit, who had gamely engaged them - but how long
could they last? In the North, the main Prussian column of Infantry and
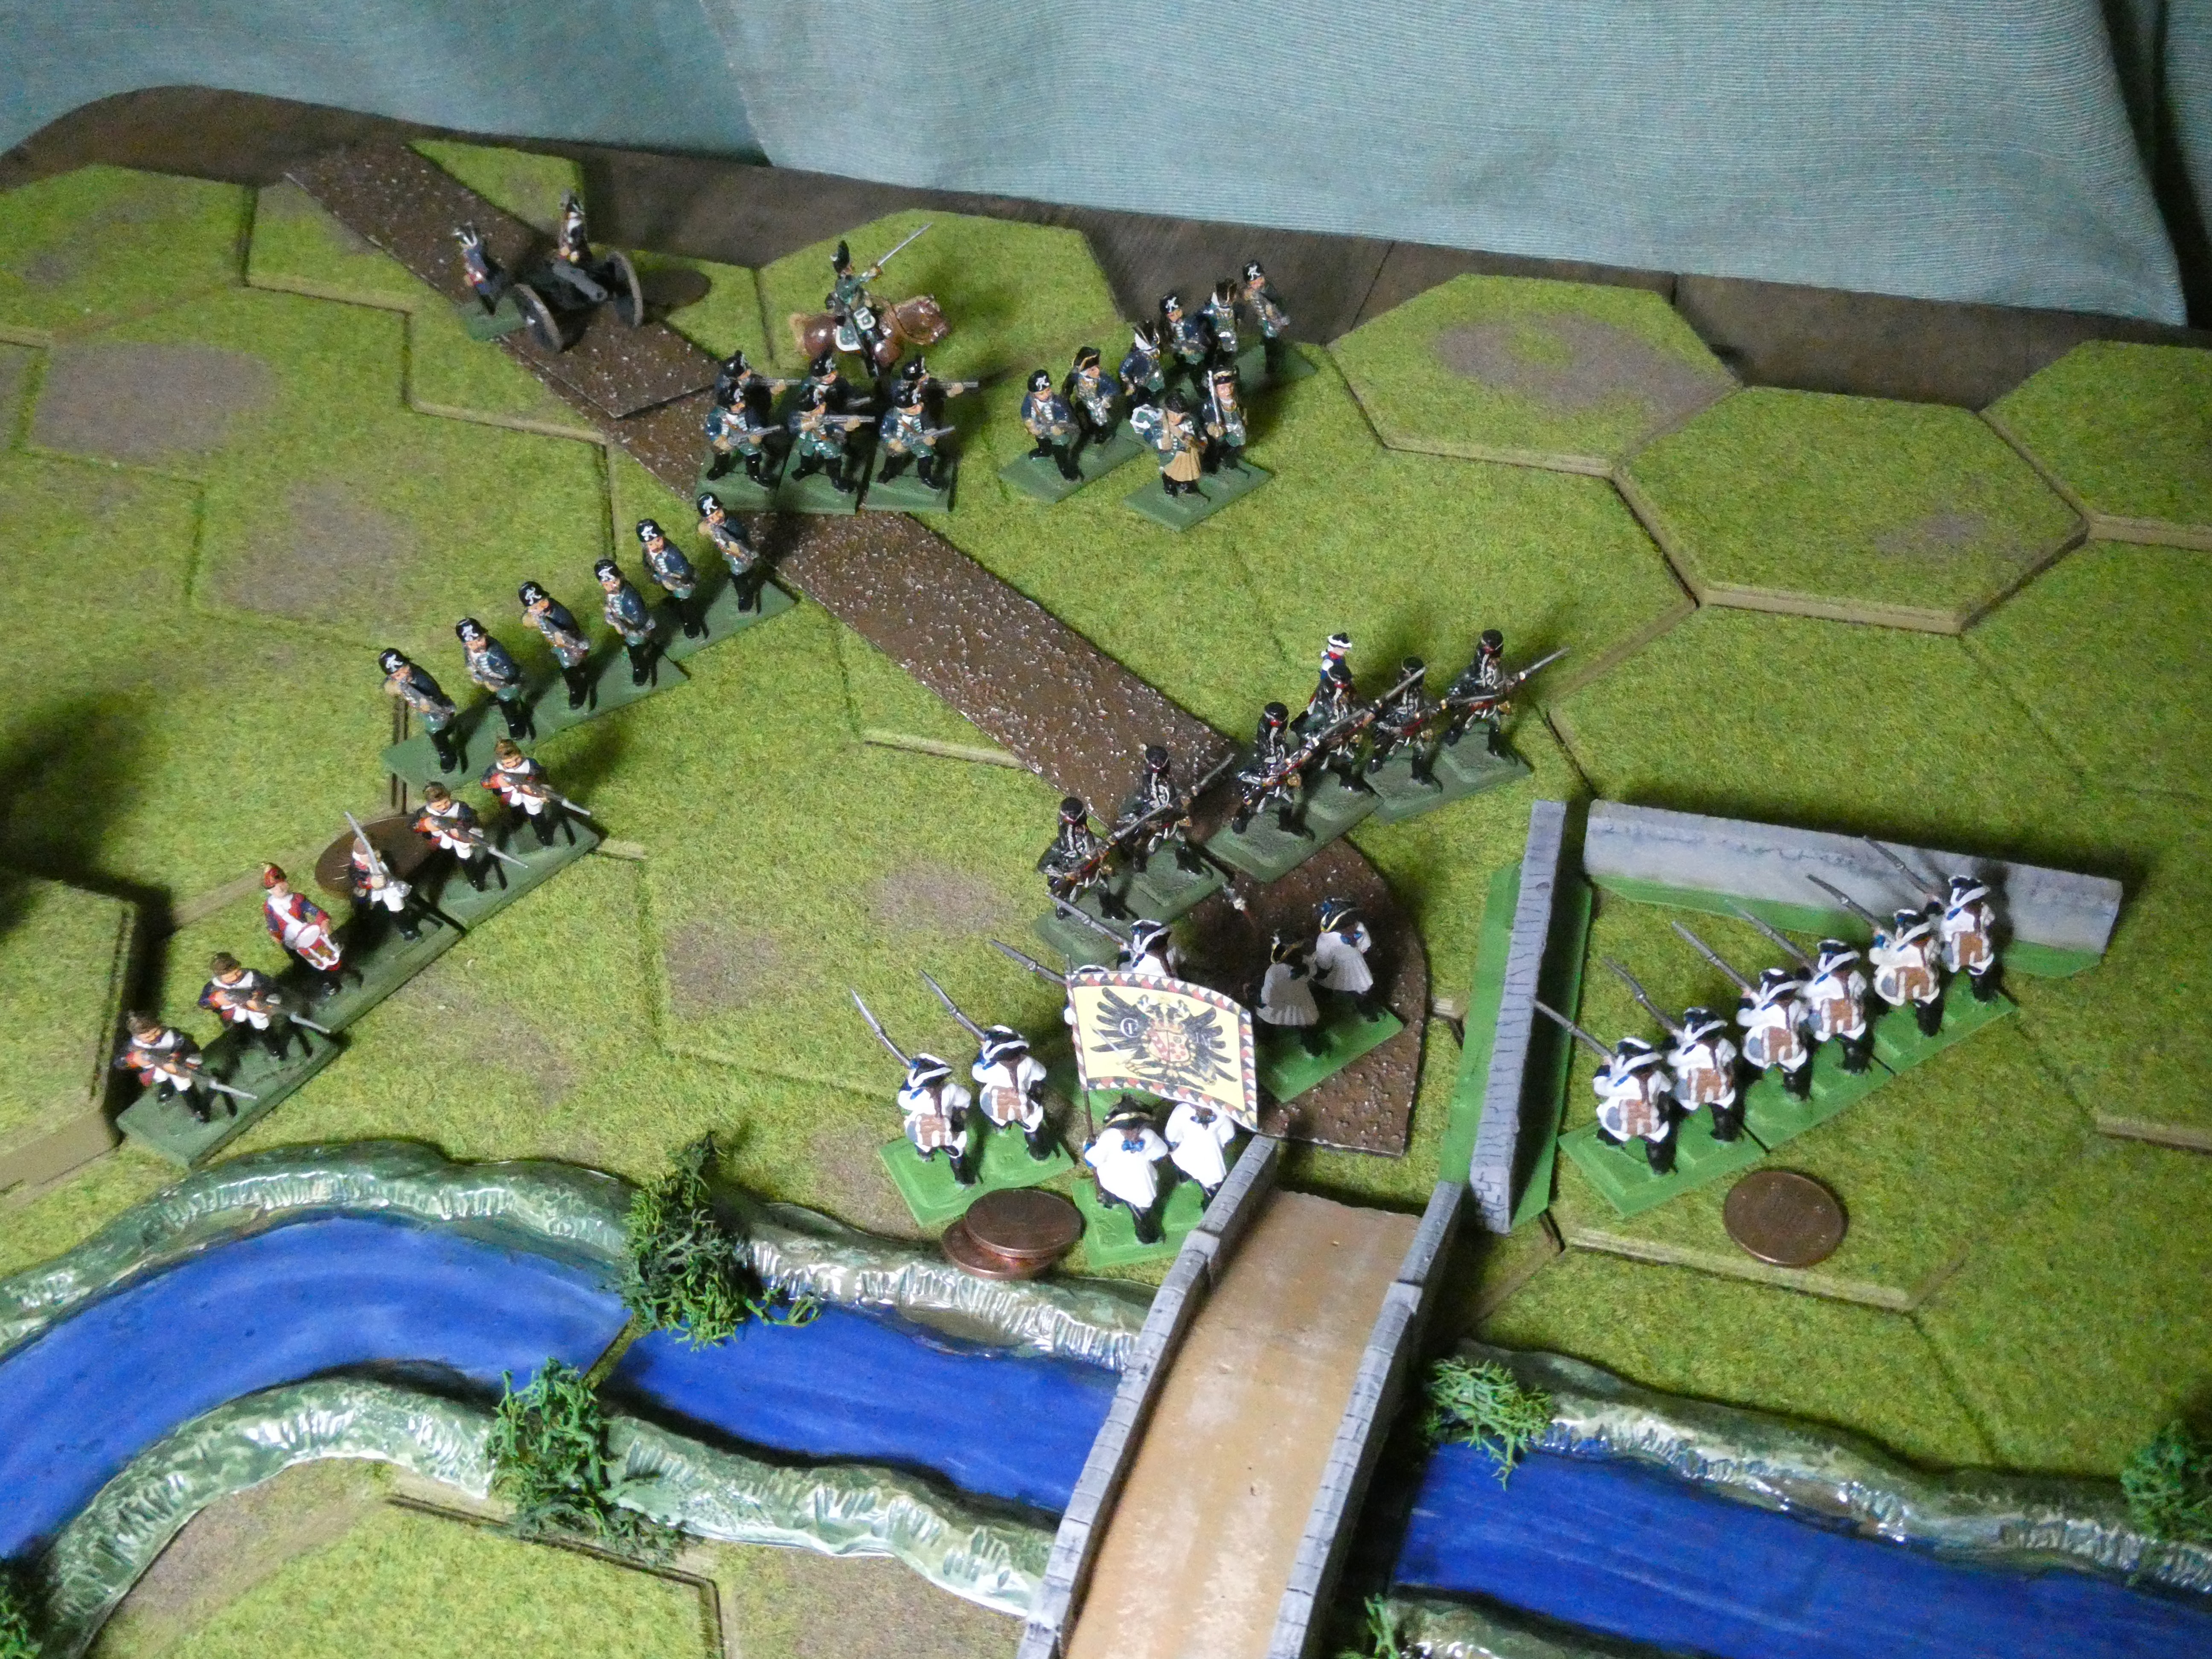
artillery were hoping to recover after the chaos and confusion inflicted by the rampaging Schwarzer Hussars, and another Austrian Light Cavalry unit - and were preparing to launch a major assault on the Austrian foot regiments of the Botta d'Adorno brigade holding the river crossing. Well, I finally found the time to finish the game, and now I can give an update on how it turned out. So, without further ado..
 |
| Grenze Hussars causing more mayhem, briefly |
Turn 9 was notable mainly for cavalry action : at the West road, the lone Austrian Cuirassier unit found itself attacked by twice its number of elite Prussian 'Heavies', but held its ground in the resulting melee, even forcing one enemy unit to retreat. In the North, the Austrian 1st Grenze Hussars charged and ran amok, forcing both the Prussian field gun and 1st Jaegers to retire, following-up twice and finally being halted by 1st von Kleist foot. Once again the Austrian Light Cavalry brought disruption to the Prussian main force. Would they ever press home their attack?
In the event, next turn things began to go the attackers way at last - the Austrian 1st Hussars took hits in melee with von Kleist and from a volley from Prussian Jaegers, and were destroyed as a result - and the quality of Prussian cavalry began to tell at the Western road, with the Austrian cuirassiers reduced to 1 remaining Strength Point ( SP ). The final Prussian unit ( 3rd Jaegers ) arrived on the table, giving them five regiments against the two Austrian foot units holding the North bridge - and the 1st von Kleist foot were first to charge against the 1st Botta regiment in its defensive position. The melee was initally inconclusive, but continued for the next four turns with losses on both sides, 1st Von Kleist actually fighting both Austrian regiments at various times, and allowing the rest of the Prussian foot to come up into firing range. Losses at end of Turn 10 were level, at 11 SP each - bad news for the weaker Austrian force. Was the tide beginning to turn?
 |
| Von Kleist charges - with powerful backup |
Prussian pressure was maintiained in Turn 11, starting with their howitzer scoring a hit which finally broke the Austrian Cuirassiers. Their place was taken immediately by 2nd Grenze Hussars, but the chances for one Light Cavalry unit agains three Prussian Heavy Cavarly regiments did not look good. and they straight away sufffered a first 1SP loss in melee. Meanwhile in the North, the two Botta foot regiments each lost 1 SP, attacked by the Prussian foot using both musketry and the bayonet. Losses now Prussians 13 SP, Austrians 14 SP - 6 Austrian losses in only 2 turns, and now only 2 SP between them and Exhaustion Point.
On the next turn, in the West a combination of howitzer fire and Prussian charges pushed the Austrian 2nd Hussars back over the bridge, allowing Prussian cavalry to finally cross the river. In the North, Prussian foot continued to advance, as the Austrian 1st Botta regmiment remained locked in combat with 1st von Kleist, holding on determinedly to their fortified postion - von Kleist did however manage to force 2nd Botta to retire, back over the bridge. But that very determination to hold their ground cost the Austrians dear, when on Turn 13 1st Botta suffered another hit in close combat with von Kleist, and yet another from a volley by 1st Jaegers, and took 2 SP losses rather than be pushed out of their defensive position - these were the 16th and 17th Austrian SP losses, which took them to 'Exhaustion Point'. From now on they could make no aggressive moves, only hold on or retreat. Turn 13 had certainly been unlucky for General Dachs.
 |
| Turn 14, Austrians hard pushed in the North ( profusion of pennies indicating losses ) |
On Turn 14 the Austrians started well, their gunners scoring a hit that finished off 1st von Kleist foot, worn out by its multiple charges on the Austrian foot. But Prussian musket fire from their Fusiliers and Jaegers scored a further two hits on 1st Botta foot - this time they retreated to avoid destruction, being pushed back over the bridge to join their 2nd Botta comrades. In turn, 1st Botta's own fire at least drove 2nd Jaeger back.
Turn 15, the last of the game - the depleted Austrian forces won the initiative die roll but could make no aggressive moves, and elected to simply stand - but their gunners scored a lucky hit which killed the von Kliest's brigadier, who had joined the Prussian Fusilier regiment after his own troops had been knocked out. This unfortunate gentleman's loss cost the Prussians 3 SPs - dangerous for them. Their own howitzer ended a successful day by hitting and finally eliminating 2nd Botta regiment. Knowing that exhaustion loomed, the Prussian commander urged his cavalry on in a last charge, with 2 Cuirassier units slamming into Austrian 2nd Hussars, who lost 1 SP but held on agianst the odds. A general advance of Prussian foot in the North looked to finally cross the bridge against little opposition.
 |
| Final charge of the Prussian Heavy Horse |
And so it finsihed, as the end of Turn 15 brought welcome darkness to the exhausted troops. Exhausted indeed - a tally of the losses came to Austrians 19 SP, Prussians 21 SP - both sides well and truly passing their respective Exhaustion Points. So, in terms of the tabletop game, a draw - but from the campaign perspective, I think quite a bad reverse for General Dachs and his Austrians. They suffered the complete loss of five regiments, who will be eliminated from the campaign game ( units only 'damaged' by partial loss of strength points will continue, and re-gain strength as further recruits come in ). The Prussians lost only a couple of regiments, albeit experienced ones, though they were unlucky to have one brigadier wounded and one killed, costing 5 SPs in all - if not for those two losses, they would not have reached Exhaustion Point.
I should put in a word for the gunners - though unable to open fire until Turn 7, the Prussian howitzer took 3 SPs from the Austrians, delivering the final coup de grace to both the Austrian Cuirassiers and 2nd Botta regiment. The Austrian field guns scored no less than 6 SPs of hits against the Prussians, battering the Fusilier regiment for 2 SPs, finishing off 1st von Kleist and finally killing its Brigadier! Only the Prussian field gun did badly, spending a lot of time trying to avoid the attention of various Austrian Hussars.
 |
| How it ended - darkness will be welcome to all |
Phew. I have limited time and space for games, and this took four gaming sessions, spread over 6 weeks - I didn't mean to be quite so slow! But worth it, I think, and good to run a slightly larger game and prove it could work in the limited space. Bob Cordery's 'Division Level' Portable Wargame rules turned out to be just about right for the task. At least with a small table, simple hex terrain and relatively small forces and units, the setting-up and dismantling of the game at each session was quite quick.
So, where next with the campaign? Well, winter is coming - both sides will go into winter quarters and try to raise new recruits to their armies. But they may also take the opportunity to open negotiations - in particular the Austrians must be worried about the losses they have taken, and the threat to their 'home' territories. Perhaps it's time for diplomacy?
As usual, I hope you've enjoyed following this, as I certainly did playing and writing it up. Time for a change of period next time? Meanwhile thanks for reading this far, and keep well, and safe, everyone.
Phew! That was nail biting to the end. Gripping encounter, related well. Something of a Pyrrhic victory for the Prussians or do they have forces to spare?
ReplyDeletethank you very much, glad you enjoyed it! Yes, I think slightly Pyrrhic, and I suspect the wiser move would have been to manouevre so as to isolate the Austrians and invade their homeland, reducing their recruitment potential. But the lure of the big decisive battle was too much for them..and me!
DeleteAs an Austrophile....boo!
ReplyDeleteWas the deadly howitzer the Spencer Smith one?
Neil
Thanks Neil, I admit my own sympathy was with the Austrians, somewhat. Given current world events, a victory for plucky outnumbered defenders would have been nice, but that's not always what happens, is it?
DeleteThe howitzer, sadly was not an S-S model, it was from the Eric Knowles collection, and I suspect probably vintage Minifigs. It was (somewhat ironically) lucky to suffer a 'retreat' when hit by Austrian counter-battery fire early on, which left it just out of their range for the rest of the game!
A brave stand with an exhausted draw being better than a rout if not enough to turn the campaign around.
ReplyDelete(How did I miss this post until this morning??)
thanks Ross, glad you caught up in the end! I think they fought each other to a standstill. The Austrians may now slip away, to recover over winter and fight again, or perhaps to negotiate a peace..
Delete